
If you take two objects with fairly smooth surfaces, and put these together, you would not expect them to stick together. At least not without a liberal amount of adhesive, water or some other substance to facilitate a temporary or more permanent bond. This assumption gets tossed out of the window when it comes to optical contact bonding, which is a process whereby two surfaces are joined together without glue.
The fascinating aspect of this process is that it uses the intermolecular forces in each surface, which normally don’t play a major role, due to the relatively rough surfaces. Before intermolecular forces like Van der Waals forces and hydrogen bonds become relevant, the two surfaces should not have imperfections or contaminants on the order of more than a few nanometers. Assuming that this is the case, both surfaces will bond together in a way that is permanent enough that breaking it is likely to cause damage.
Although more labor-intensive than using adhesives, the advantages are massive when considering that it creates an effectively uninterrupted optical interface. This makes it a perfect choice for especially high-precision optics, but with absolutely zero room for error.
Intermolecular Forces
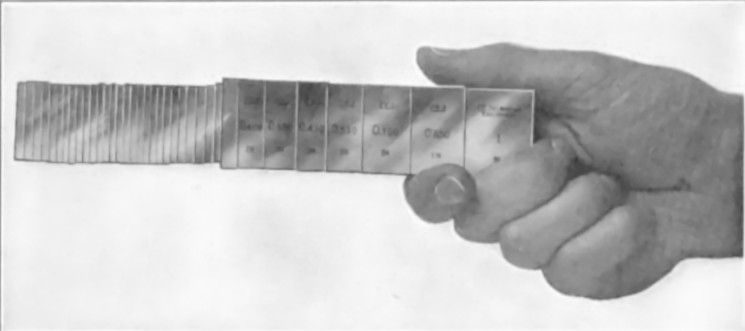
 Thirty-six gauges wrung together and held horizontally. (Credit: Goodrich & Stanley, 1907)
As creatures of the macro world, we are largely only aware of the macro effects of the various forces at play around us. We mostly understand gravity, and how the friction of our hand against a glass prevents it from sliding out of our hand before shattering into many pieces on the floor. Yet add some water on the skin of our hands, and suddenly there’s not enough friction, leading to unfortunate glass slippage, or a lid on a jar of pickles that stubbornly refuses to open because we cannot generate enough friction until we manage to dry our hands sufficiently.
Many of these macro-level interactions are the result of molecular-level interactions, which range from the glass staying in one piece instead of drifting off as a cloud of atoms, to the system property that we refer to as ‘friction‘, which itself is also subdivided into static stiction and dynamic friction. The system of friction can be considered to be analogous to contact binding when we consider two plates with one placed on top of the other. If we proceed to change the angle of these stacked plates, at some point the top plate will slide off the bottom plate. This is the point where the binding forces can no longer compensate for the gravitational pull, with material type and surface finish affecting the final angle.
An interesting example of how much surface smoothness matters can be found in gauge blocks. These are precision ground and lapped blocks of metal or ceramic which match a specific thickness. Used for mainly calibration purposes, they posses the fascinating property due to their smooth surfaces that you can make multiple of them adhere together in a near-permanent manner in what is called wringing. This way you can combine multiple lengths to create a single gauge block with sub-millimeter accuracy.
Enabling all this are intermolecular forces, in particular the Van der Waals forces, including dipole-dipole electrostatic interactions. These do not rely on chemical or similar properties as they depend only on aspects like the mutual repulsion between the electron clouds of the atoms that make up the materials involved. Although these forces are very weak and drop off rapidly with distance, they are generally independent of aspects like temperature.
Hydrogen bonds can also occur if present, with each type of force having its own set of characteristics in terms of strength and effective distance.
Make It Smooth
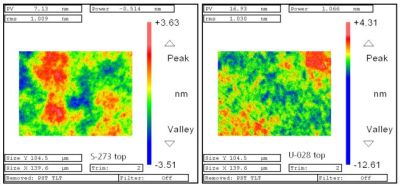 Surface roughnesses of a SiO2 wafer (left, ≈1.01 nm RMS) and an ULE wafer (right, ≈1.03 nm RMS) (Credit: Kalkowski et al., 2011)
One does not simply polish a surface to a nanometer-perfect sheen, though as computer cooling enthusiasts and kin are aware, you can get pretty far with a smooth surface and various grits of sandpaper all the way up to ridiculously high levels. Giving enough effort and time, you can match the surface finish of something like gauge blocks and shave off another degree or two on that CPU at load.
Achieving even smoother surfaces is essentially taking this to the extreme, though it can be done without 40,000 grit sandpaper as well. The easiest way is probably found in glass and optics production, the latter of which has benefited immensely from the semiconductor industry. A good demonstration of this can be found in a 2011 paper (full PDF) by Fraunhofer researchers G. Kalkowski et al. as published in Optical Manufacturing and Testing.
They describe the use of optical contact bonding in the context of glass-glass for optical and precision engineering, specifically low-expansion fused silica (SiO2) and ultra-low expansion materials. There is significant overlap between semiconductor wafers and the wafers used here, with the same nanometer level precision, <1 nm RMS surface roughness, a given. Before joining, the surfaces are extensively cleaned of any contaminants in a vacuum environment.
Worse Than Superglue
Once the surfaces are prepared, there comes the tricky part of making both sides join together. Unlike with the gauge blocks, these super smooth surfaces will not come apart again without a fight, and there’s no opportunity to shimmy them around to get that perfect fit like when using adhesive. With the demonstrated method by Kalkowski et al., the wafers were joined followed by heating to 250 ℃ to create permanent Si-O-Si bonds between the two surfaces. In addition bonding pressure was applied for two hours at 2 MPa using either N2 or O2 gas.
This also shows another aspect of optical contact binding: although it’s not technically permanent, the bond is still just using intermolecular forces, and, as shown in this study, can be pried apart with a razorblade and some effort. By heating and applying pressure, the two surfaces can be annealed, forming molecular bonds and effectively turning the two parts into one.
Of course, there are many more considerations, such as the low-expansion materials used in the referenced study. If both sides use too dissimilar materials, the bond will be significantly more tenuous than if the materials with the same expansion properties are used. It’s also possible to use chemically activated direct bonding with a chemical activation process, all of which relies on the used materials.
In summary, optical contact bonding is a very useful technique, though you may want to have a well-equipped home lab if you want to give it a spin yourself.
From Blog – Hackaday via this RSS feed


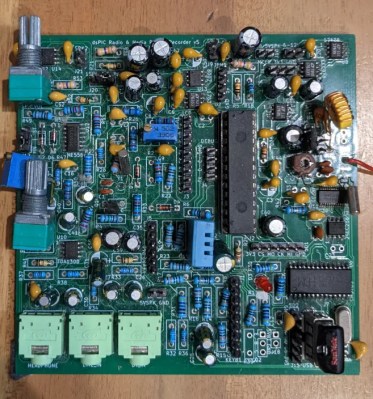 Just look at that thru-hole goodness.


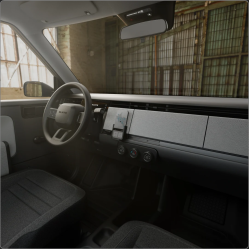 Using the cellphone for infotainment makes for a less expensive product and a very clean dash. (Image: Slate Motors)

