
Over the course of more than a decade, physical media has gradually vanished from public view. Once computers had an optical drive except for ultrabooks, but these days computer cases that even support an internal optical drive are rare. Rather than manuals and drivers included on a data CD you now get a QR code for an online download. In the home, DVD and Blu-ray (BD) players have given way to smart TVs with integrated content streaming apps for various services. Music and kin are enjoyed via smart speakers and smart phones that stream audio content from online services. Even books are now commonly read on screens rather than printed on paper.
With these changes, stores selling physical media have mostly shuttered, with much audiovisual and software content no longer pressed on discs or printed. This situation might lead one to believe that the end of physical media is nigh, but the contradiction here comes in the form of a strong revival of primarily what used to be considered firmly obsolete physical media formats. While CD, DVD and BD sales are plummeting off a cliff, vinyl records, cassette tapes and even media like 8-track tapes are undergoing a resurgence, in a process that feels hard to explain.
How big is this revival, truly? Are people tired of digital restrictions management (DRM), high service fees and/or content in their playlists getting vanished or altered? Perhaps it is out of a sense of (faux) nostalgia?
A Deserved End
 Ask anyone who ever has had to use any type of physical media and they’ll be able to provide a list of issues with various types of physical media. Vinyl always was cumbersome, with clicking and popping from dust in the grooves, and gradual degradation of the record with a lifespan in the hundreds of plays. Audio cassettes were similar, with especially Type I cassettes having a lot of background hiss that the best Dolby noise reduction (NR) systems like Dolby B, C and S only managed to tame to a certain extent.
Add to this issues like wow and flutter, and the joy of having a sticky capstan roller resulting in tape spaghetti when you open the tape deck, ruining that precious tape that you had only recently bought. These issues made CDs an obvious improvement over both audio formats, as they were fully digital and didn’t wear out from merely playing them hundreds of times.
Although audio CDs are better in many ways, they do not lend themselves to portability very well unlike tape, with anti-shock read buffers being an absolute necessity to make portable CD players at all feasible. This same issue made data CDs equally fraught with issues, especially if you went into the business of writing your own (data or audio) CDs on CD-Rs. Burning coasters was exceedingly common for years. Yet the alternative was floppies – with LS-120 and Zip disks never really gaining much market share – or early Flash memory, whether USB sticks (MB-sized) or those inside MP3 players and early digital cameras. There were no good options, but we muddled on.
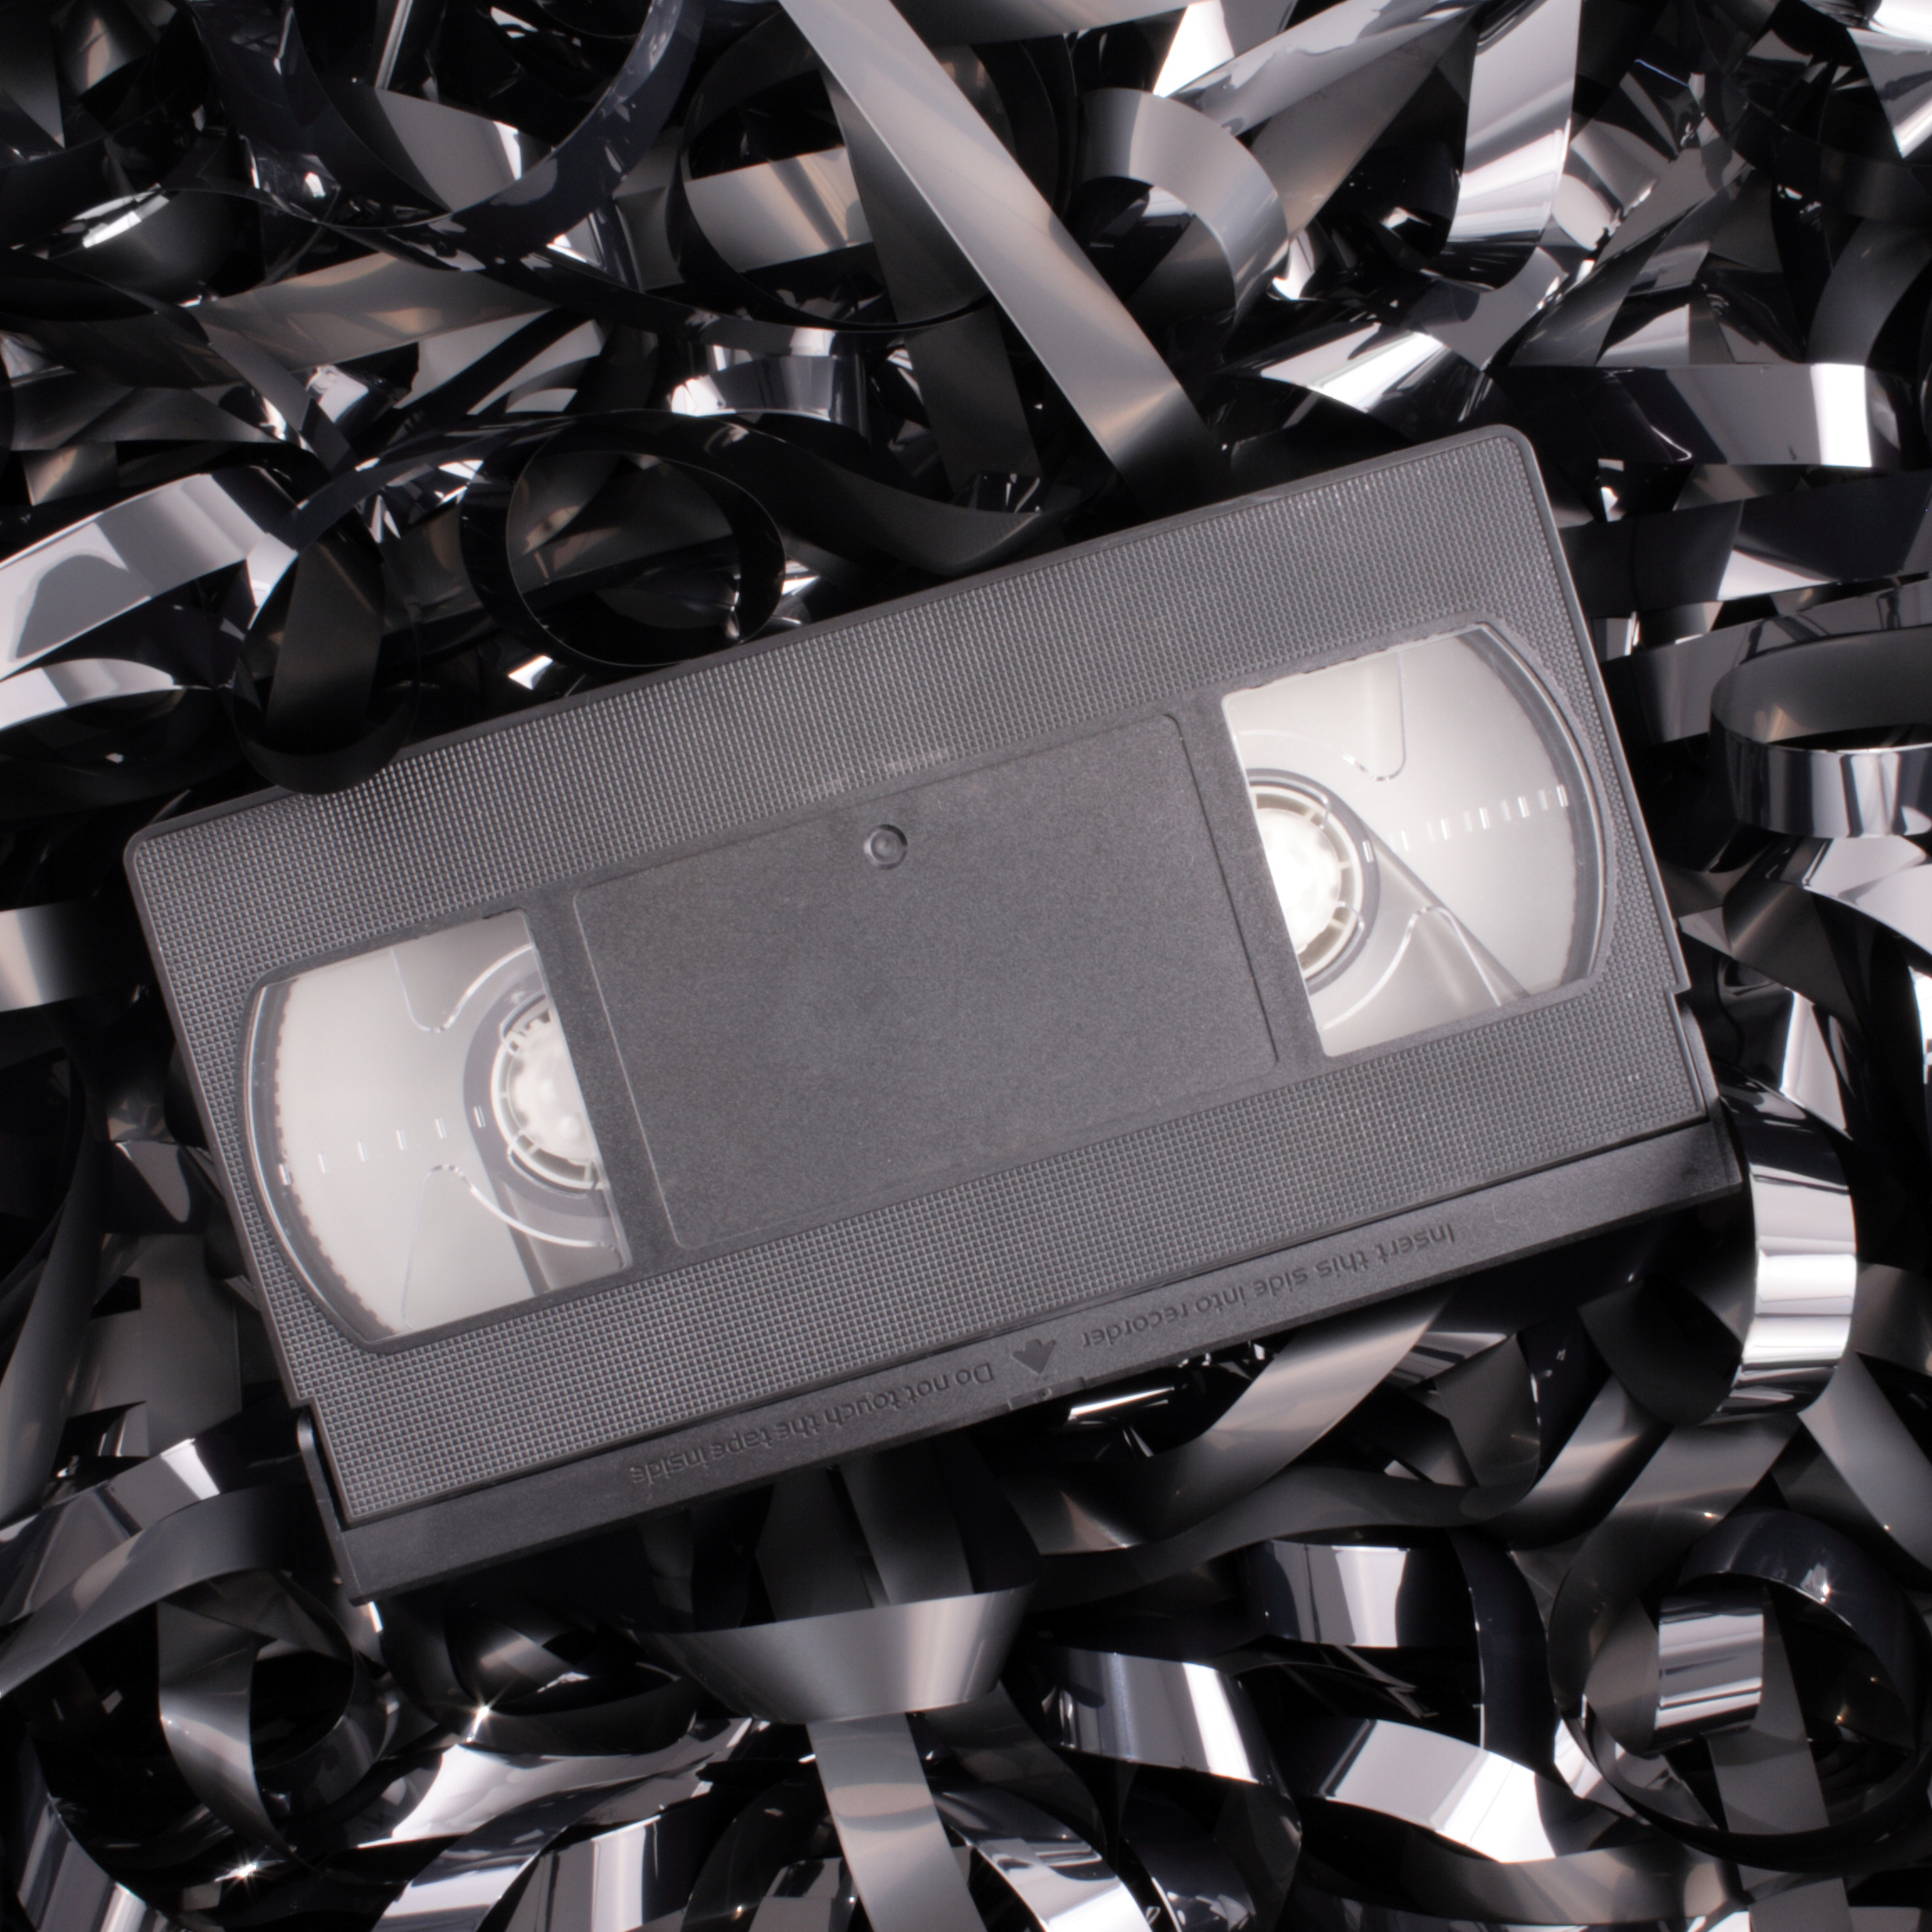
 On the video side VHS had truly brought the theater into the home, even if it was at fuzzy NTSC or PAL quality with astounding color bleed and other artefacts. Much like audio cassette tapes, here too the tape would gradually wear out, with the analog video signal ensuring that making copies would result in an inferior copy.
Rewinding VHS tapes was the eternal curse, especially when popping in that tape from the rental store and finding that the previous person had neither been kind, nor rewound. Even if being able to record TV shows to watch later was an absolute game changer, you better hope that you managed to appease the VHS gods and had it start at the right time.
It could be argued that DVDs were mostly perfect aside from a lack of recording functionality by default and pressed DVDs featuring unskippable trailers and similar nonsense. One can also easily argue here that DVDs’ success was mostly due to its DRM getting cracked early on when the CSS master key leaked. DVDs would also introduce region codes that made this format less universal than VHS and made things like snapping up a movie during an overseas vacation effectively impossible.
This was a practice that BDs doubled-down on, and with the encryption still intact to this day, it means that unlike with DVDs you must pay to be allowed to watch BDs which you previously bought, whether this cost is included in the dedicated BD player, or the license cost for a BD video player for on the PC.
Thus, when streaming services gave access to a very large library for a (small) monthly fee, and cloud storage providers popped up everywhere, it seemed like a no-brainer. It was like paying to have the world’s largest rental store next door to your house, or a data storage center for all your data. All you had to do was create an account, whip out the credit card and no more worries.
Combined with increasingly faster and ubiquitous internet connections, the age of physical media seemed to have come to its natural end.
The Revival
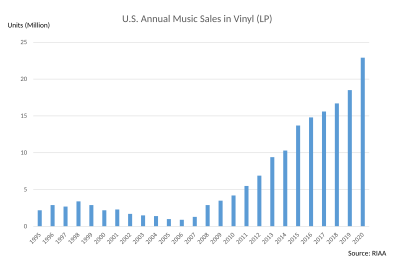 US vinyl record sales 1995-2020. (Credit: Ippantekina with RIAA data)
Despite this perfect landscape where all content is available all the time via online services through your smart speakers, smart TVs, smart phones and so on, the number of vinyl record sales has surged the past years despite its reported death in the early 2000s. In 2024 the vinyl records market grew another few percent, with more and more new record pressing plants coming online. In addition to vinyl sales, UK cassette sales also climbed, hitting 136,000 in 2023. CD sales meanwhile have kept plummeting, but not as strongly any more.
Perhaps the most interesting part is that most of newly released vinyl are new albums, by artists like Taylor Swift, yet even the classics like Pink Floyd and Fleetwood Mac keep selling. As for the ‘why’, some suggest that it’s the social and physical experience of physical media and the associated interactions that is a driving factor. In this sense it’s more of a (cultural) statement, as a rejection of the world of digital streaming. The sleeve of a vinyl record also provides a lot of space for art and other creative expressions, all of which provides a collectible value.
Although so far CD sales haven’t really seen a revival, the much lower cost of producing these shiny discs could reinvigorate this market too for many of the same reasons. Who doesn’t remember hanging out with a buddy and reading the booklet of a CD album which they just put into the player after fetching it from their shelves? Maybe checking the lyrics, finding some fun Easter eggs or interesting factoids that the artists put in it, and having a good laugh about it with your buddy.
As some responded when asked, they like the more intimate experience of vinyl records along with having a physical item to own, while streaming music is fine for background music. The added value of physical media here is thus less about sound quality, and more about a (social) experience and collectibles.
 On the video side of the fence there is no such cheerful news, however. In 2024 sales of DVDs, BDs and UHD (4K) BDs dropped by 23.4% year-over-year to below $1B in the US. This compares with a $16B market value in 2005, underlining a collapsing market amidst brick & mortar stores either entirely removing their DVD & BD section, or massively downsizing it. Recently Sony also announced the cessation of its recordable BD, MD and MiniDV media, as a further indication of where the market is heading.
Despite streaming services repeatedly bifurcating themselves and their libraries, raising prices and constantly pulling series and movies, this does not seem to hurt their revenue much, if at all. This is true for both audiovisual services like Netflix, but also for audio streaming services like Spotify, who are seeing increasing demand (per Billboard), even as digital track sales are seeing a pretty big drop year-over-year (-17.9% for Week 16 of 2025).
Perhaps this latter statistic is indicative that the idea of ‘buying’ a music album or film which – courtesy of DRM – is something that you’re technically only leasing, is falling out of favor. This is also illustrated by the end of Apple’s iPod personal music player in favor of its smart phones that are better suited for streaming music on the go. Meanwhile many series and some movies are only released on certain streaming platforms with no physical media release, which incentivizes people to keep those subscriptions.
To continue the big next-door-rental-store analogy, in 2025 said single rental store has now turned into fifty stores, each carrying a different inventory that gets either shuffled between stores or tossed into a shredder from time to time. Yet one of them will have That New Series , which makes them a great choice, unless you like more rare and older titles, in which case you get to hunt the dusty shelves over at EBay and kin.
It’s A Personal Thing
Humans aren’t automatons that have to adhere to rigid programming. They have each their own preferences, ideologies and wishes. While for some people the DRM that has crept into the audiovisual world since DVDs, Sony’s MiniDisc (with initial ATRAC requirement), rootkits on audio CDs, and digital music sales continues to be a deal-breaker, others feel no need to own all the music and videos they like and put them on their NAS for local streaming. For some the lower audio quality of Spotify and kin is no concern, much like for those who listened to 64 kbit WMA files in the early 2000s, while for others only FLACs ripped from a CD can begin to appease their tastes.
Reading through the many reports about ‘the physical media’ revival, what jumps out is that on one hand it is about the exclusivity of releasing something on e.g. vinyl, which is also why sites like Bandcamp offer the purchase of a physical album, and mainstream artists more and more often opt for this. This ties into the other noticeable reason, which is the experience around physical media. Not just that of handling the physical album and operating of the playback device, but also that of the offline experience, being able to share the experience with others without any screens or other distractions around. Call it touching grass in a socializing sense.
As I mentioned already in an earlier article on physical media and its purported revival, there is no reason why people cannot enjoy both physical media as well as online streaming. If one considers the rental store analogy, the former (physical media) is much the same as it always was, while online streaming merely replaces the brick & mortar rental store. Except that these new rental stores do not take requests for tapes or DVDs not in inventory and will instead tell you to subscribe to another store or use a VPN, but that’s another can of worms.
So far optical media seems to be still in freefall, and it’s not certain whether it will recover, or even whether there might be incentives in board rooms to not have DVDs and BDs simply die. Here the thought of having countless series and movies forever behind paywalls, with occasional ‘vanishings’ might be reason enough for more people to seek out a physical version they can own, or it may be that the feared erasure of so much media in this digital, DRM age is inevitable.
Running Up That Hill
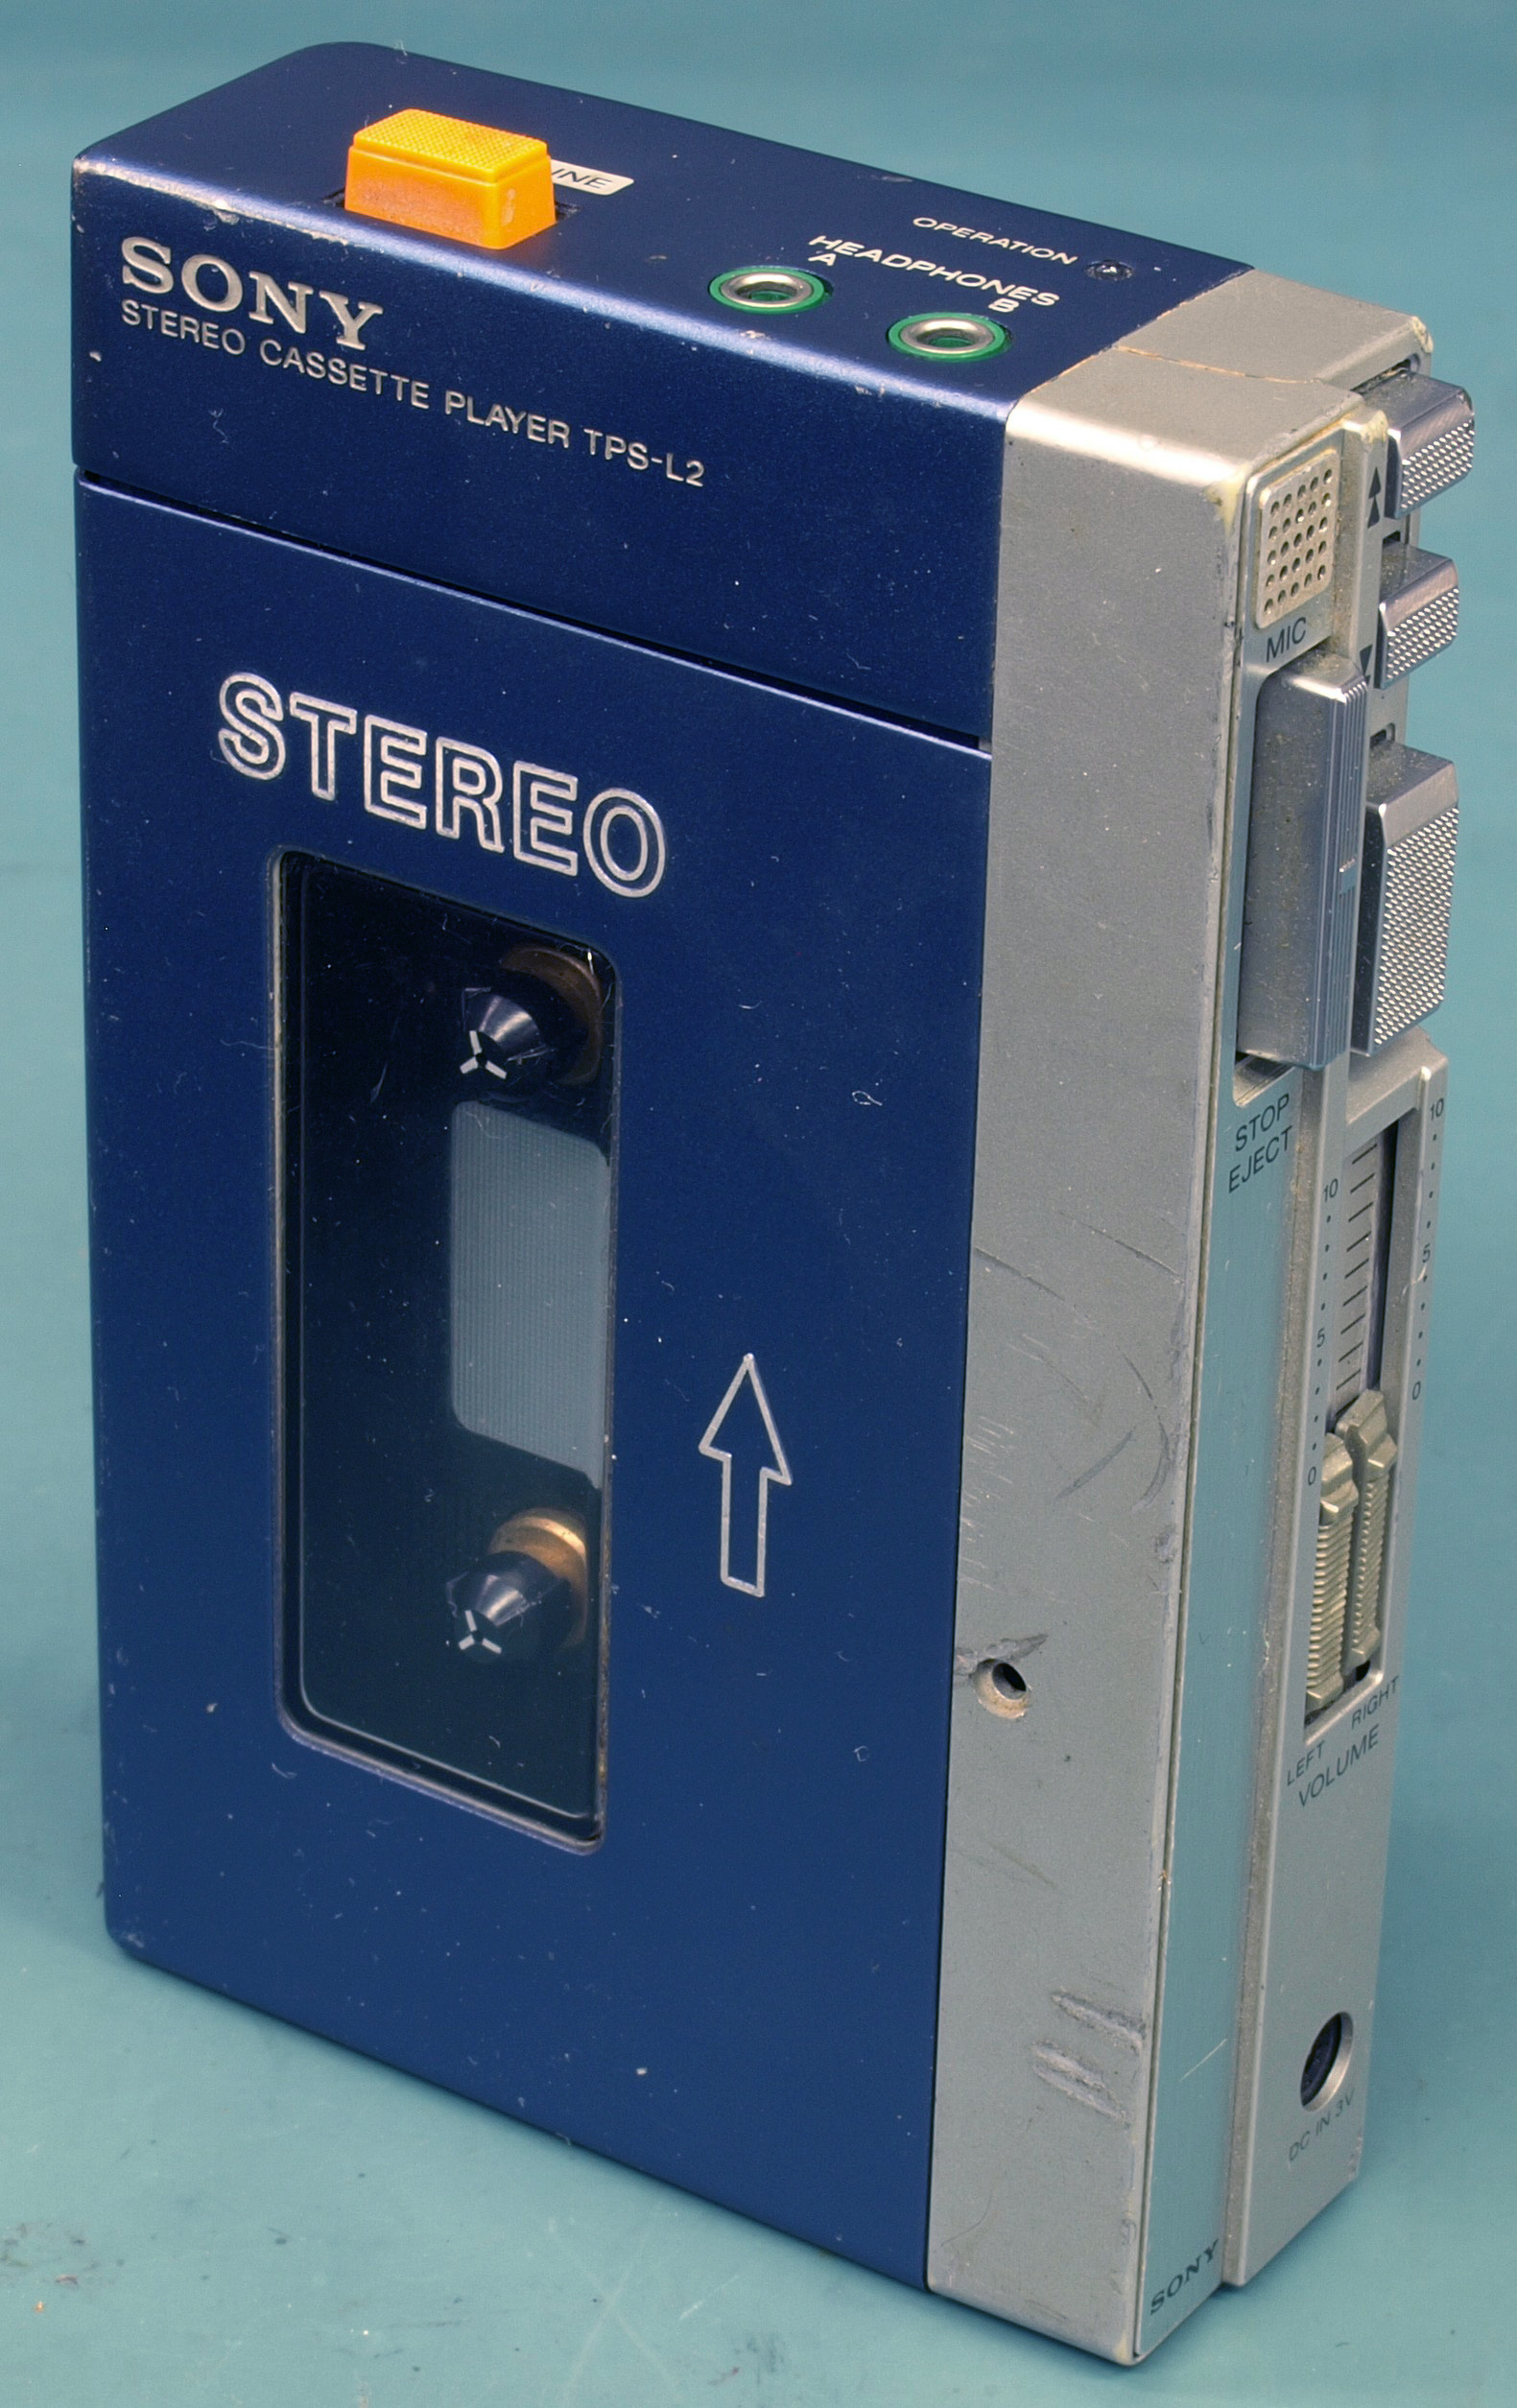
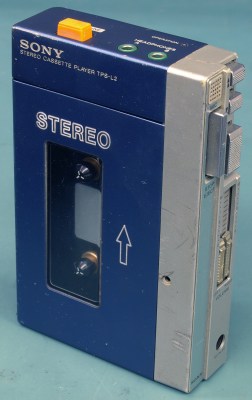 Original Sony Walkman TPS-L2 from 1979.
The ironic thing about this revival is that it seems influenced very much by streaming services, such as with the appearance of a portable cassette player in Netflix’s Stranger Things, not to mention Rocket Raccoon’s original Sony Walkman TPS-L2 in Marvel’s Guardians of the Galaxy.
After many saw Sony’s original Walkman in the latter movie, there was a sudden surge in EBay searches for this particular Walkman, as well as replicas being produced by the bucket load, including 3D printed variants. This would seem to support the theory that the revival of vinyl and cassette tapes is more about the experiences surrounding these formats, rather than anything inherent to the format itself, never mind the audio quality.
As we’re now well into 2025, we can quite confidently state that vinyl and cassette tape sales will keep growing this year. Whether or not new (and better) cassette mechanisms (with Dolby NR) will begin to be produced again along with Type II tapes remains to be seen, but there seems to be an inkling of hope there. It was also reported that Dolby is licensing new cassette mechanisms for NR, so who knows.
Meanwhile CD sales may stabilize and perhaps even increase again, in the midst of still a very uncertain future optical media in general. Recordable optical media will likely continue its slow death, as in the PC space Flash storage has eaten its lunch and demanded seconds. Even though PCs no longer tend to have 5.25″ bays for optical drives, even a simple Flash thumb drive tends to be faster and more durable than a BD. Here the appeal of ‘cloud storage’ has been reduced after multiple incidents of data loss & leaks in favor of backing up to a local (SSD) drive.
Finally, as old-school physical audio formats experience a revival, there just remains the one question about whether movies and series will soon only be accessible via streaming services, alongside a veritable black market of illicit copies, or whether BD versions of movies and series will remain available for sale. With the way things are going, we may see future releases on VHS, to match the vibe of vinyl and cassette tapes.
In lieu of clear indications from the industry on what direction things will be heading into, any guess is probably valid at this point. The only thing that seems abundantly clear at this point is that physical media had to die first for us to learn to truly appreciate it.
From Blog – Hackaday via this RSS feed


 Feynman diagram of electron-positron annihilation, showing the characteristic gamma-ray emission.


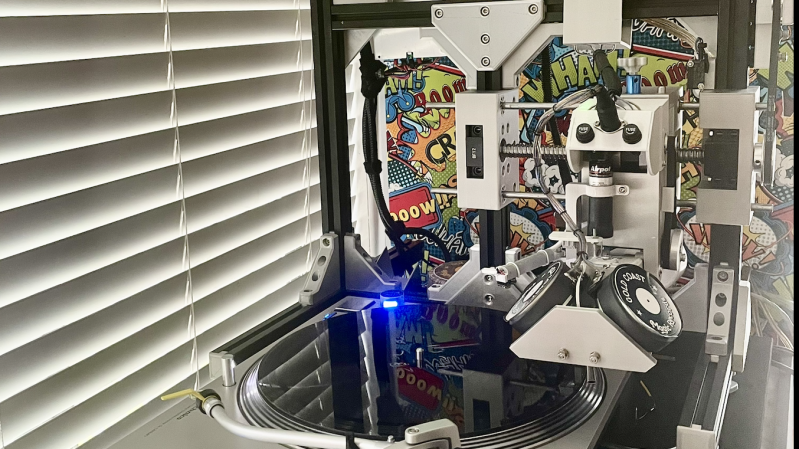
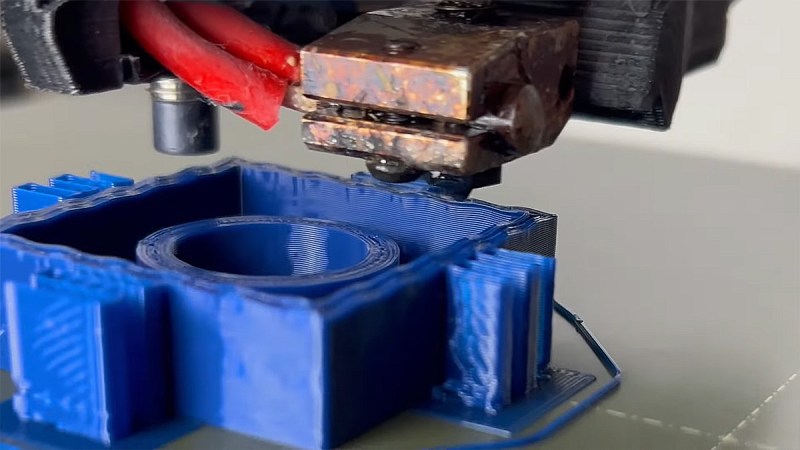
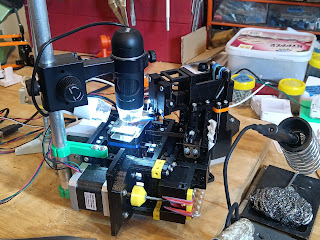
![photograph of [ronald's] setup](https://hackaday.com/wp-content/uploads/2025/04/groovy_lathe.png?w=301) [ronald’s] record cutting lathe looks quite professional.It seems like it should be a simple problem, at least in concept: wiggle an engraving needle to scratch grooves in plastic. Of course for a stereo record, the wiggling needs to be two-axis, and for stereo HiFi you need that wiggling to be very precise over a very large range of frequencies (7 Hz to 50 kHz, to match the pros). Then of course there’s the question of how you’re controlling the wiggling of this engraving needle. (In this case, it’s through a DAC, so technically this is a CNC hack.) As often happens, once you get down to brass tacks (or diamond styluses, as the case may be) the “simple” problem becomes a major project.
[ronald’s] record cutting lathe looks quite professional.It seems like it should be a simple problem, at least in concept: wiggle an engraving needle to scratch grooves in plastic. Of course for a stereo record, the wiggling needs to be two-axis, and for stereo HiFi you need that wiggling to be very precise over a very large range of frequencies (7 Hz to 50 kHz, to match the pros). Then of course there’s the question of how you’re controlling the wiggling of this engraving needle. (In this case, it’s through a DAC, so technically this is a CNC hack.) As often happens, once you get down to brass tacks (or diamond styluses, as the case may be) the “simple” problem becomes a major project.


 The central solenoid is in the “doughnut hole” of the tokamak in this cutaway diagram. Image: US ITER.


