72
submitted 11 months ago by lemann@lemmy.dbzer0.com to c/3dprinting@lemmy.ml

I've wanted one of these for a while, decided to bite the bullet a couple days ago! Seeing as I was somewhat familiar with CAD software (from engineering classes several years ago) it seemed fairly straightforward.

As someone completely new to this, there have been a TON of things I've learned from binging 3d printing channels...

  • First layer adhesion ๐Ÿ˜ญ
  • Bed levelling
  • Types of extruders (bowden/direct) and how they affect what materials you can print
  • Tons of printing materials, personally will be using PETG and PLA
  • Keeping filament dry in a vacuum bag

And soo much more - but there is still a lot that I have absolutely no idea about.

The printer is a second-hand Flsun Q5, the seller sent it fully assembled (very, very brave of them, but it arrived unharmed). I had a brief look around at other options, but for the price of an easythreed, this was a no brainer.

I think the seller had some issues with bed adhesion, as there was a ton of slimy stuff on the print bed when it arrived. Used some isopropyl alcohol and a dish sponge to scrub it off, seems all fine now!

I had some issues with the Z-offset but got it good enough to where there is some first layer adhesion.

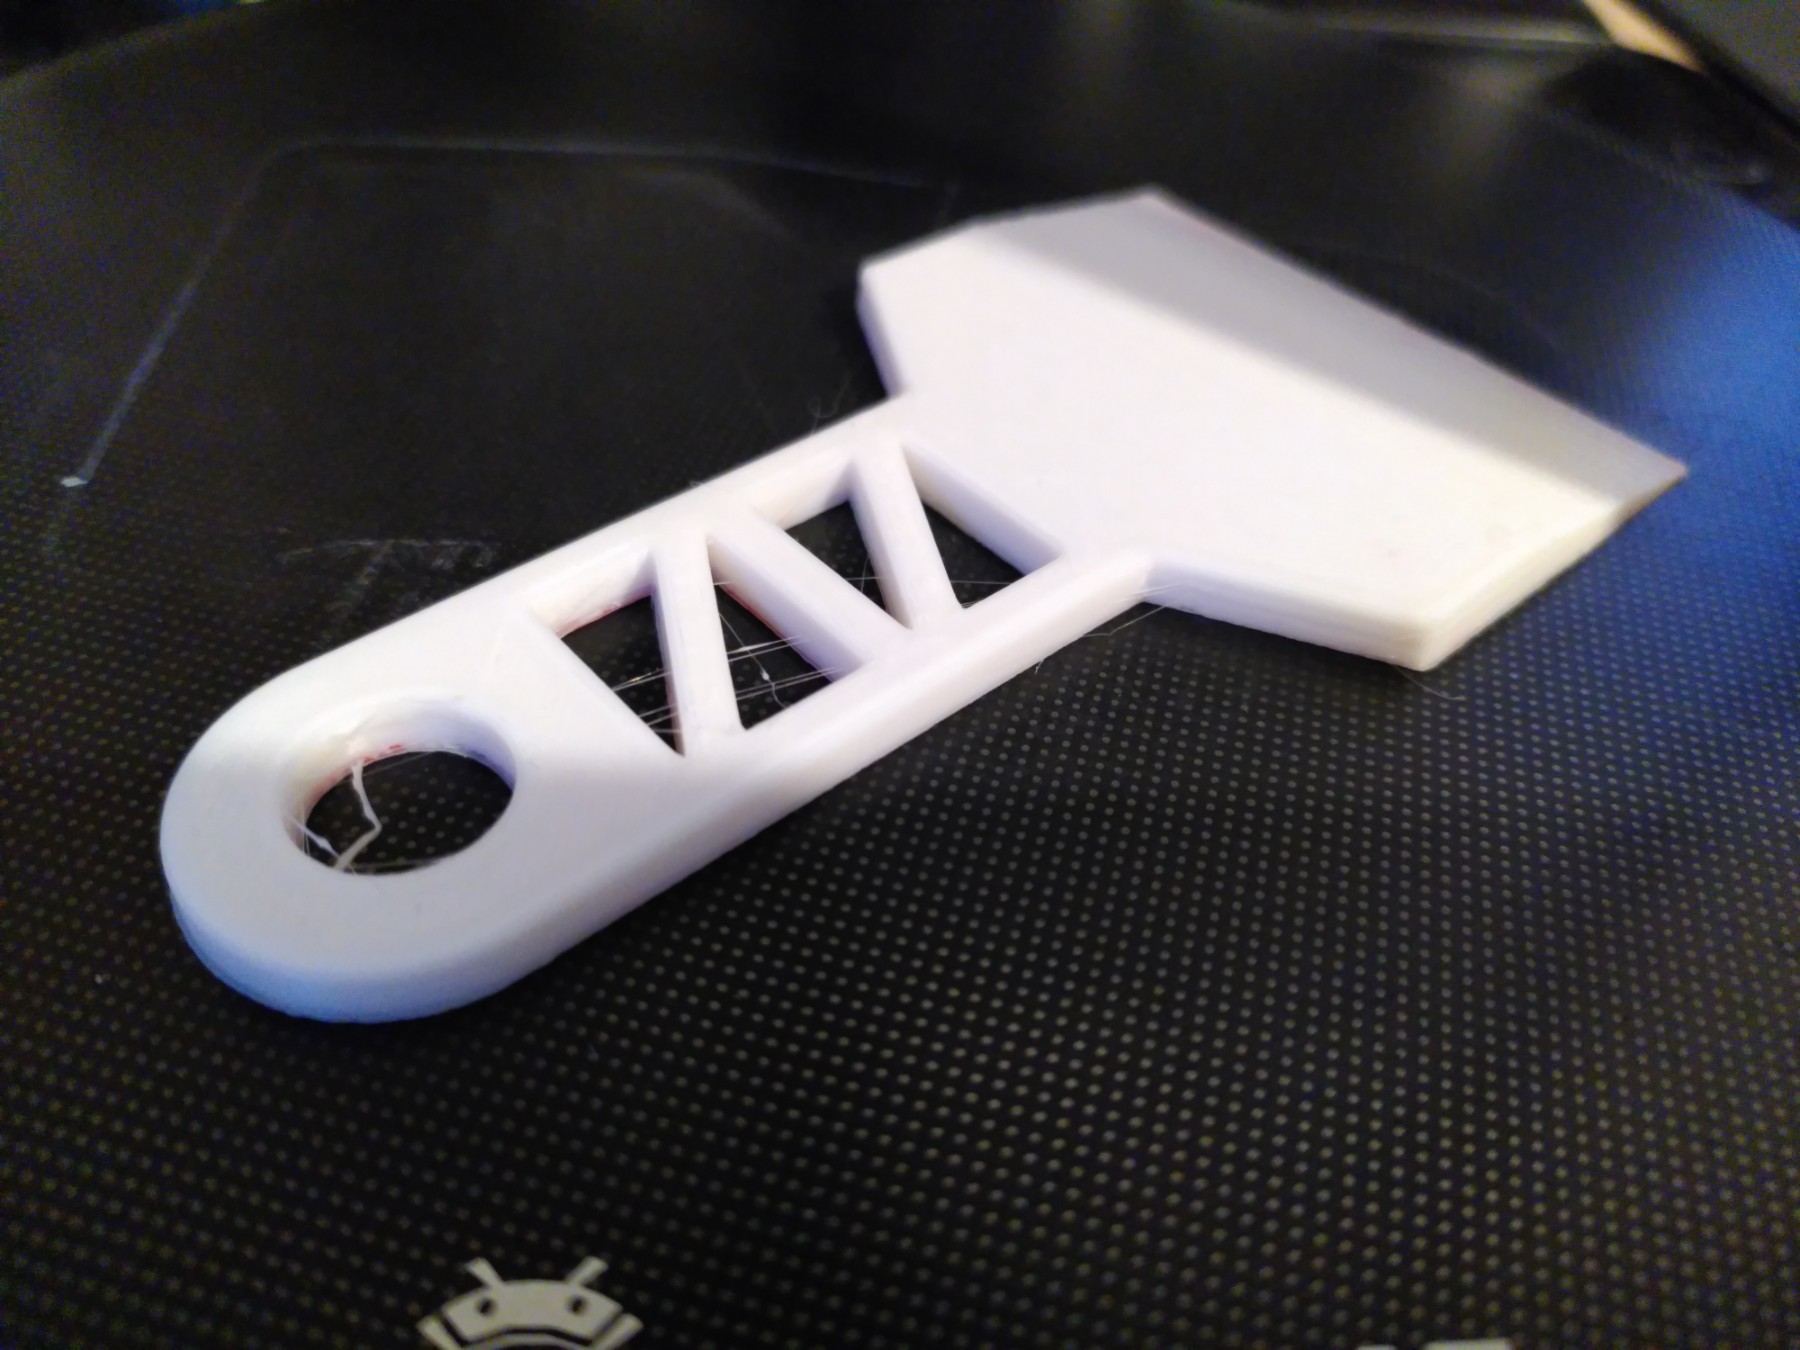
Model finished printing while I was drafting this post, I sprayed some contact cleaner onto the glass bed to take it off (is that bad?). There's some stringing:

top 13 comments
sorted by: hot top controversial new old
[-] IMALlama@lemmy.world 10 points 11 months ago

Welcome to the club! It sounds like you know what to search for, so you're off to a good start. If you haven't found it already, Ellis' print tuning guide will give you a good foundation for tuning your printer well.

It looks like you have an Ultrabase bed, or at least something very similar. I had one on my i3 clone and it served me well for a number of years.

As you discovered, prints will stick to it well if it's clean. Dish soap and IPA (use the 90+% stuff) do a decent job of cleaning it. Windex also works well for keeping it fresh. Prints will easily release after the bed is cool, especially after the bed gets some miles on it. I'm betting the prior owner either had trouble with their first layer sticking or releasing - glue sticks are used by some for both scenarios. Proper first layer squish, a slow first layer, a clean bed, and a cool bed are all it really takes unless you're printing something like ABS/ASA and then your first step should probably be an enclosure, not an adhesion promoter.
[-] lemann@lemmy.dbzer0.com 2 points 11 months ago

Thanks for sharing, will check out that guide as it looks pretty comprehensive.

[-] damnthefilibuster@lemmy.world 4 points 11 months ago

What tool is it that you printed?

[-] OZFive@lemmy.world 10 points 11 months ago

That looks like a bed scraper to remove prints from the heated printer bed.

https://www.printables.com/search/models?q=Scraper

[-] cordlesslamp@lemmy.today 7 points 11 months ago

But how he's supposed to get it out now?

[-] OZFive@lemmy.world 8 points 11 months ago

Needs to buy a new 3d printer to print a scraper to get that one out.

[-] lemann@lemmy.dbzer0.com 4 points 11 months ago

It was a scraper as @OZfive@lemmy.world said ๐Ÿ˜

[-] XTL@sopuli.xyz 3 points 11 months ago

I would recommend the round scraper instead. It's efficient and nice to use and has the maximum amount of usable edge in proportion to footprint.

Of course you only really need one to lift off skirt or brim or purge lines. Parts should just snap off and if the don't, scrapes rarely help.

But anything that keeps fingerprints off the bed and doesn't scratch it is good.

[-] Apepollo11@lemmy.world 4 points 11 months ago

I have that exact printer, and it's an absolute champ.

One tip that might sound stupidly obvious, but when the printing is done, let the bed cool down fully before you try to remove the print. 99% of the time, you'll hear an audible 'pop' as the print detaches itself automatically. I've never had any need to ever use a scraper on it.

[-] Mambert@beehaw.org 2 points 3 months ago

Contact cleaner is just saltwater, it does lead to one part of the bed getting cooled faster than the rest, which over time doesn't improve the bed.

Just wait for it to cool and peel it off and it should be fine from here out.

Spraying conductive saltwater near powered electronics is something I do not recommend.

[-] Mambert@beehaw.org 2 points 3 months ago

TIL there is electronic contact cleaner, I thought what you sprayed was a cleaning/solution for eye contacts. The cooling statement still stands, and I still do not think it is necessary to remove a print from the bed.

[-] lemann@lemmy.dbzer0.com 2 points 3 months ago

TIL there was a cleaning solution for contact lenses - I thought they were only available as single use consumables...

I would agree that it's not necessary - I only really use it when I'm feeling impatient or doing rapid prototyping of small parts ๐Ÿ˜…

Definitely isn't good for the bed though, on some occasions I've seen pieces of the bed material on printed parts that have been removed this way

[-] Mambert@beehaw.org 2 points 3 months ago

Make sure to use alcohol to clean the bed for every print/every 2/3 prints. I've heard trouble with glass bets and adhesion, so best of luck!

this post was submitted on 30 Dec 2023
72 points (93.9% liked)

3D Printing

4371 readers
1 users here now

For everyhting 3D printing related.

Please be excellent to each other :)

Icon by Freepik, Banner photo by Thiago Medeiros Araujo

founded 4 years ago
MODERATORS