57
13 skeletons
(lemmy.world)
Another old shitpost I don't think I posted anywhere.

Yeah okay.
Didn't know paypal were doing that…
Sadly I don't think that's on the cards. :(
I will object when this BS heads out my way eventually, of course. But if some law gets passed requiring the OS to be able to tell programs the age of the user, I would vastly prefer it just be something set by the sysadmin at account creation, and that the user not be able to change it themself. That last part mainly because if the user can change it themself, even braindead politicians will realise it is not doing anything and they will legislate something else. Probably something worse.
Honestly, no. I'm aware there are other options. But if the govt is mandating something, I'd rather it made sense. Demanding everyone set an env var is nonsense.
Honestly I'm not sure. I feel like I'd want that as a parent tho, personally.
In every OS I know of including linux, you need admin/su rights to create a user account. If the age is tied to the account that at least prevents tampering without admin/su access.
I suspect something the nonprivileged user can effortlessly change would be deemed insufficient. :P
The way this is written, it would just be a case of entering your age or DOB at account creation, which wouldn't be so bad. Indeed, this would be the kind of parent-empowering solution I'd like to see, since it kind of assumes the admin of a device (who sets up user accounts) is an adult who will enter the correct info for their kids.
Of course, there's always the concern they might try to push for adding 3rd party age attestation after the fact, with this being the thin end of the wedge. And it'd be a bit of a pain for the various linux distros to organise a compliant solution even IF it's just adding a new parameter to useradd and the associated "age signal" API for applications to query.
cross-posted from: https://lemmy.world/post/15565311
It was a long running project, but I finally did it. I built what I'm calling a smart mailbox that communicates the presence of mail locally with Home Assistant via ESPHome.
Parts:
- Pine plank roughly the width of my mailbox
- Treated pine plank for mounting
- Thin sheet of perspex or similar transparent plastic
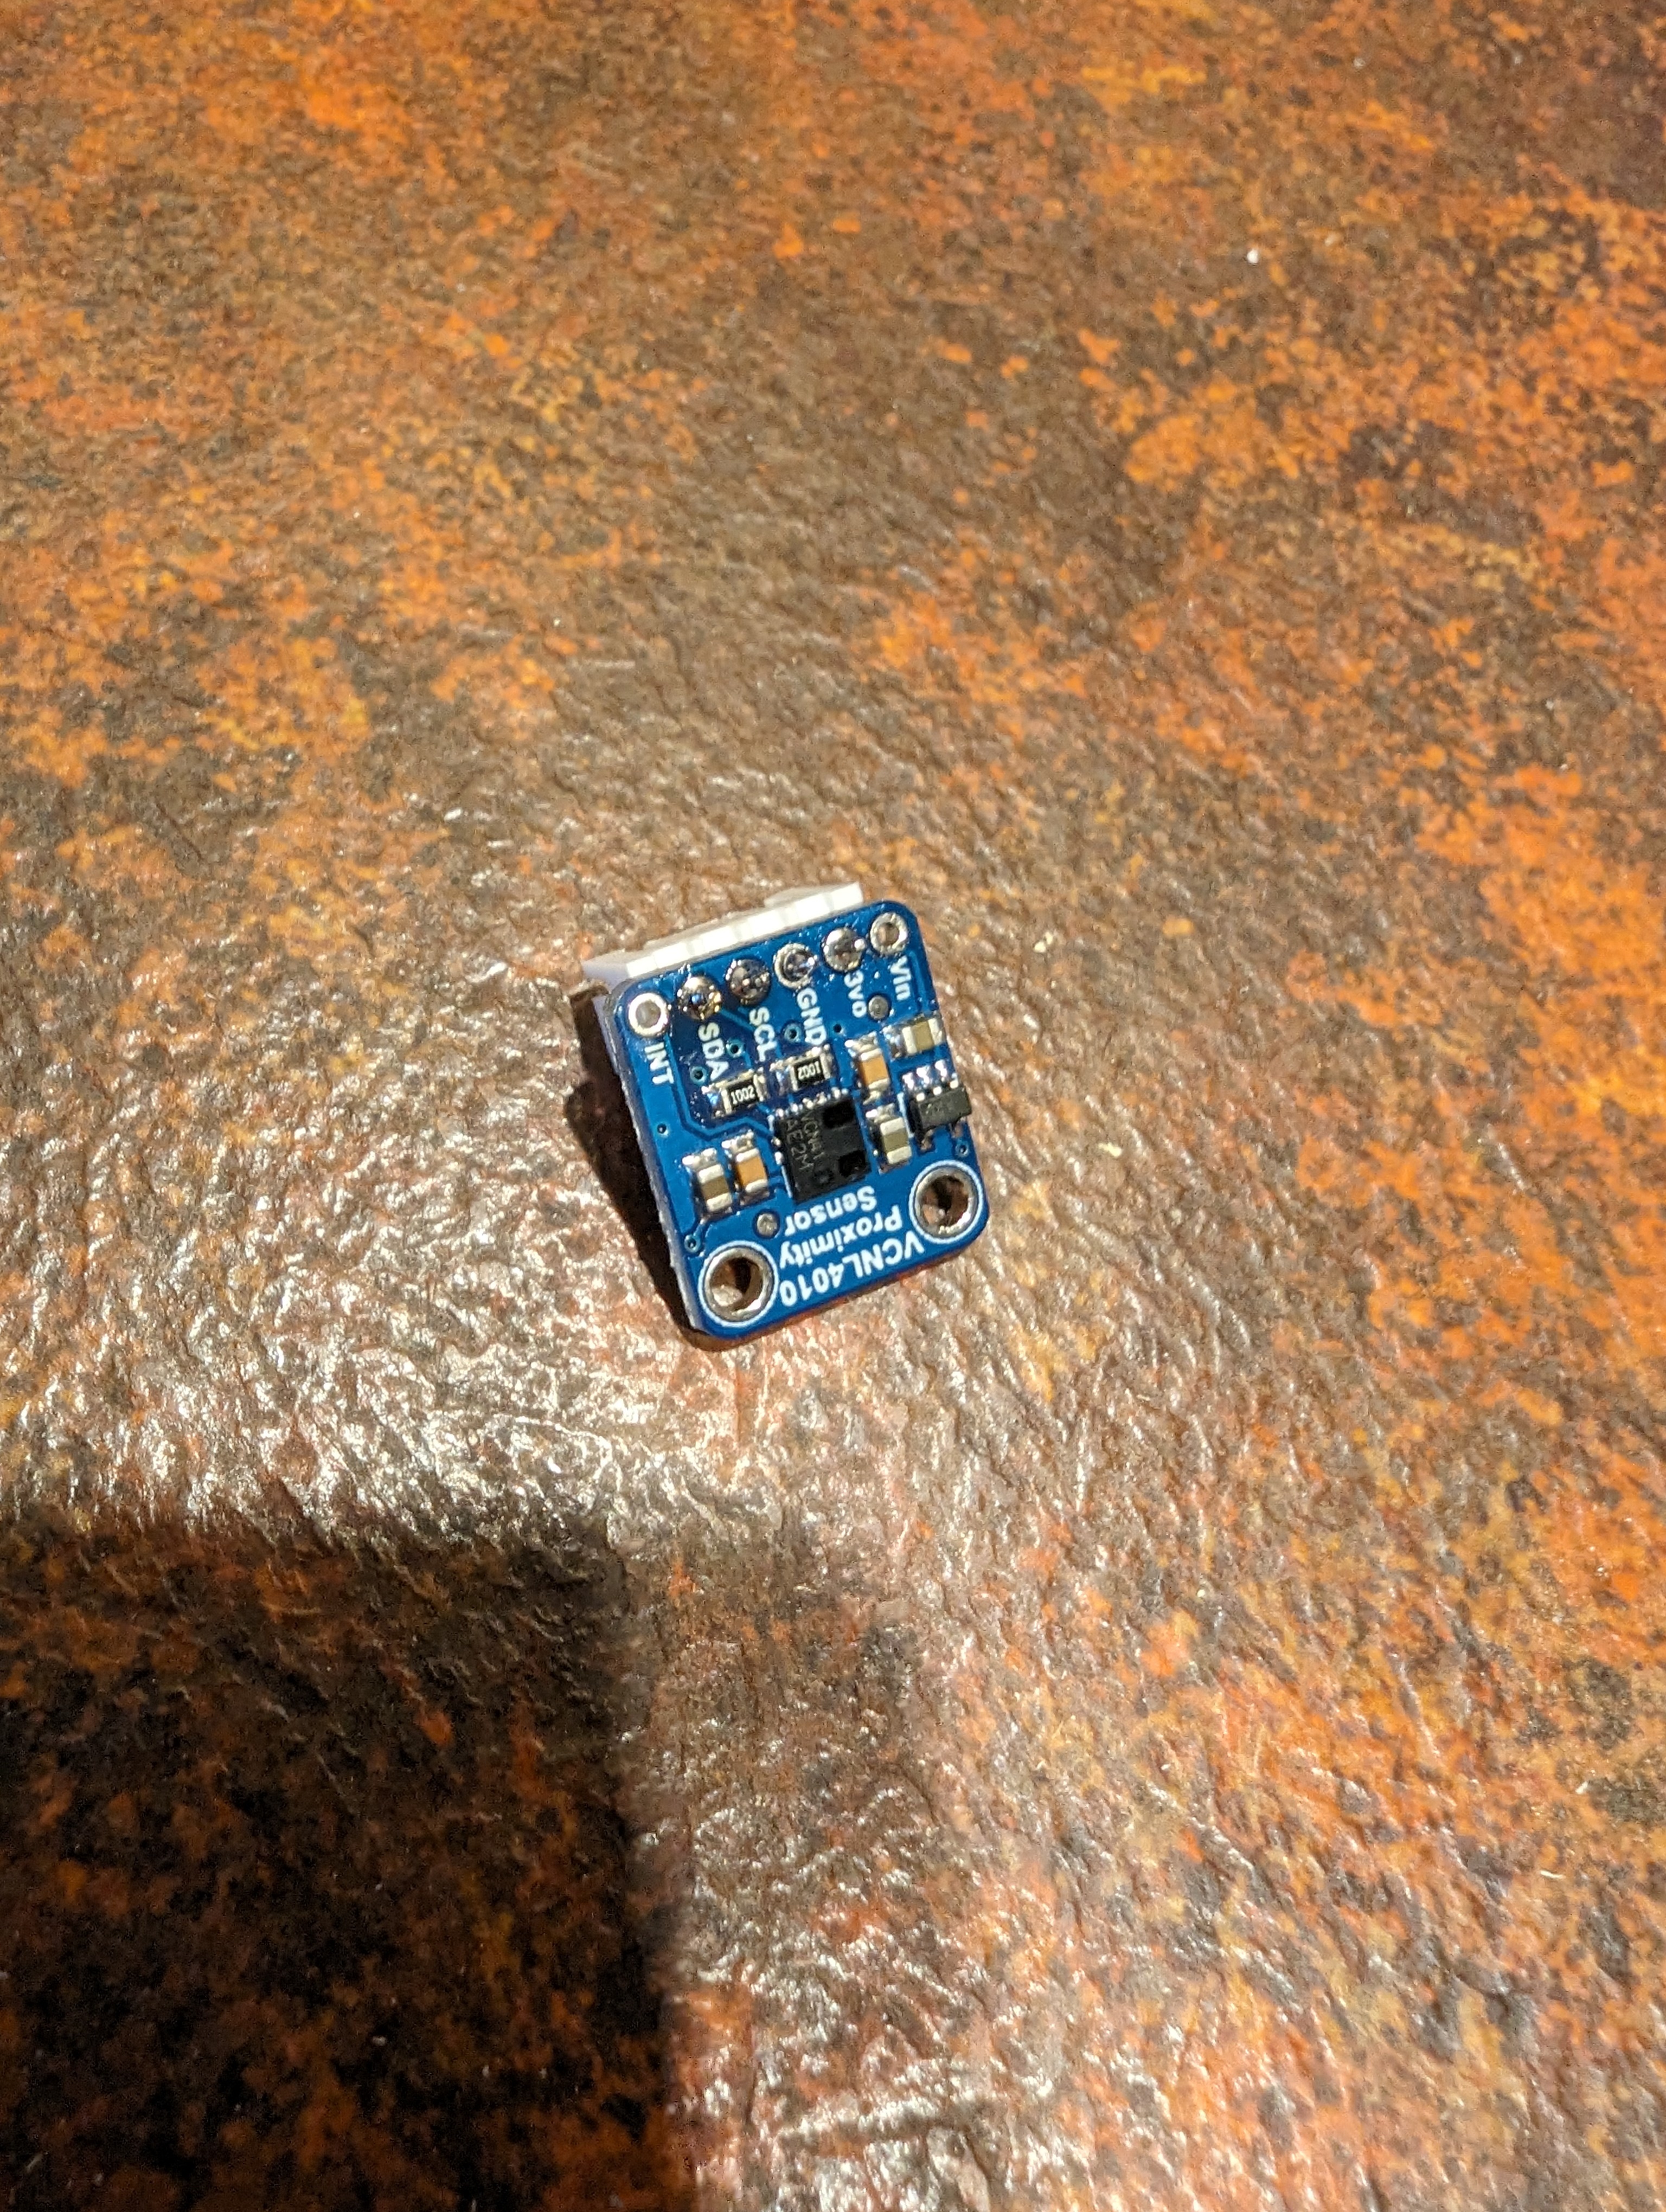
- 2x VCNL4010 proximity sensor
- ESP32 dev board with antenna
- Bigger antenna
- Prototype board
- 2.54mm pitch JST connectors
- 2.54mm pitch pin header sockets
- 18650 battery
- 18650 Type-C charging module
- Battery holder
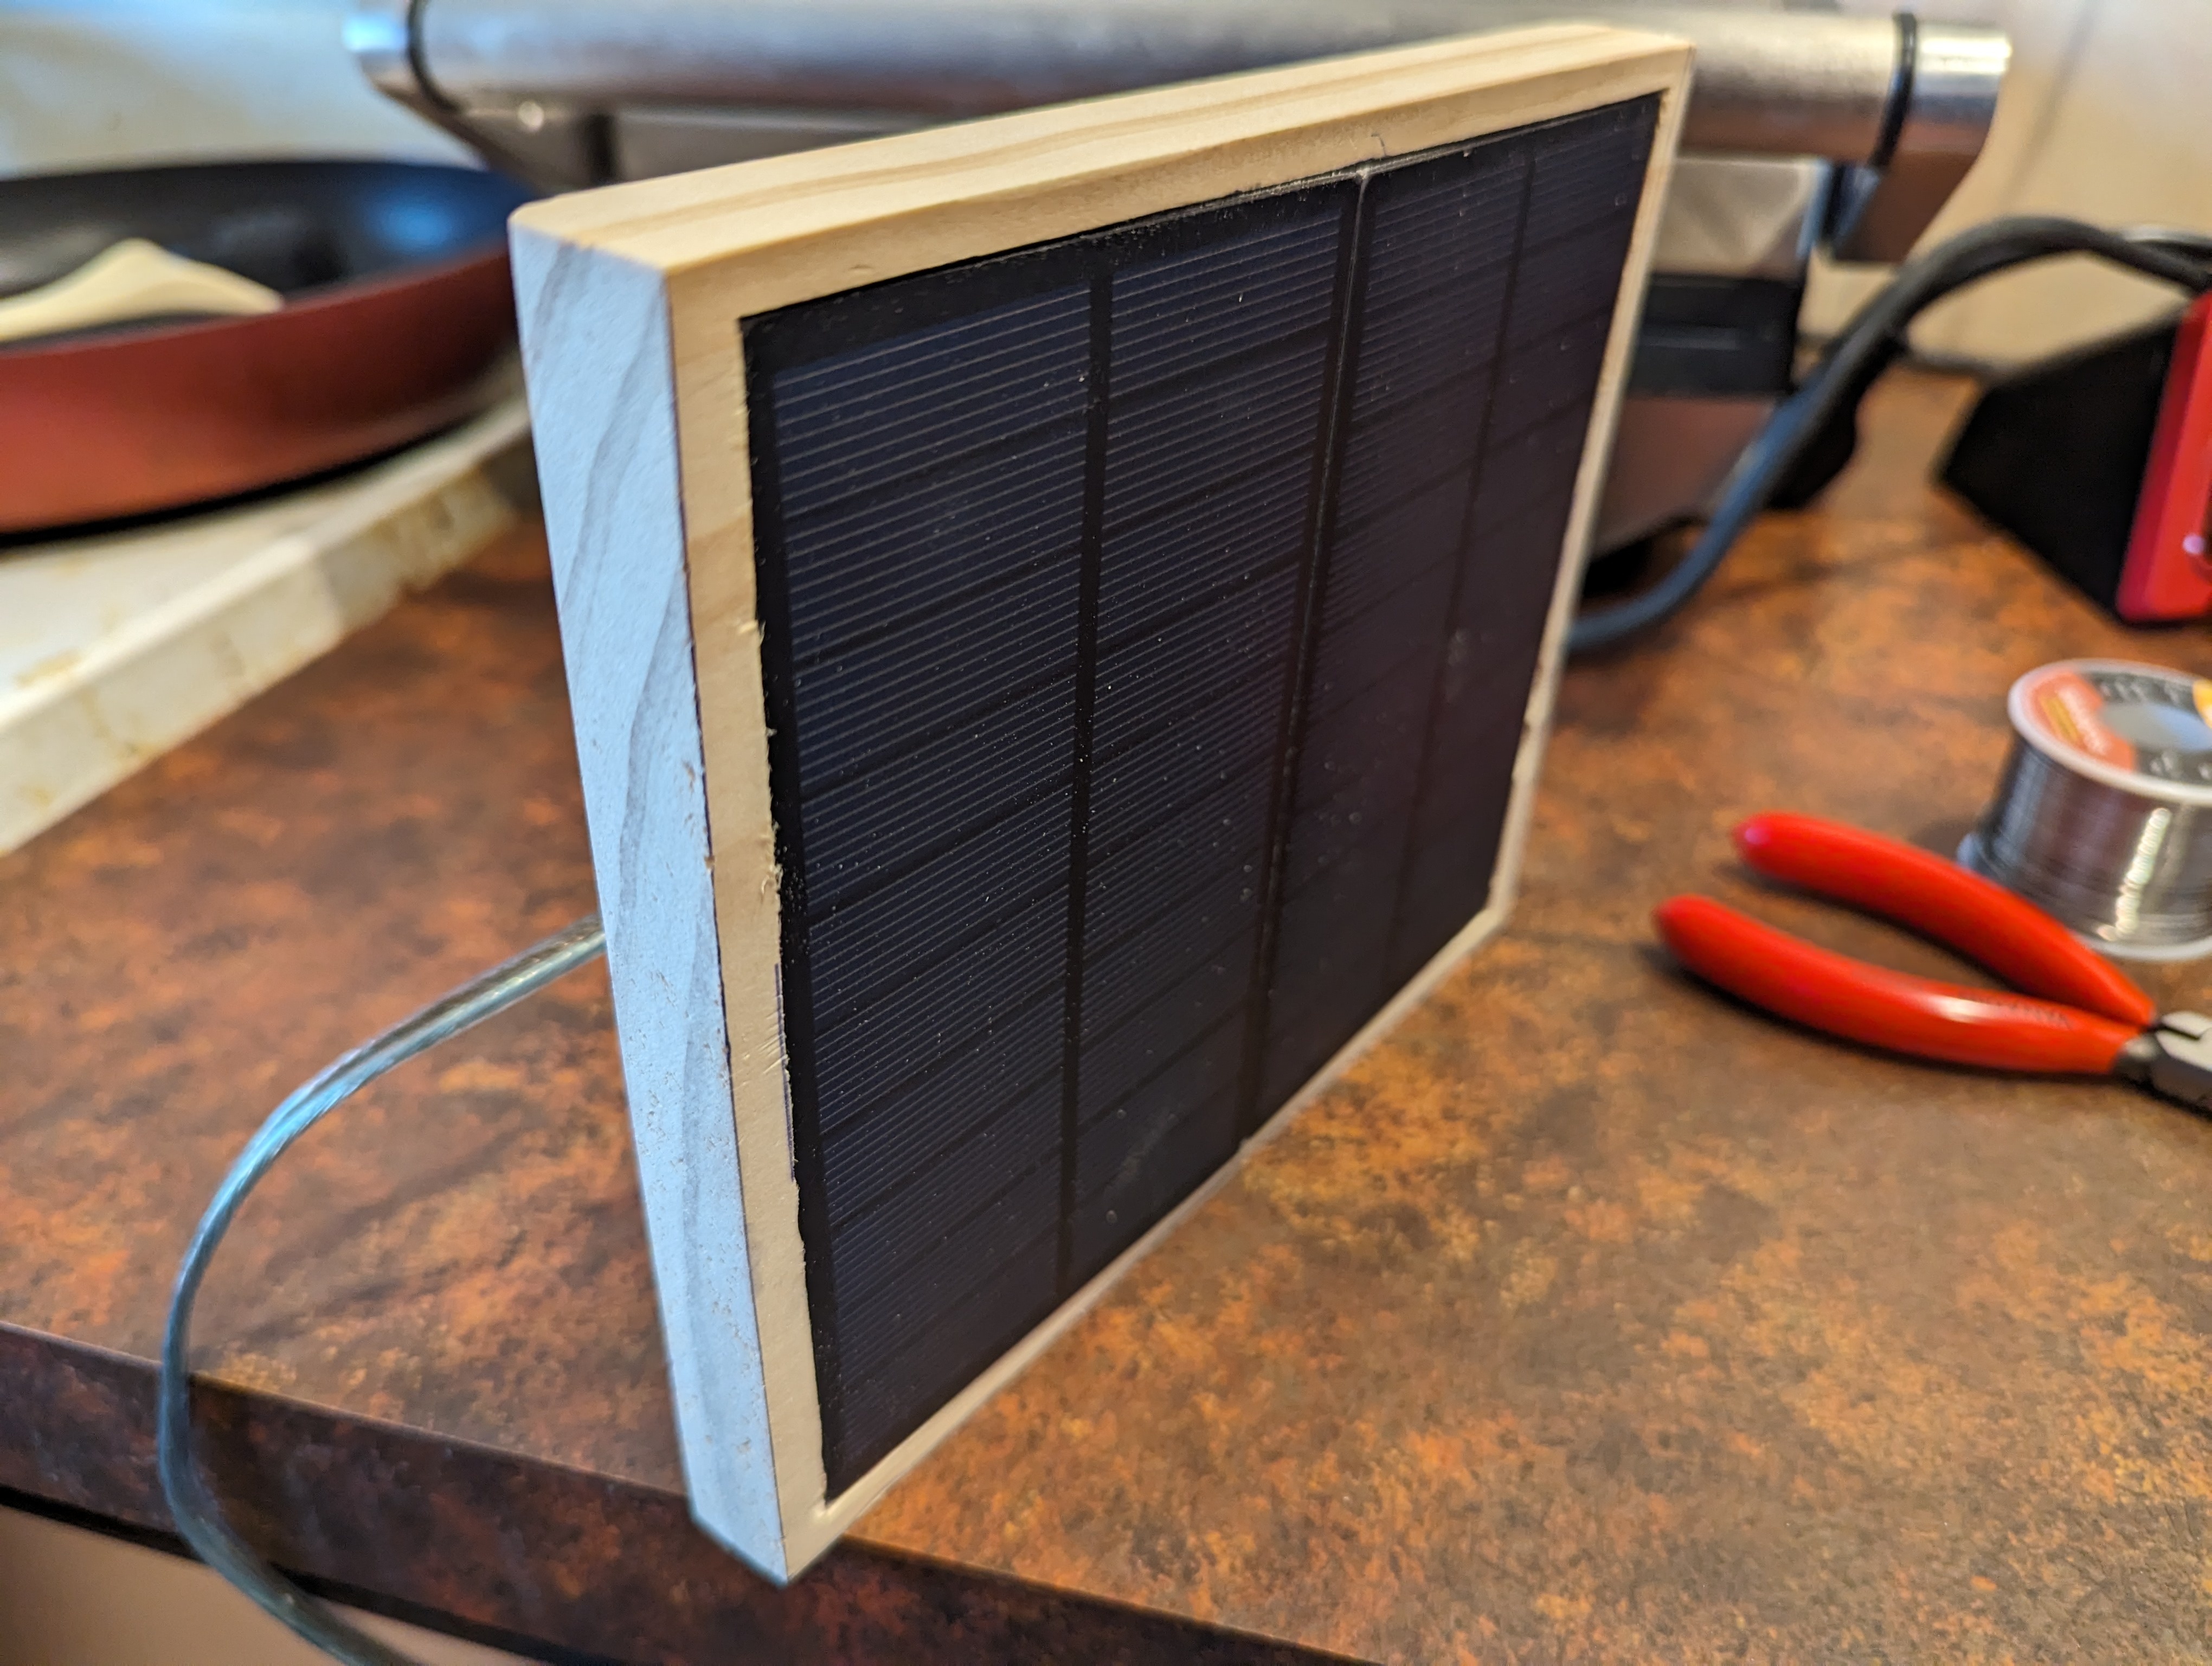
- 2x 5V 1.5W solar panels
- MCP1700-3302E LDO regulator
- 100uF electrolytic capacitor
- 100nF ceramic capacitor
- Resistors... I think I ended up using a 1 MOhm and a 330 kOhm
- Weatherproof junction box
- Nylon screw spacers
- Cable glands
- 12mm waterproof button
- Various cables and wires
- Paint and polyurethane spray to weatherproof the wood
Tools:
- Soldering iron
- Router for cutting grooves in wood
- Drill and hole saw bits
- Various files and sandpaper
For a start, I followed this guide to get me started on the power delivery portion, but I ended up using much higher valued resistors since I found that I was losing more battery charge through the voltage divider than I was from the ESP32 or proximity sensors.
Once I'd tested the concept with the parts just laying in a jumble on the table, it was time to get to work.
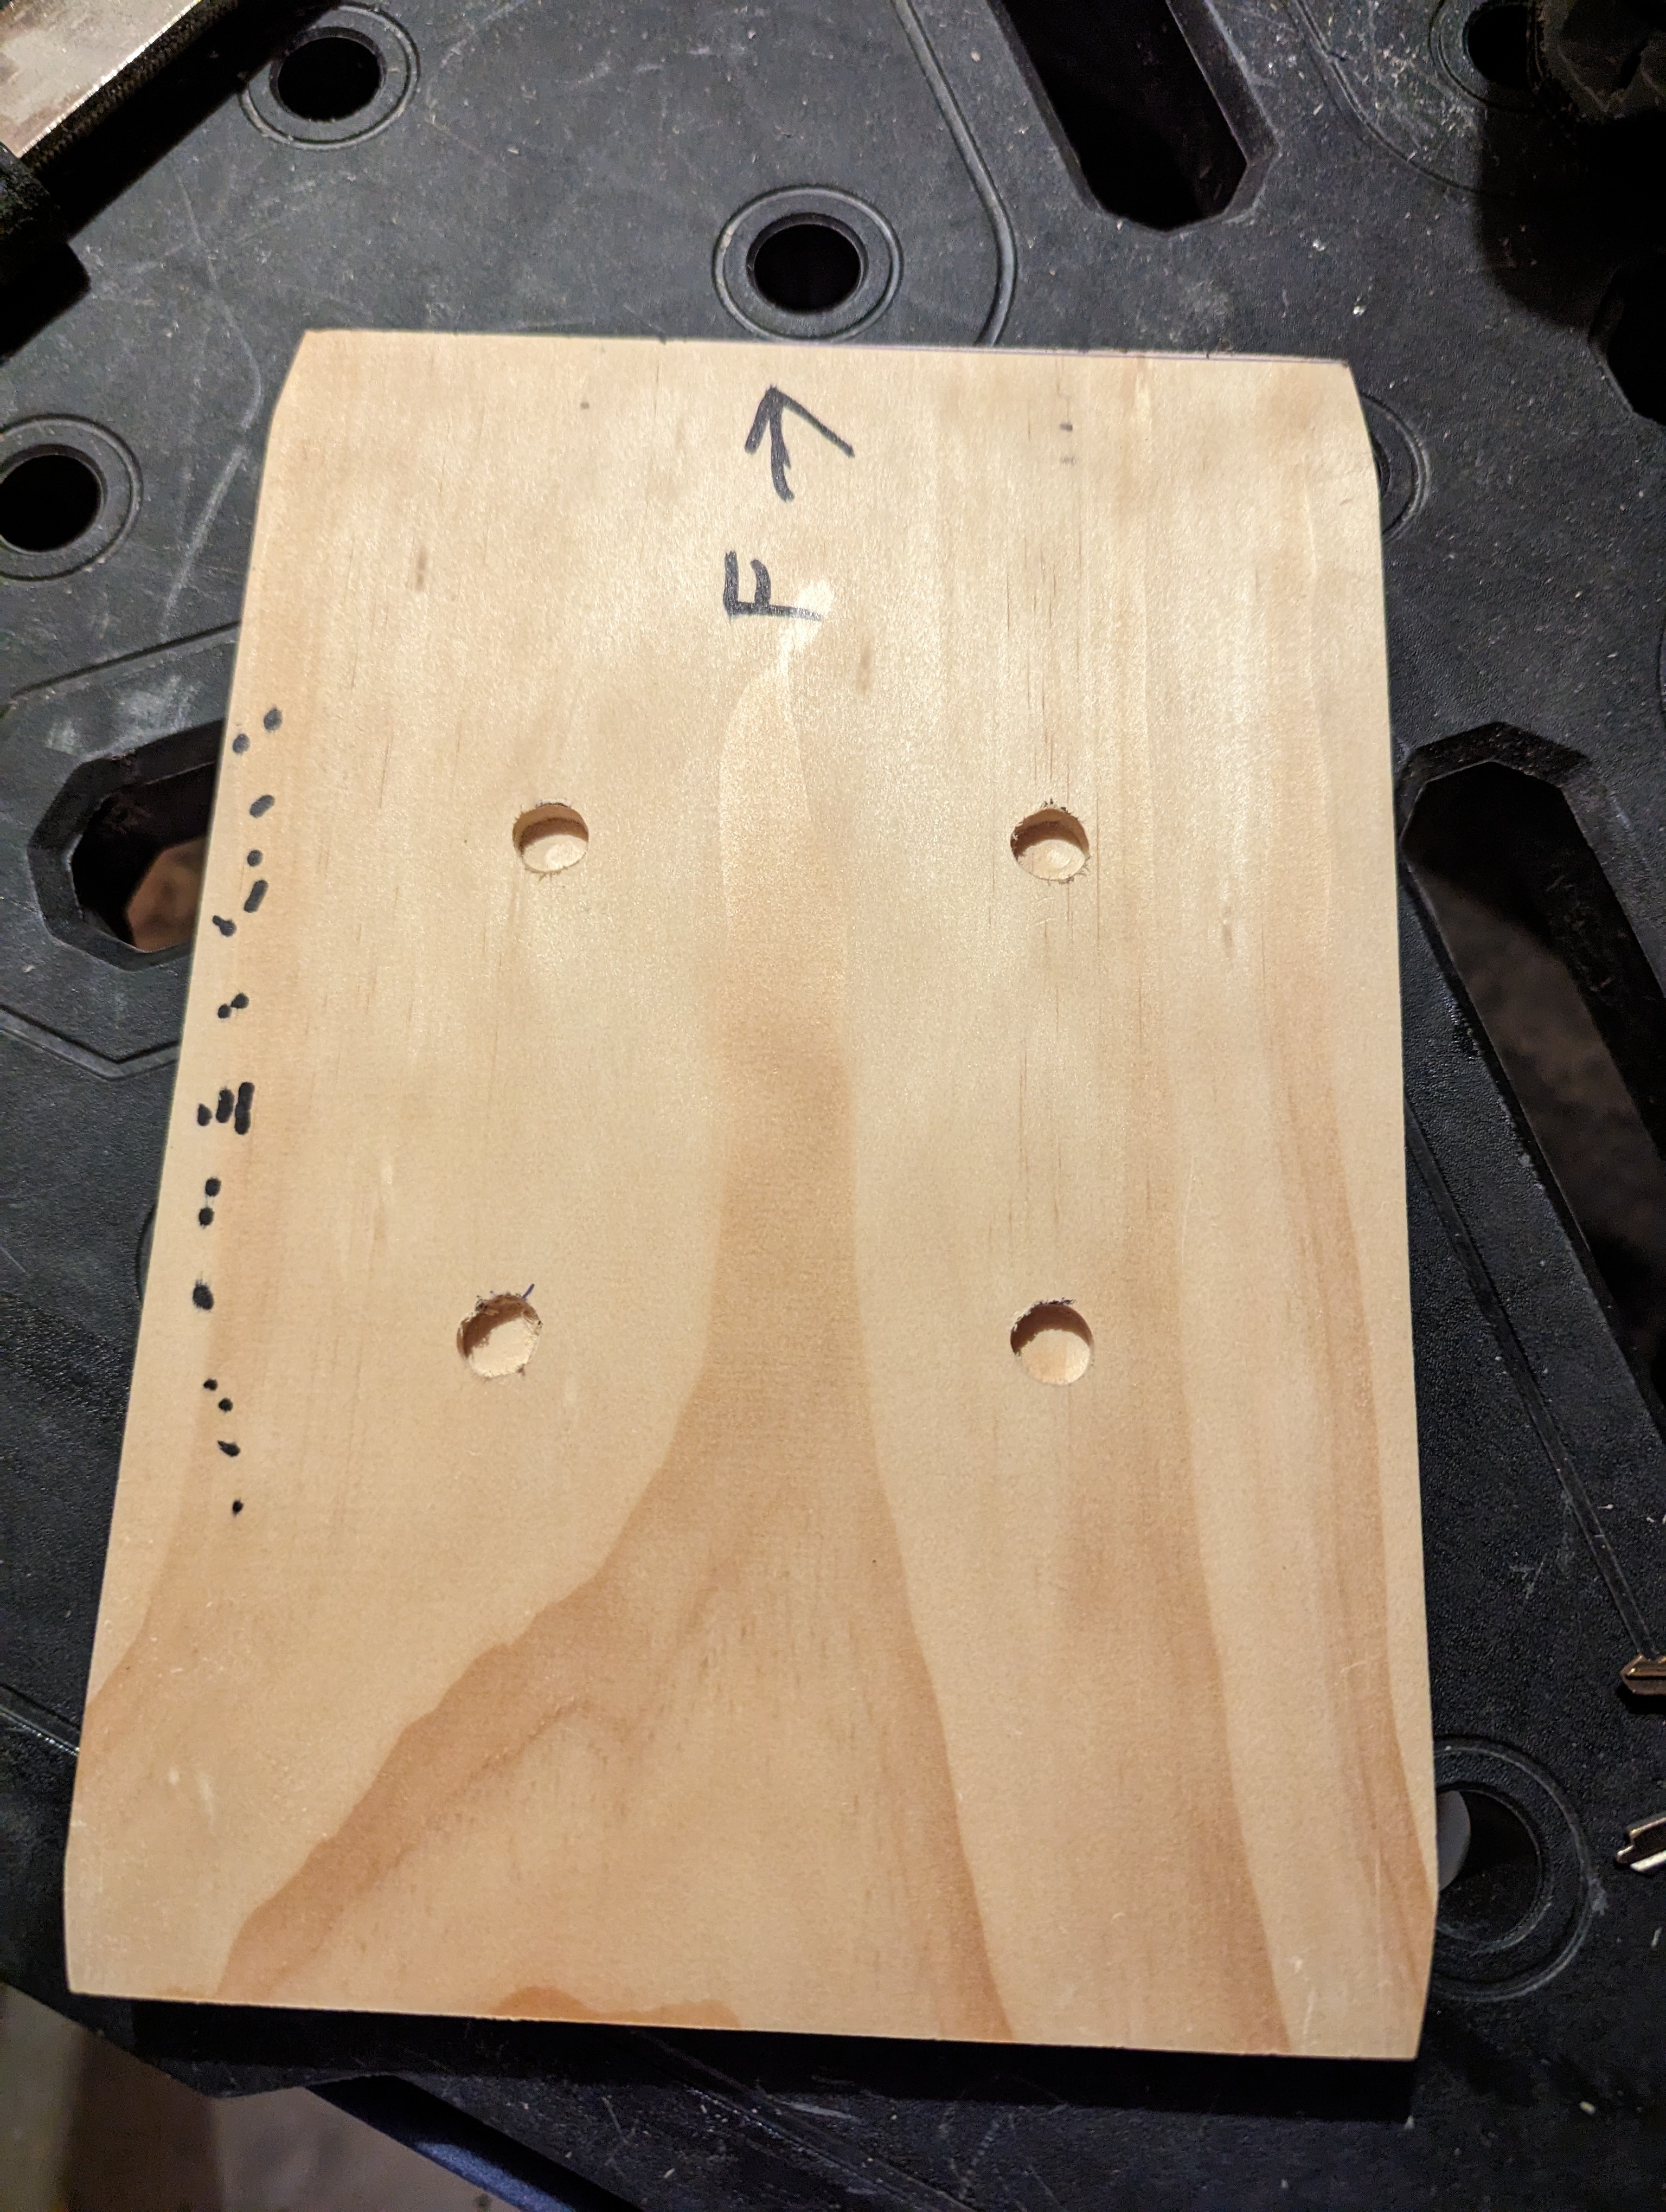
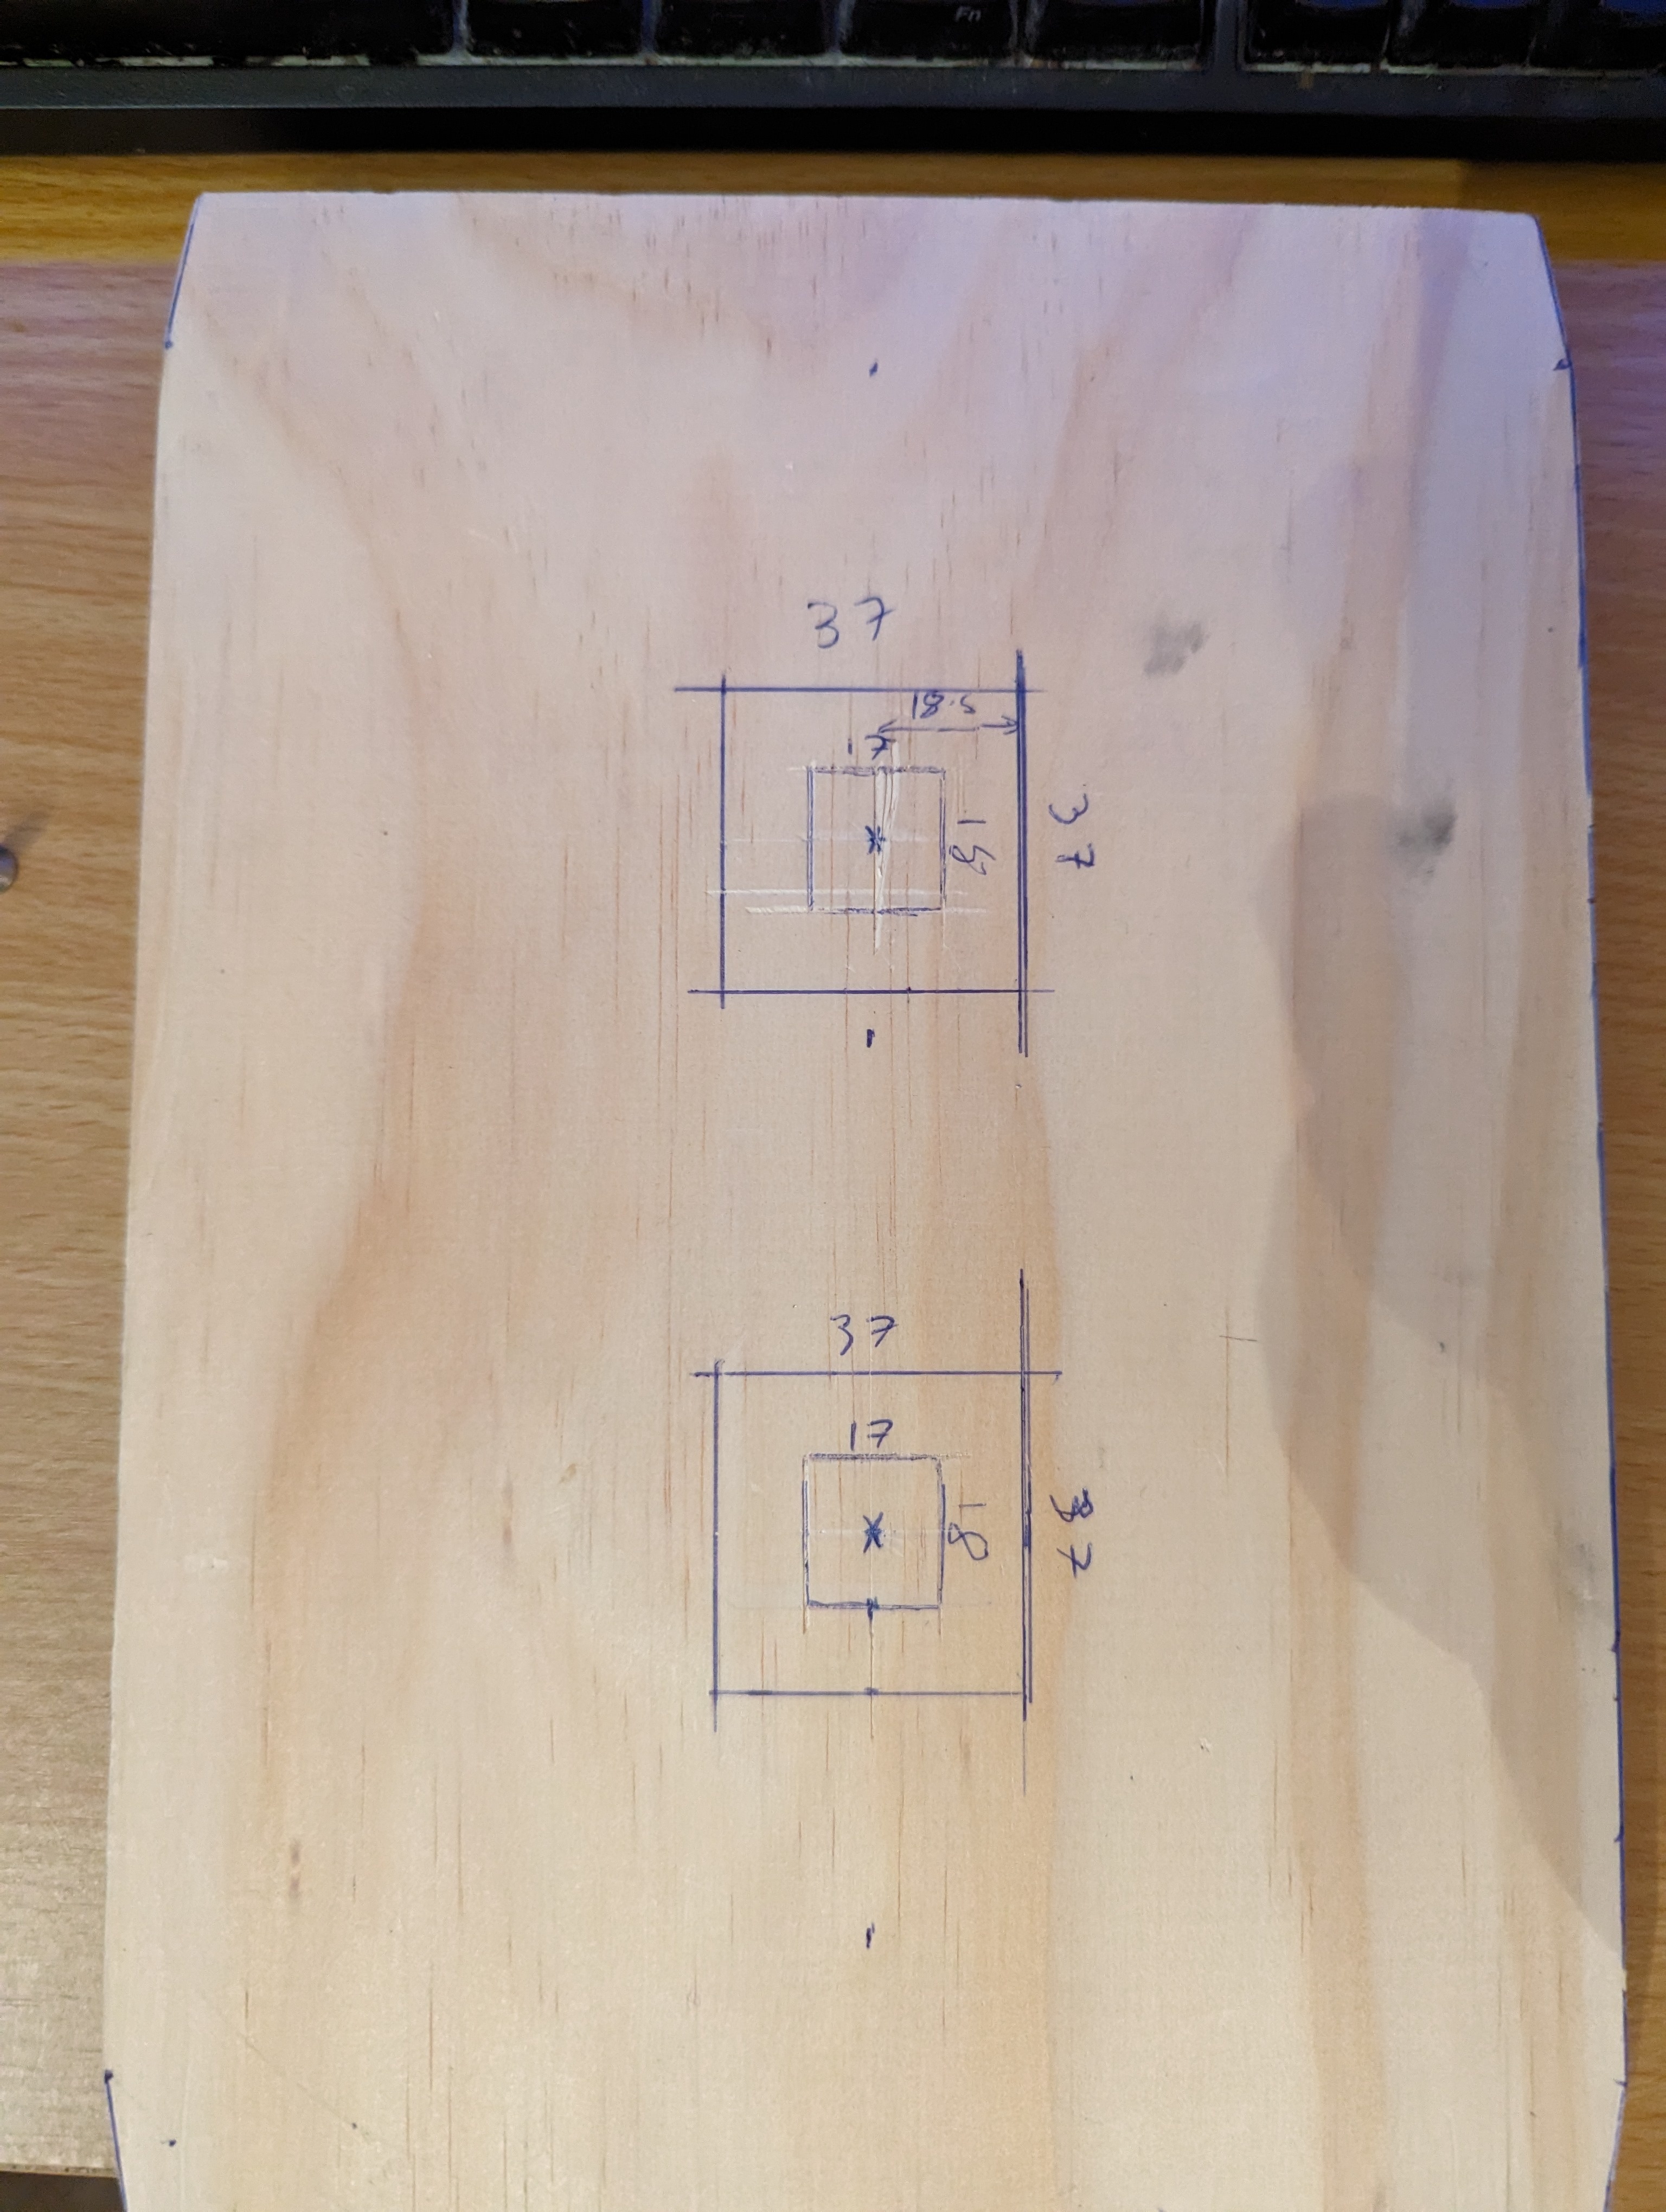
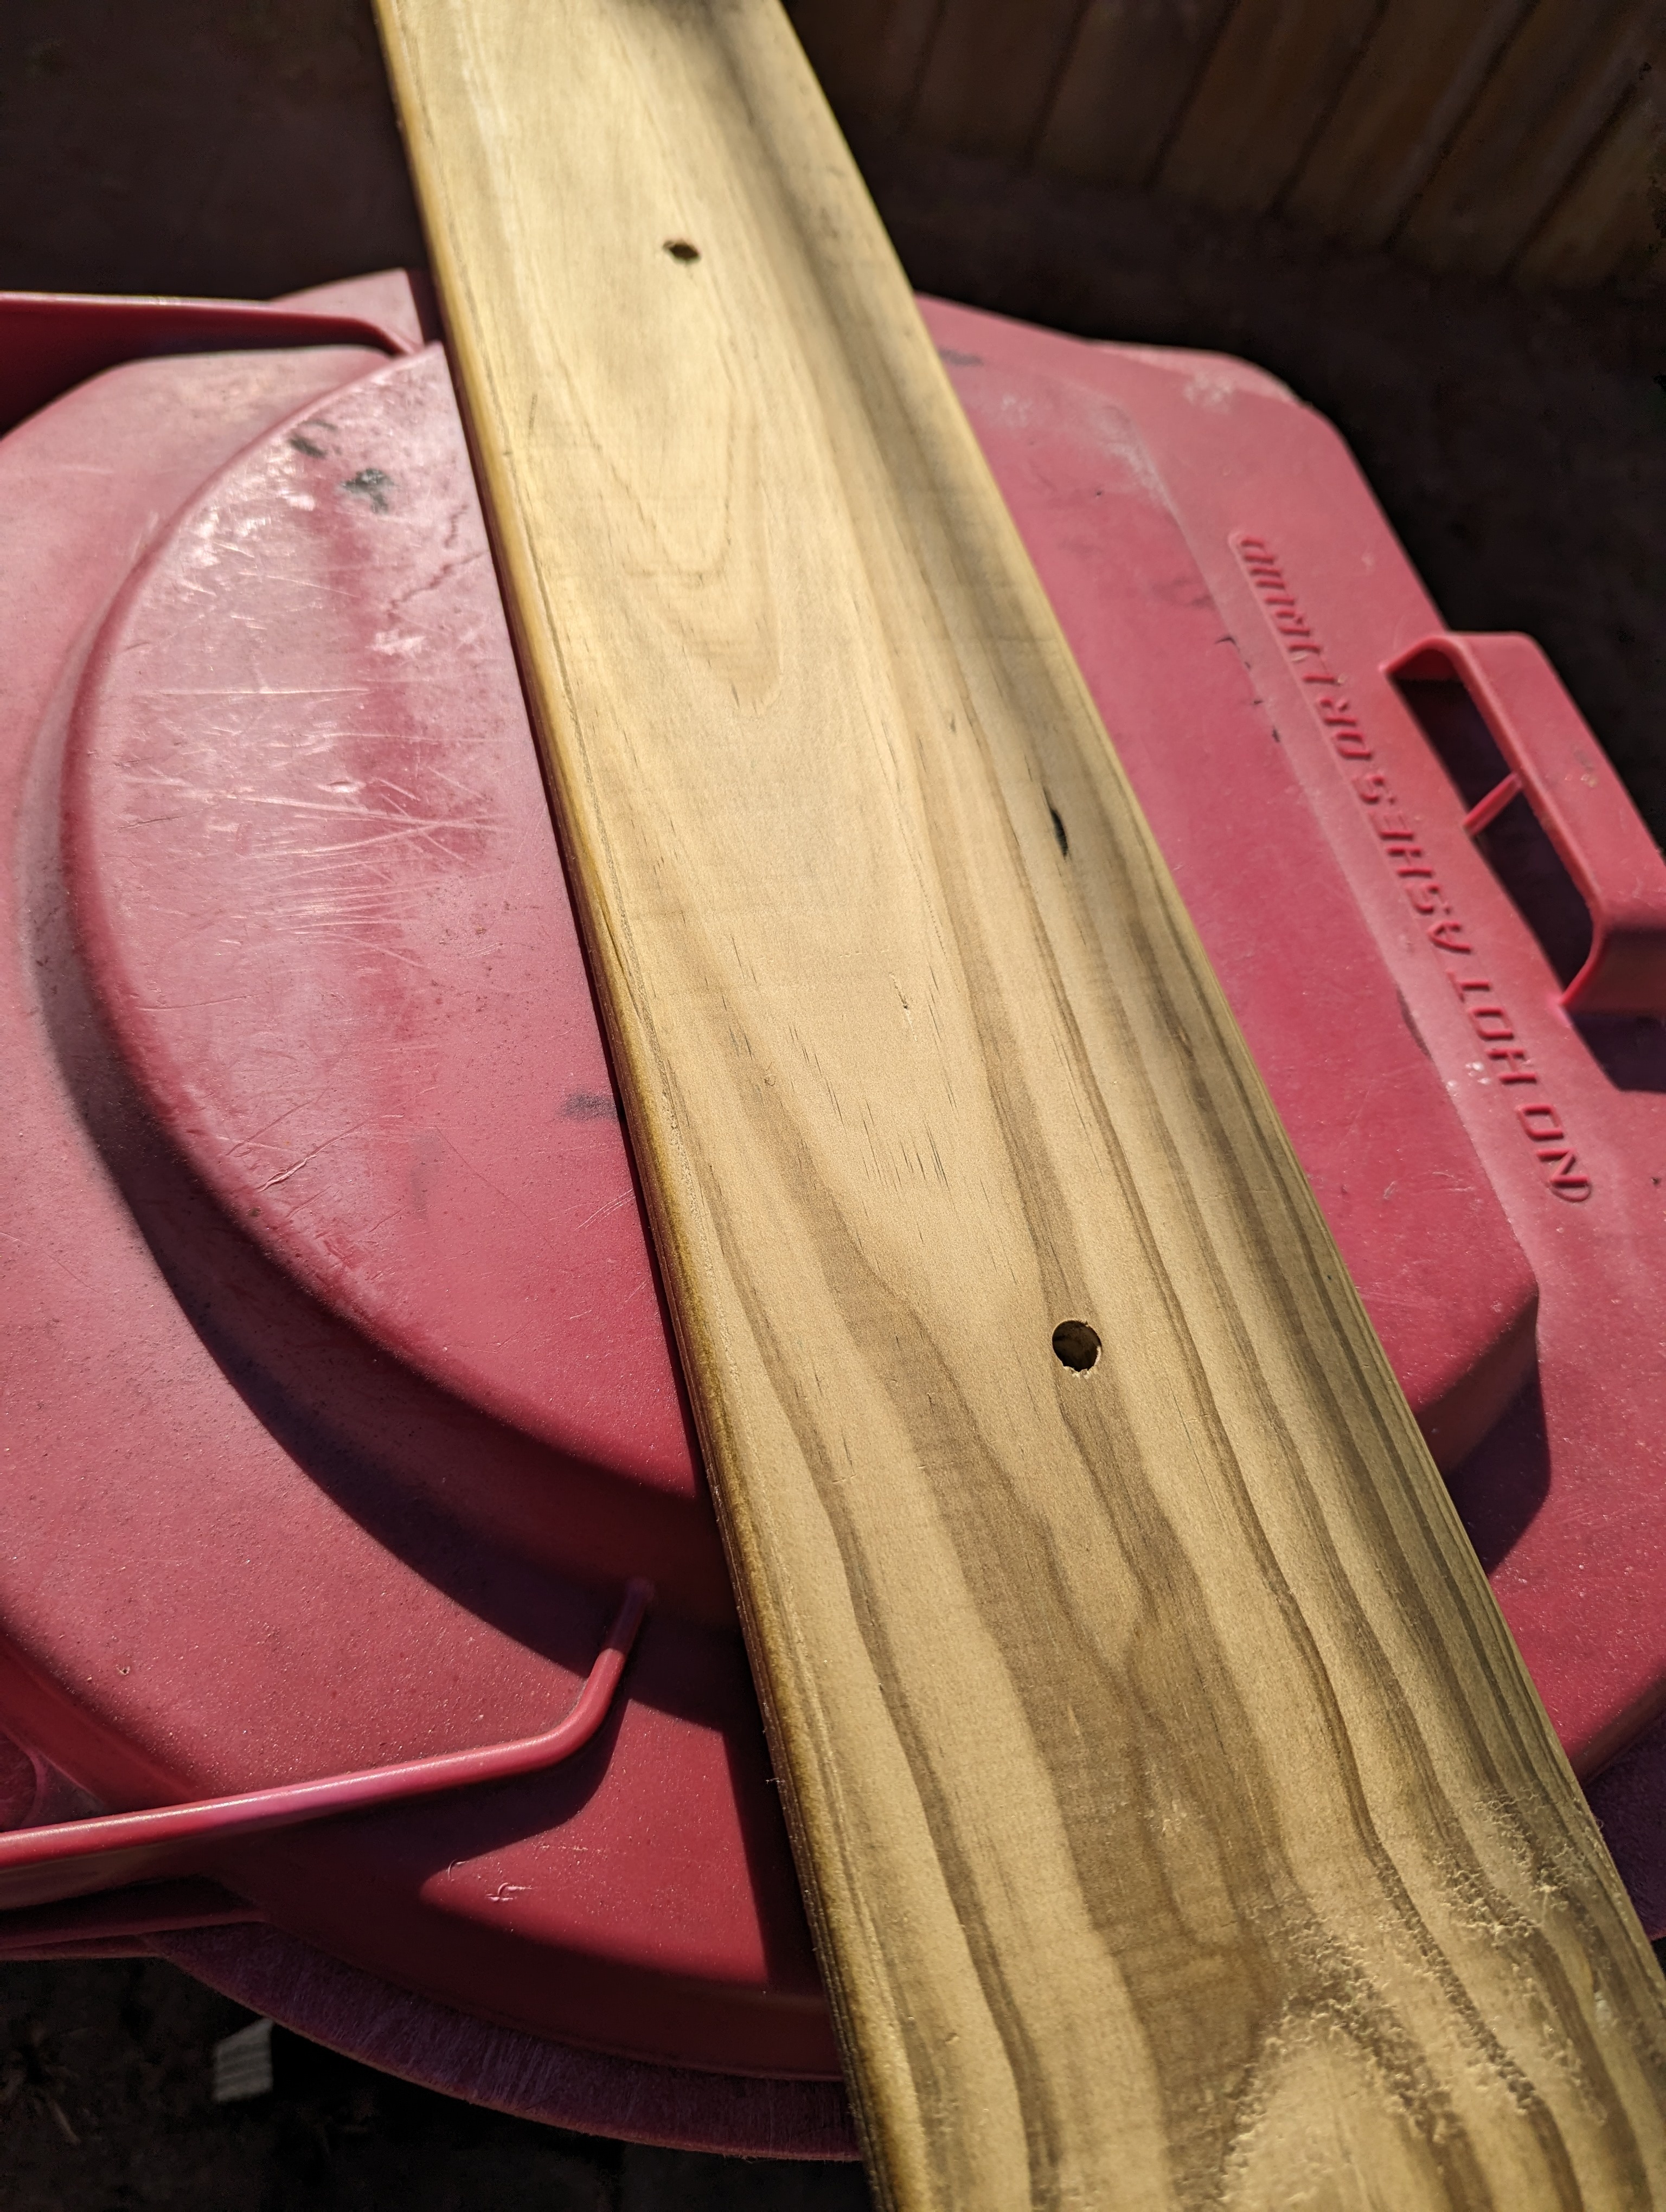
I started by cutting a plank of pine to fit my mailbox, chamfering the ends to make space for the metal joins. I routed out some spaces for the tops of the bolts that hold the mailbox down.
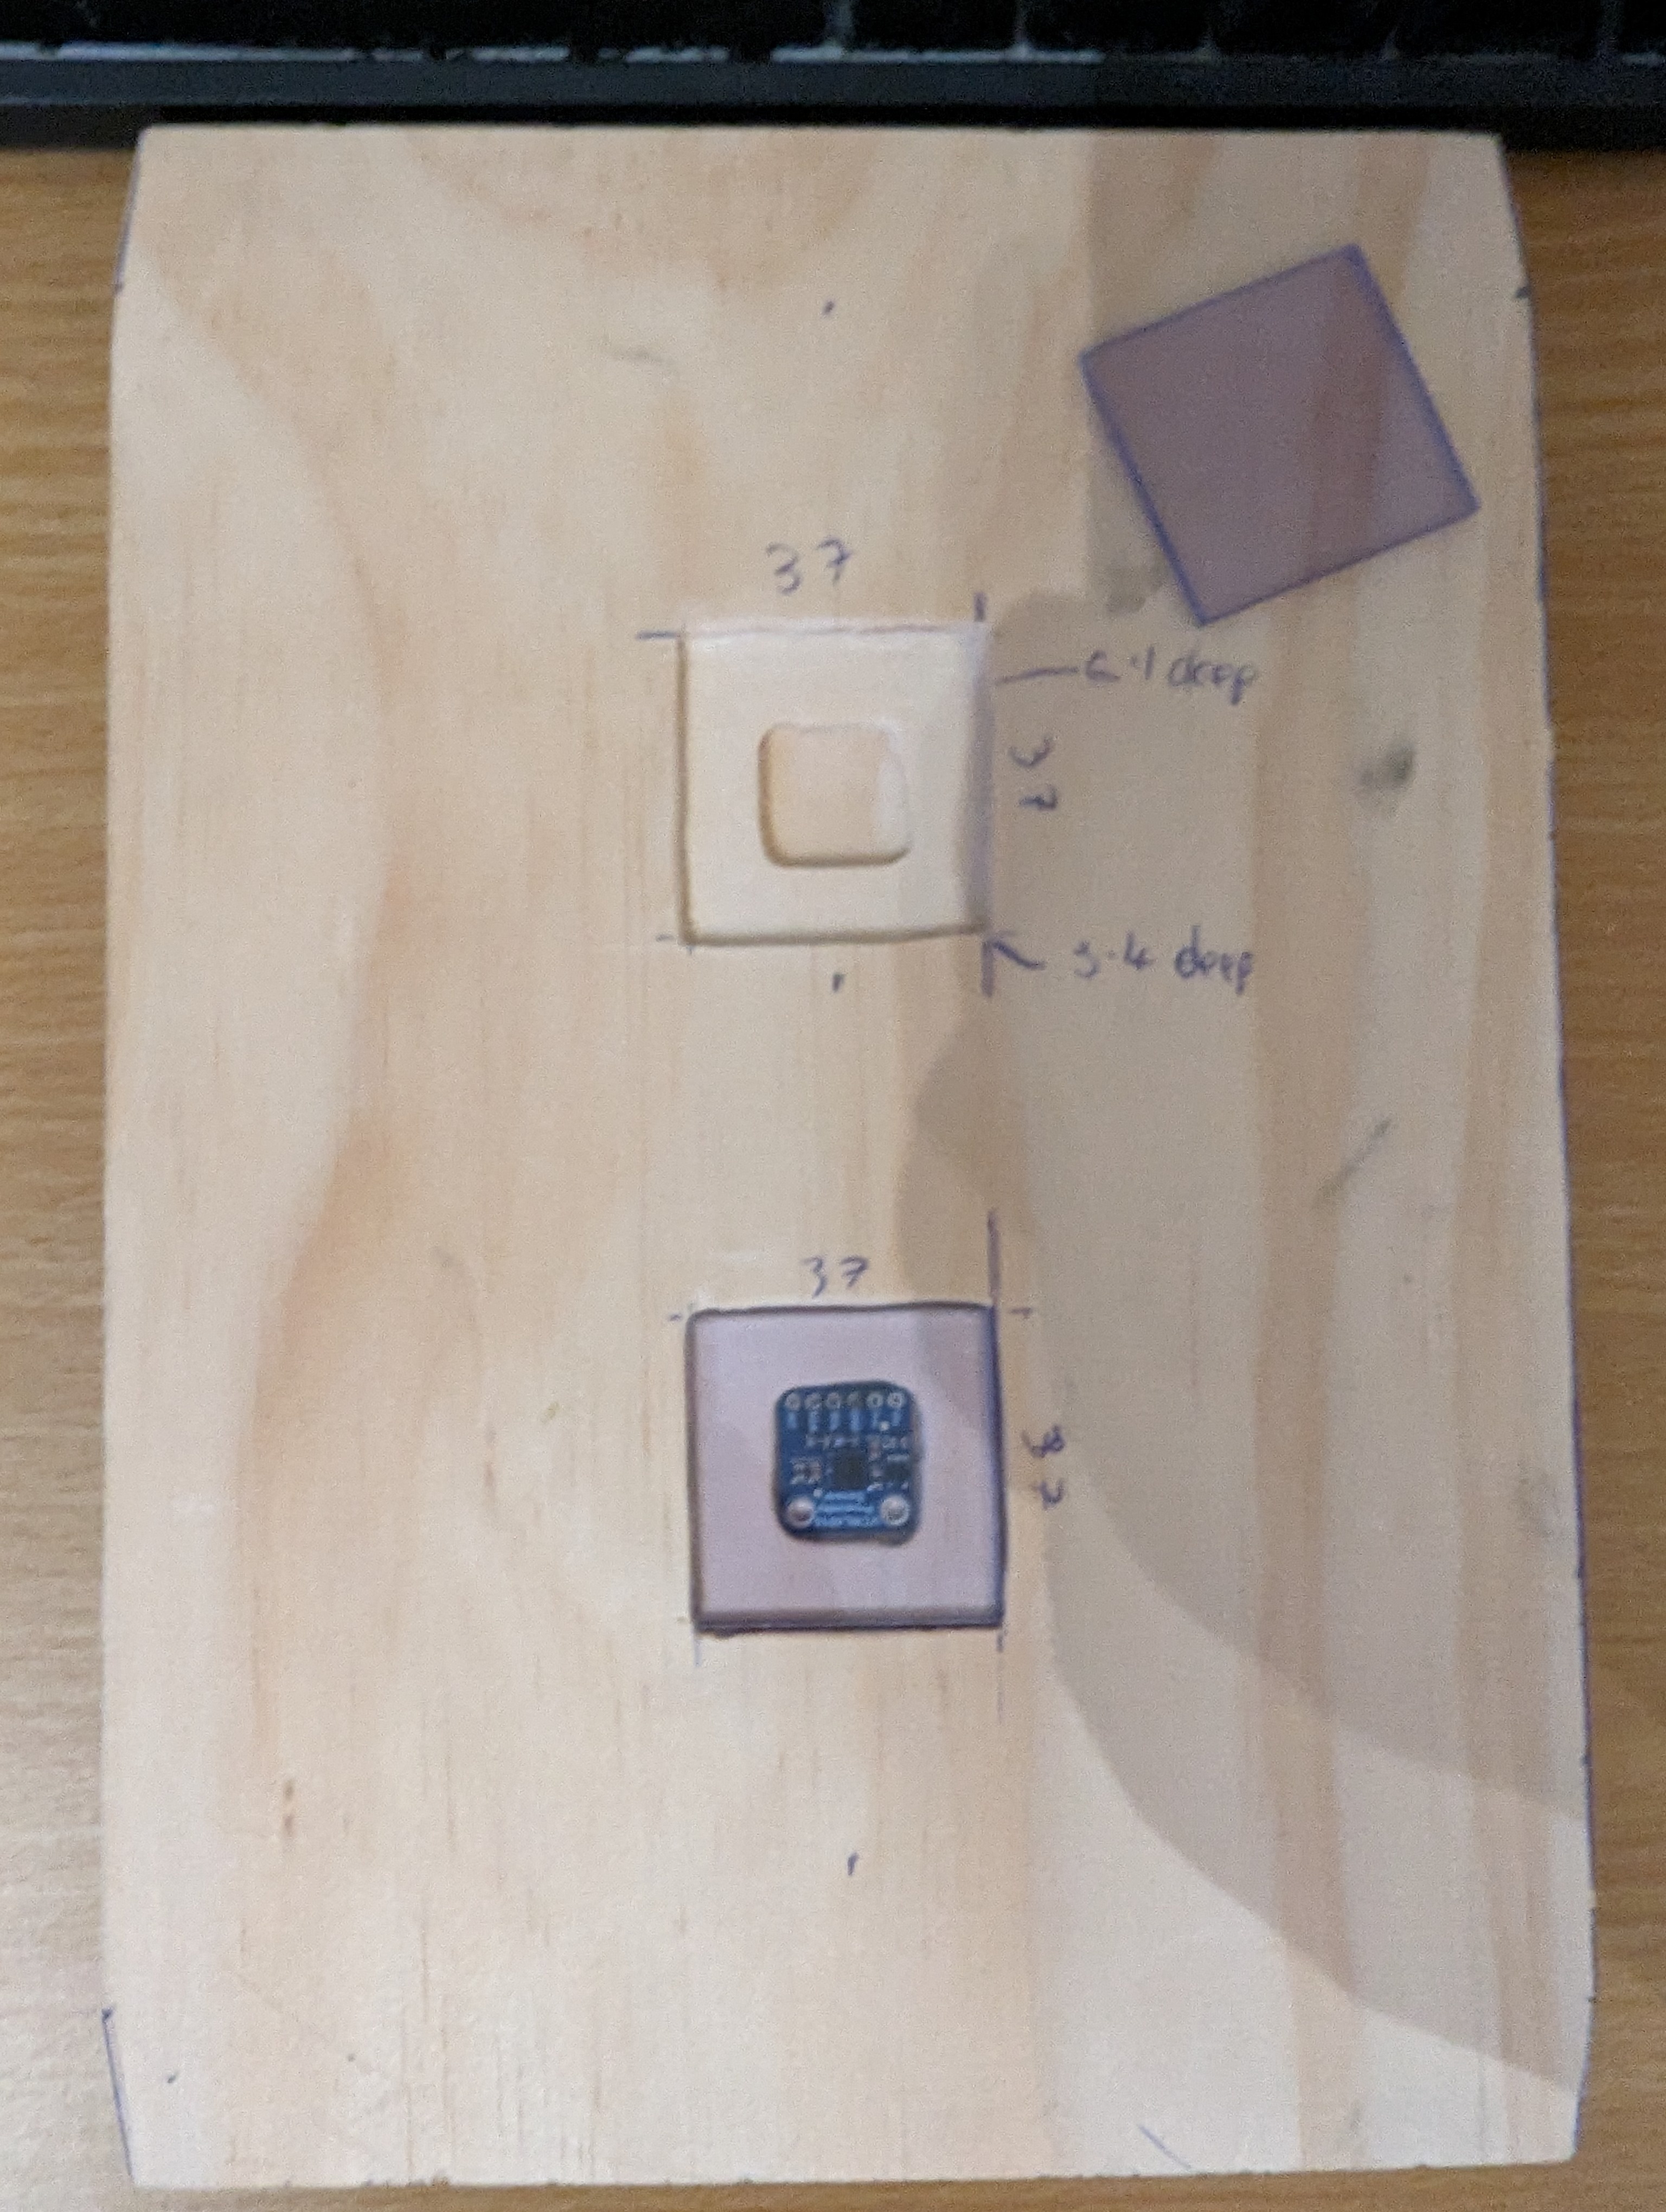
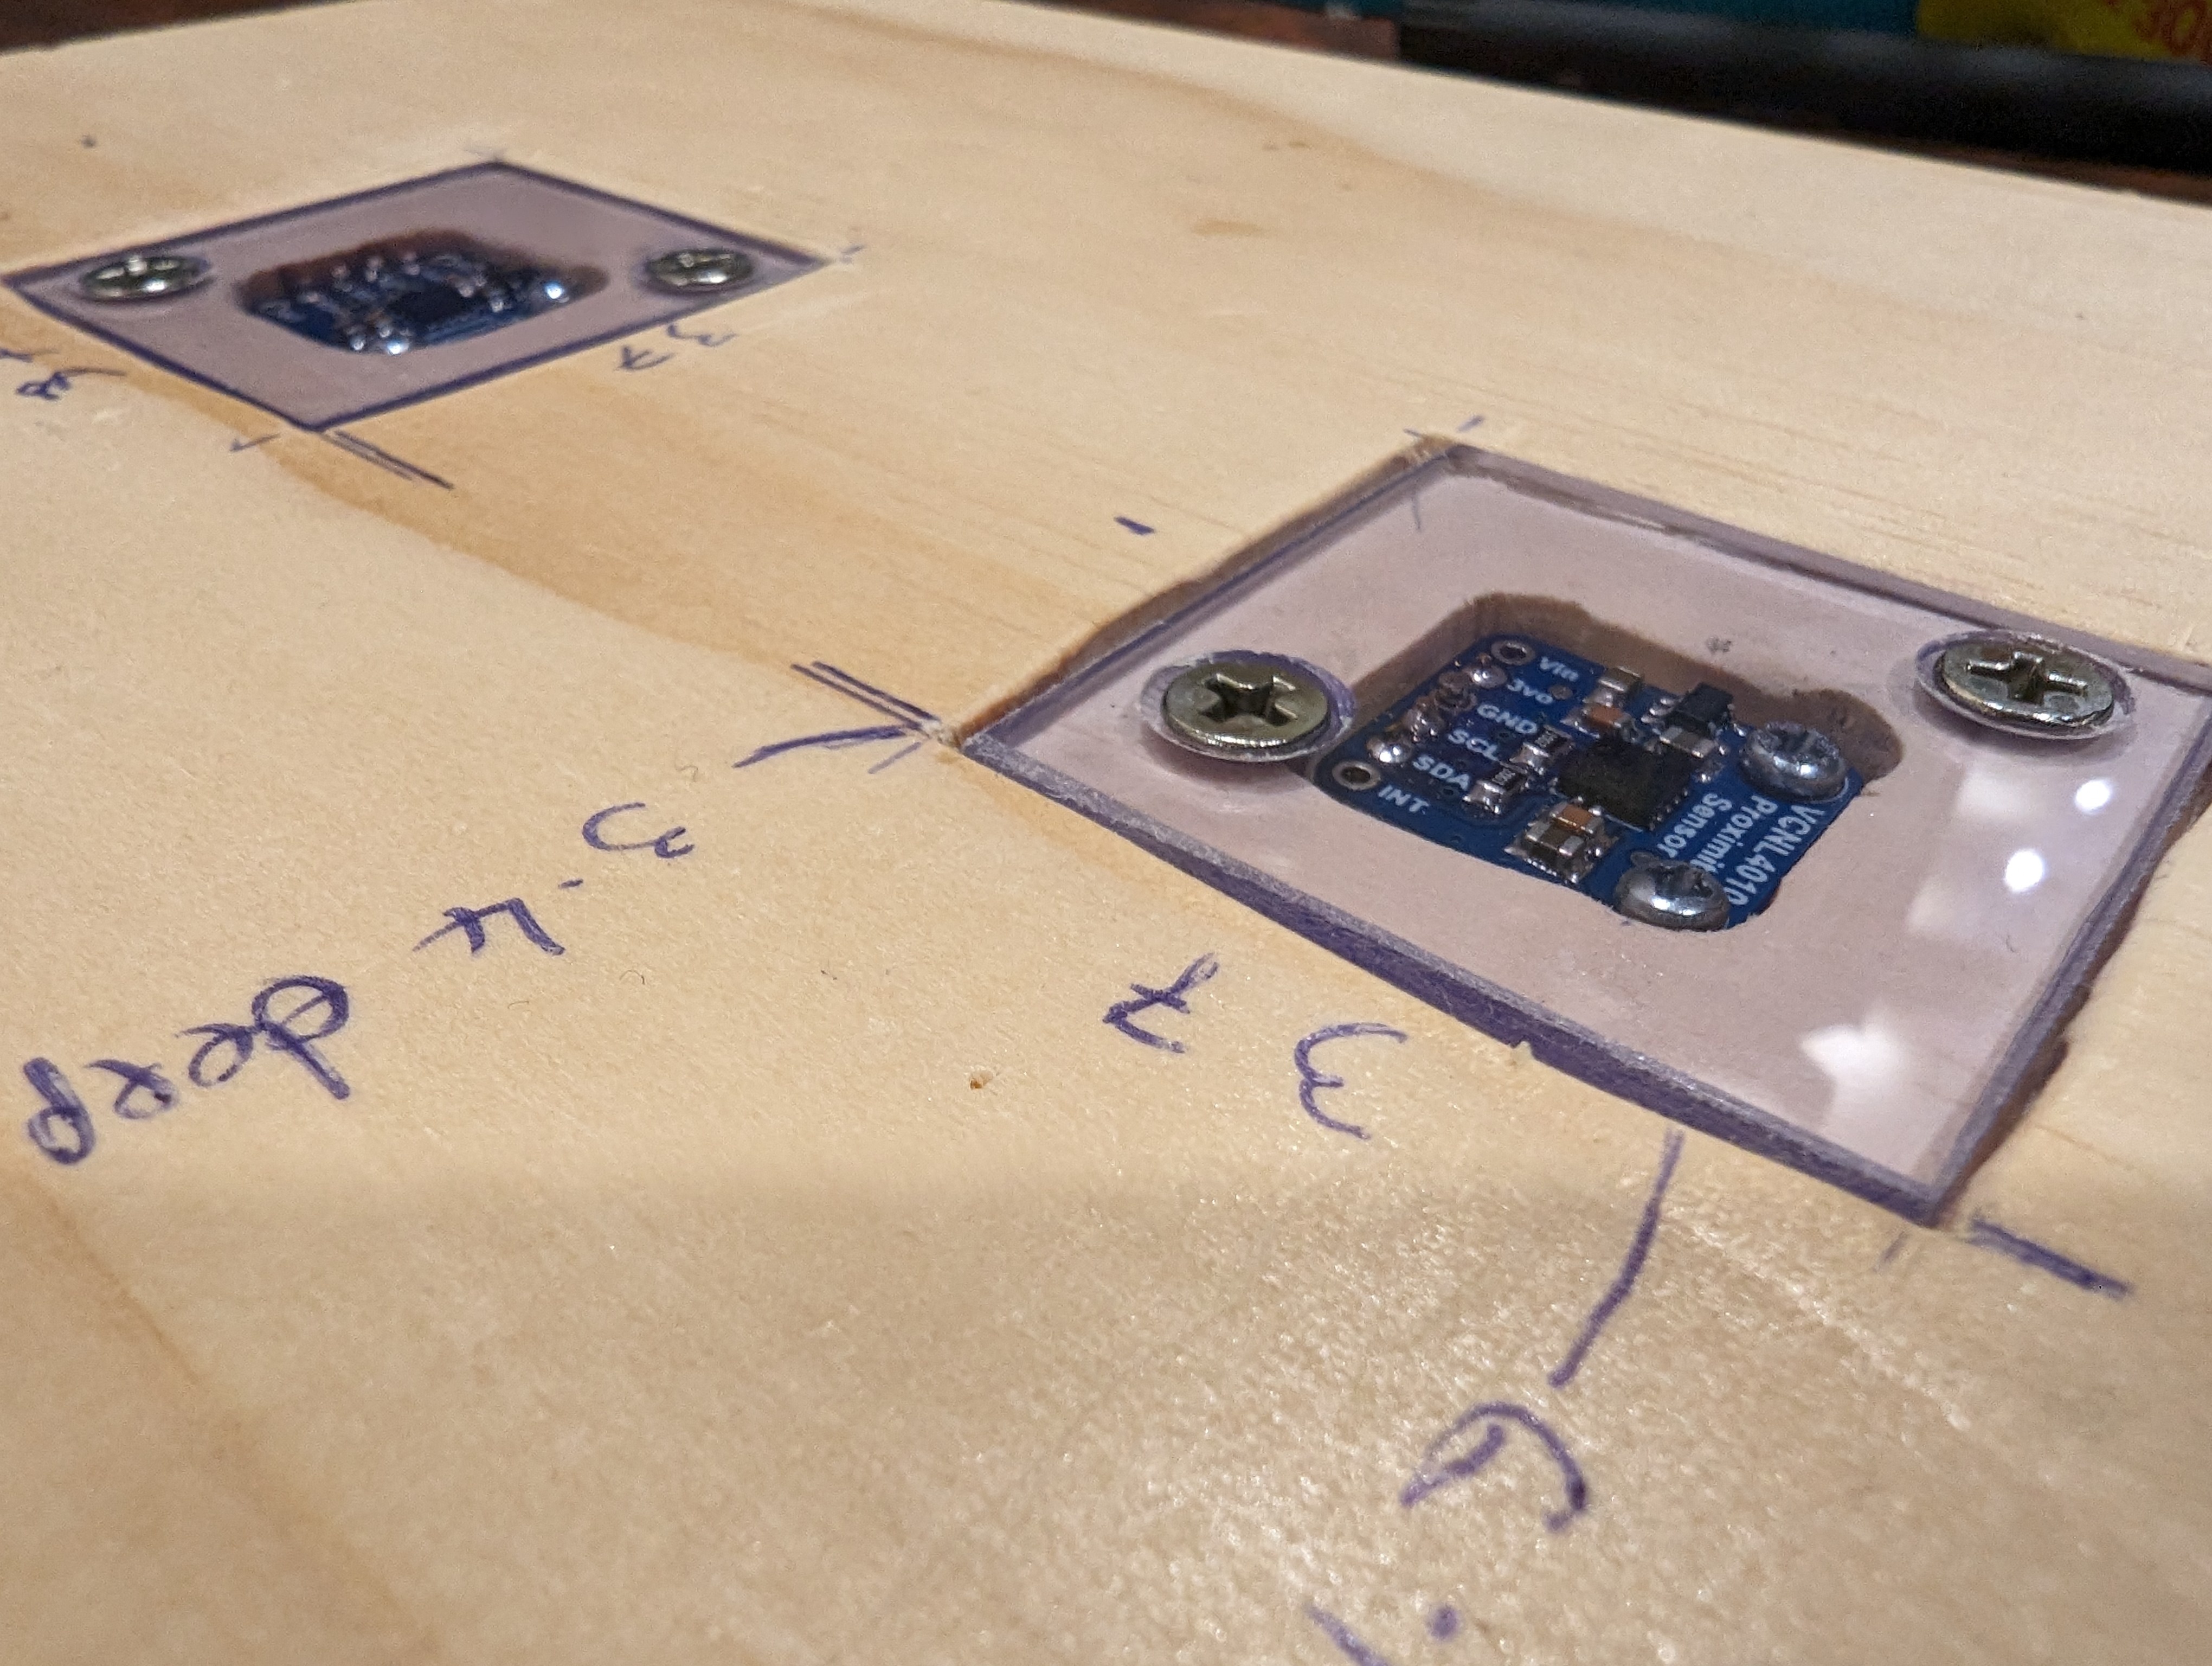
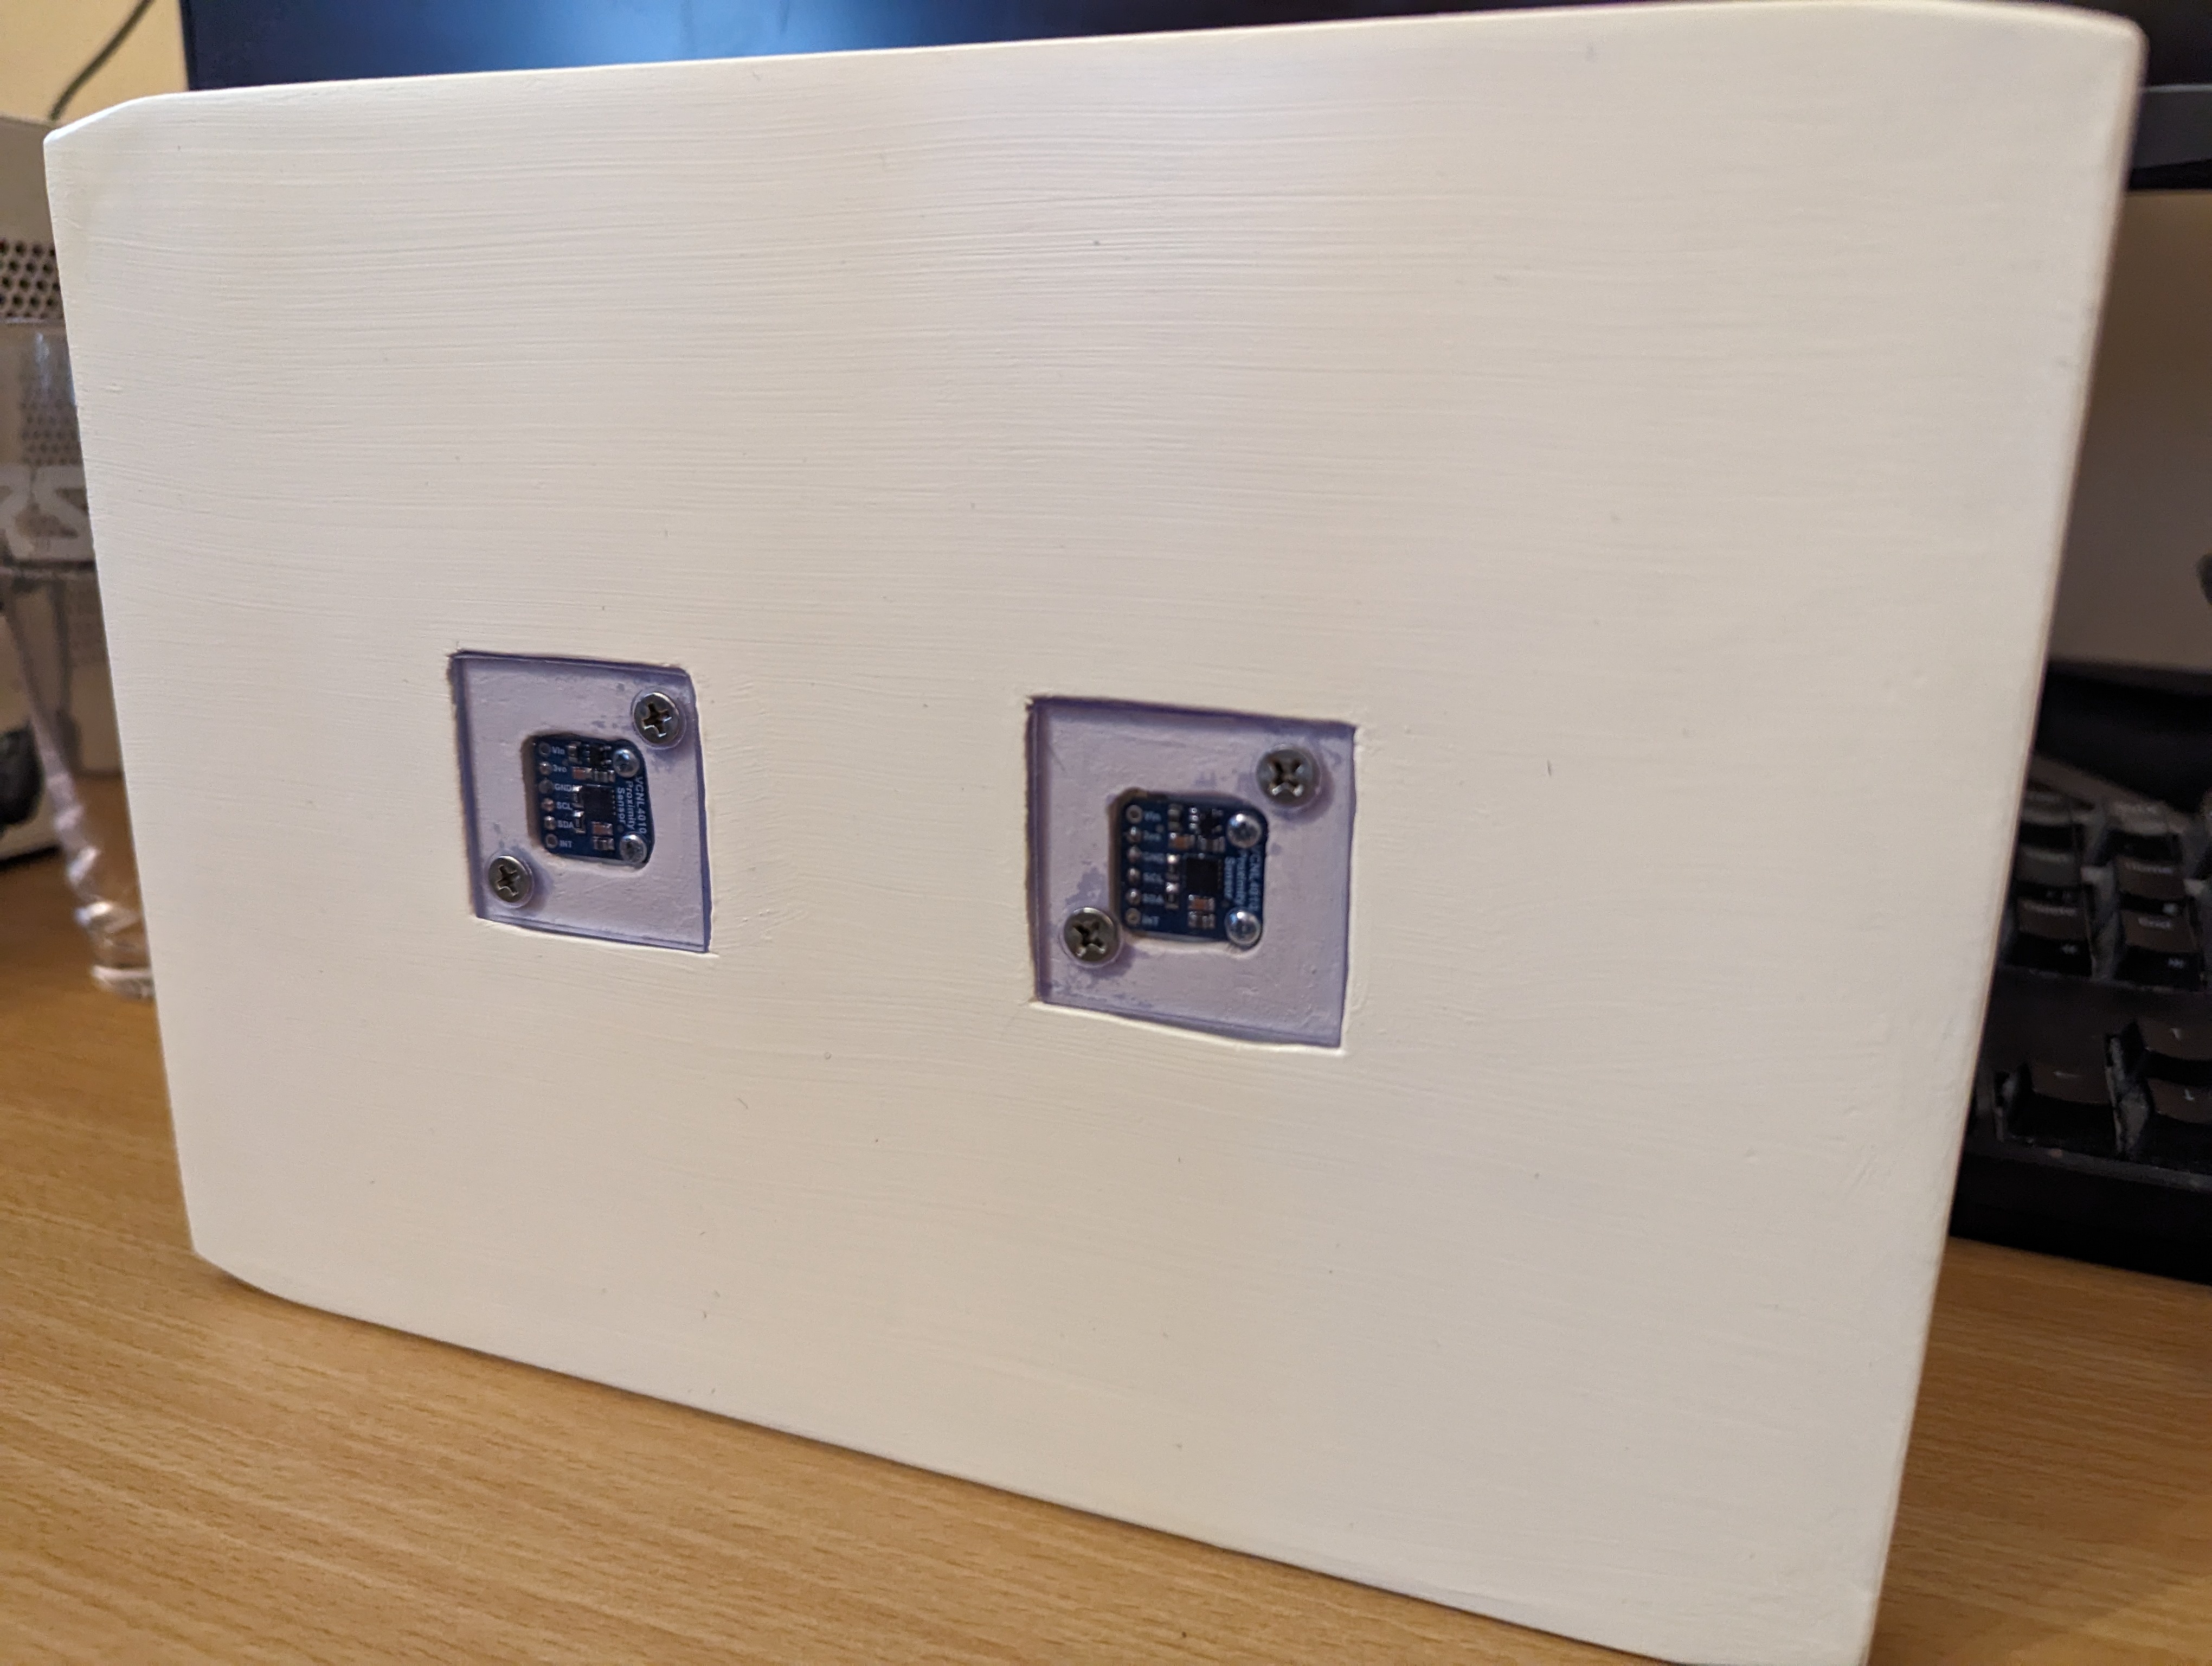
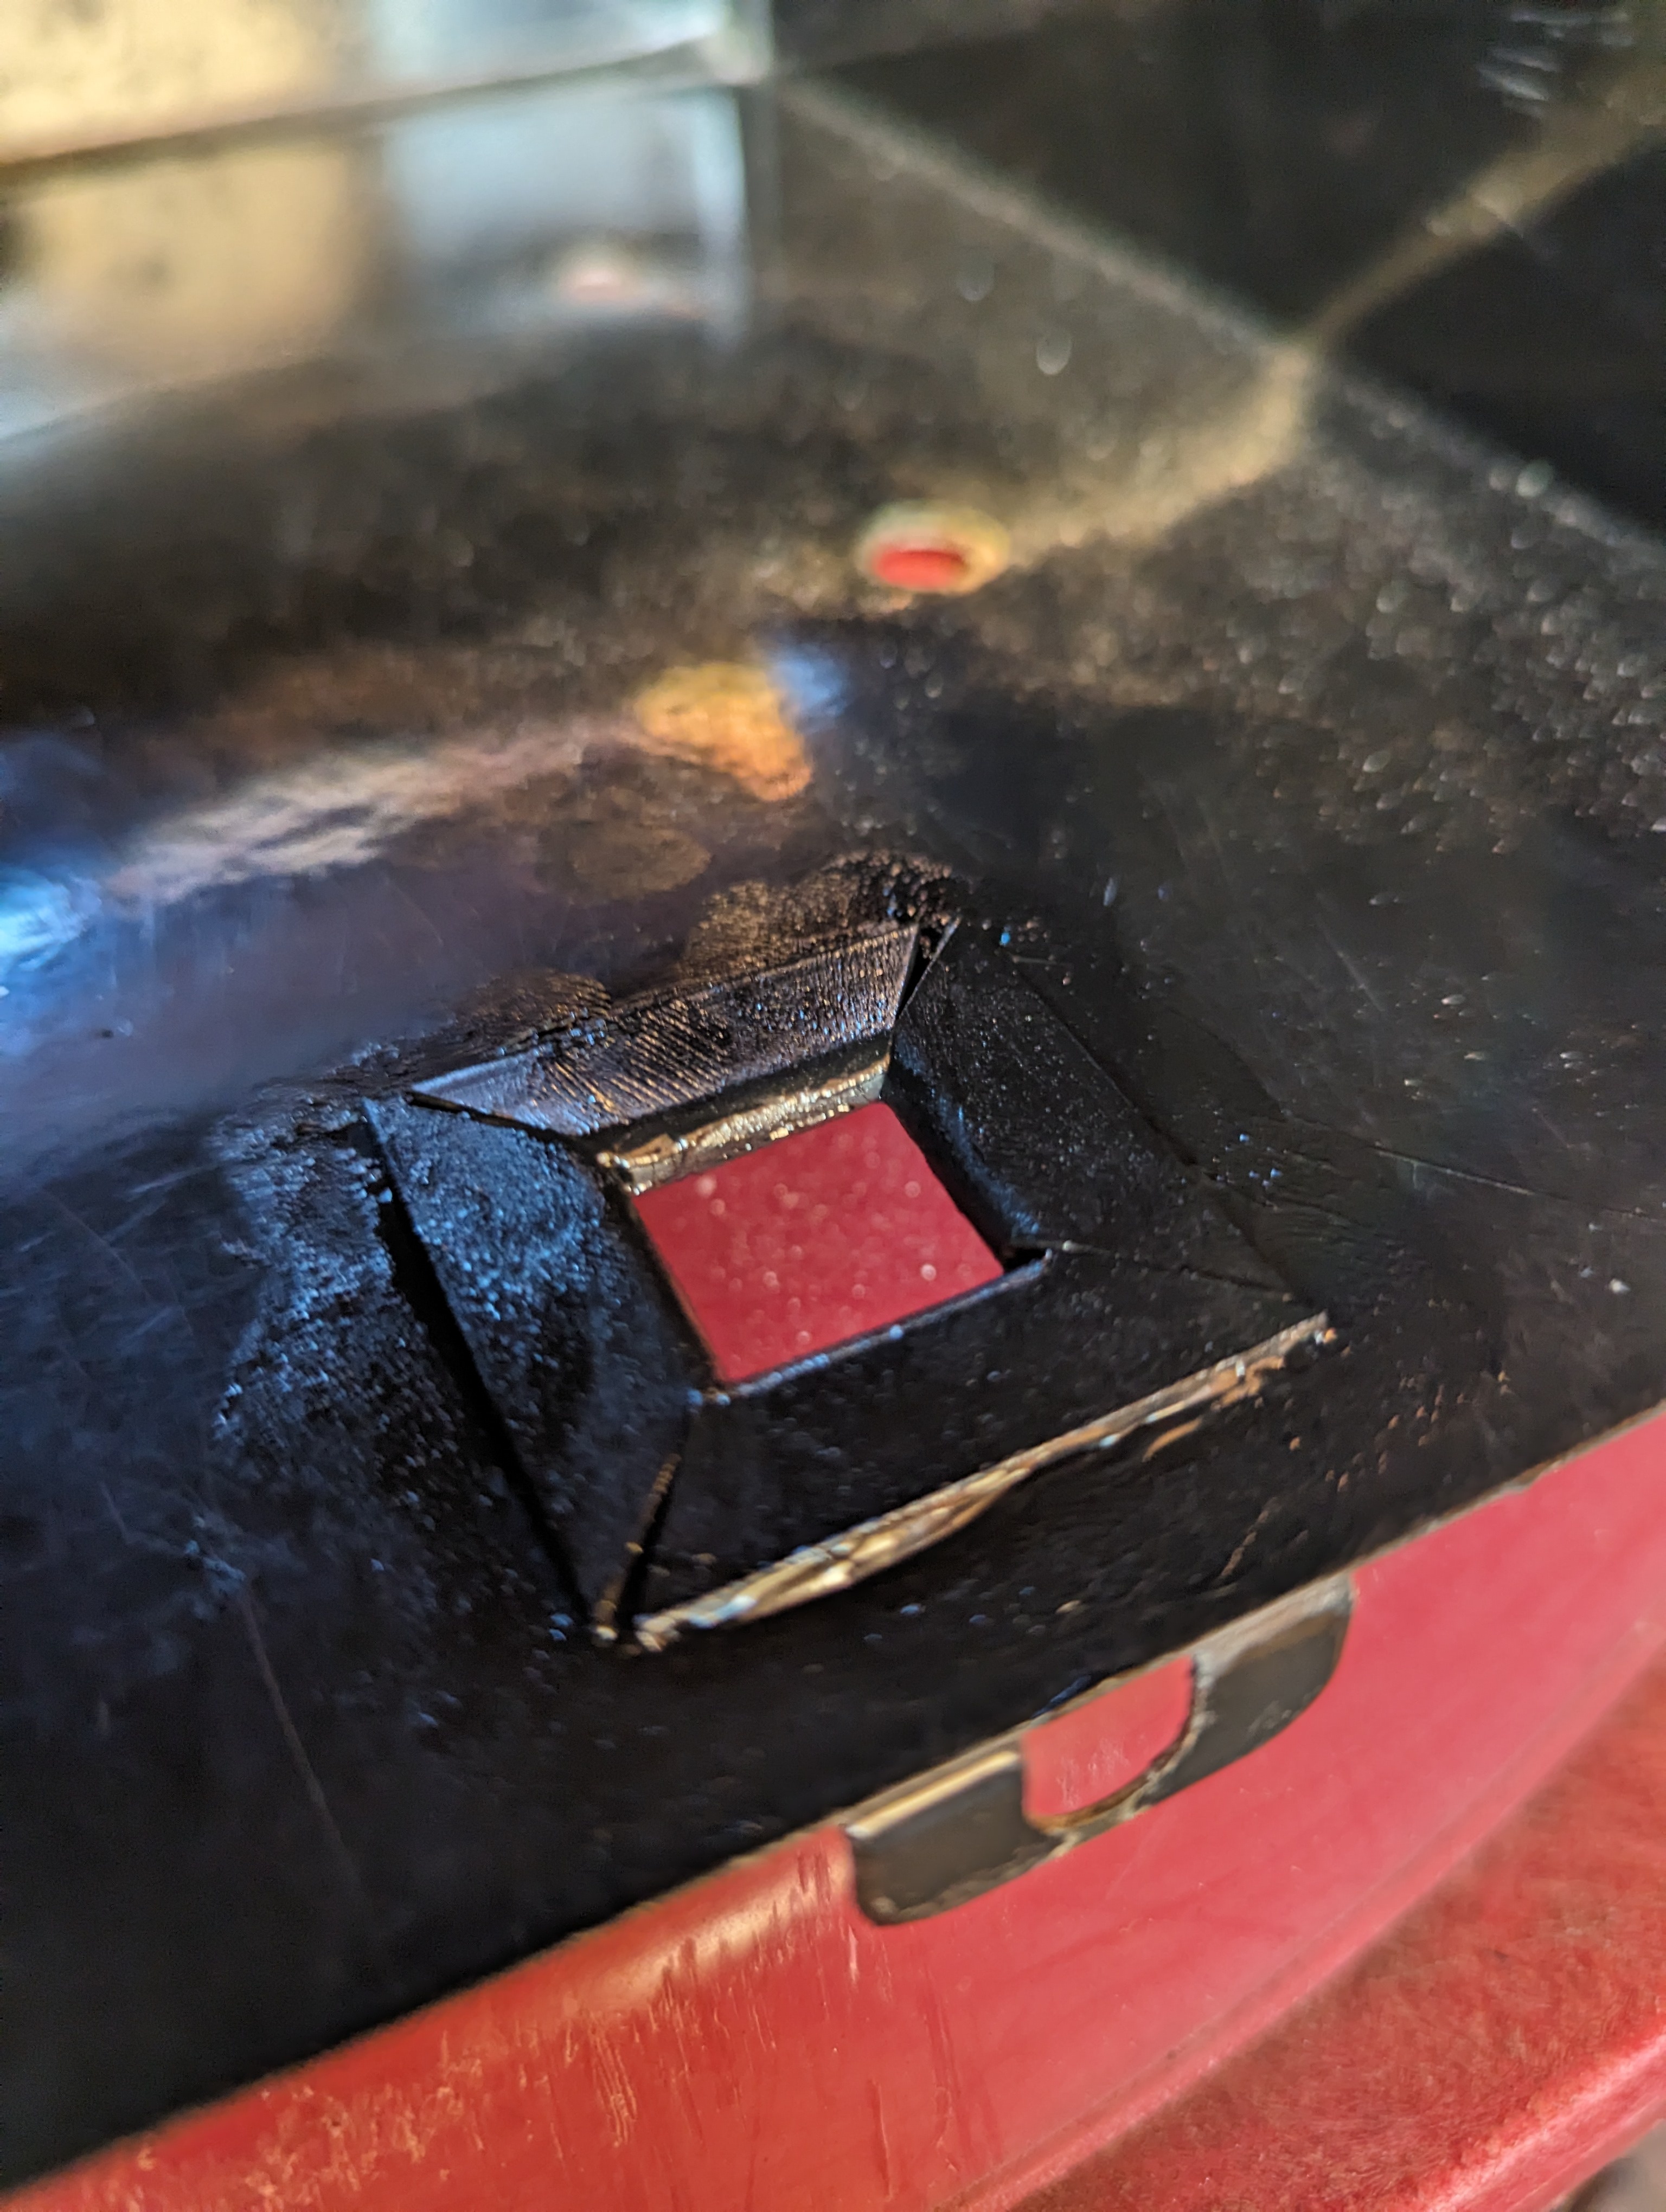
Measured out where the sensors should go, along with a surrounding space to screw down some little perspex windows to cover them. The idea I wanted was for the mail to be able to slide over the sensors without getting caught on them, as well as to protect them from dust.
Routed out the dents and cleaned them up with a chisel and sandpaper. Cut the perspex to shape for a test fit.
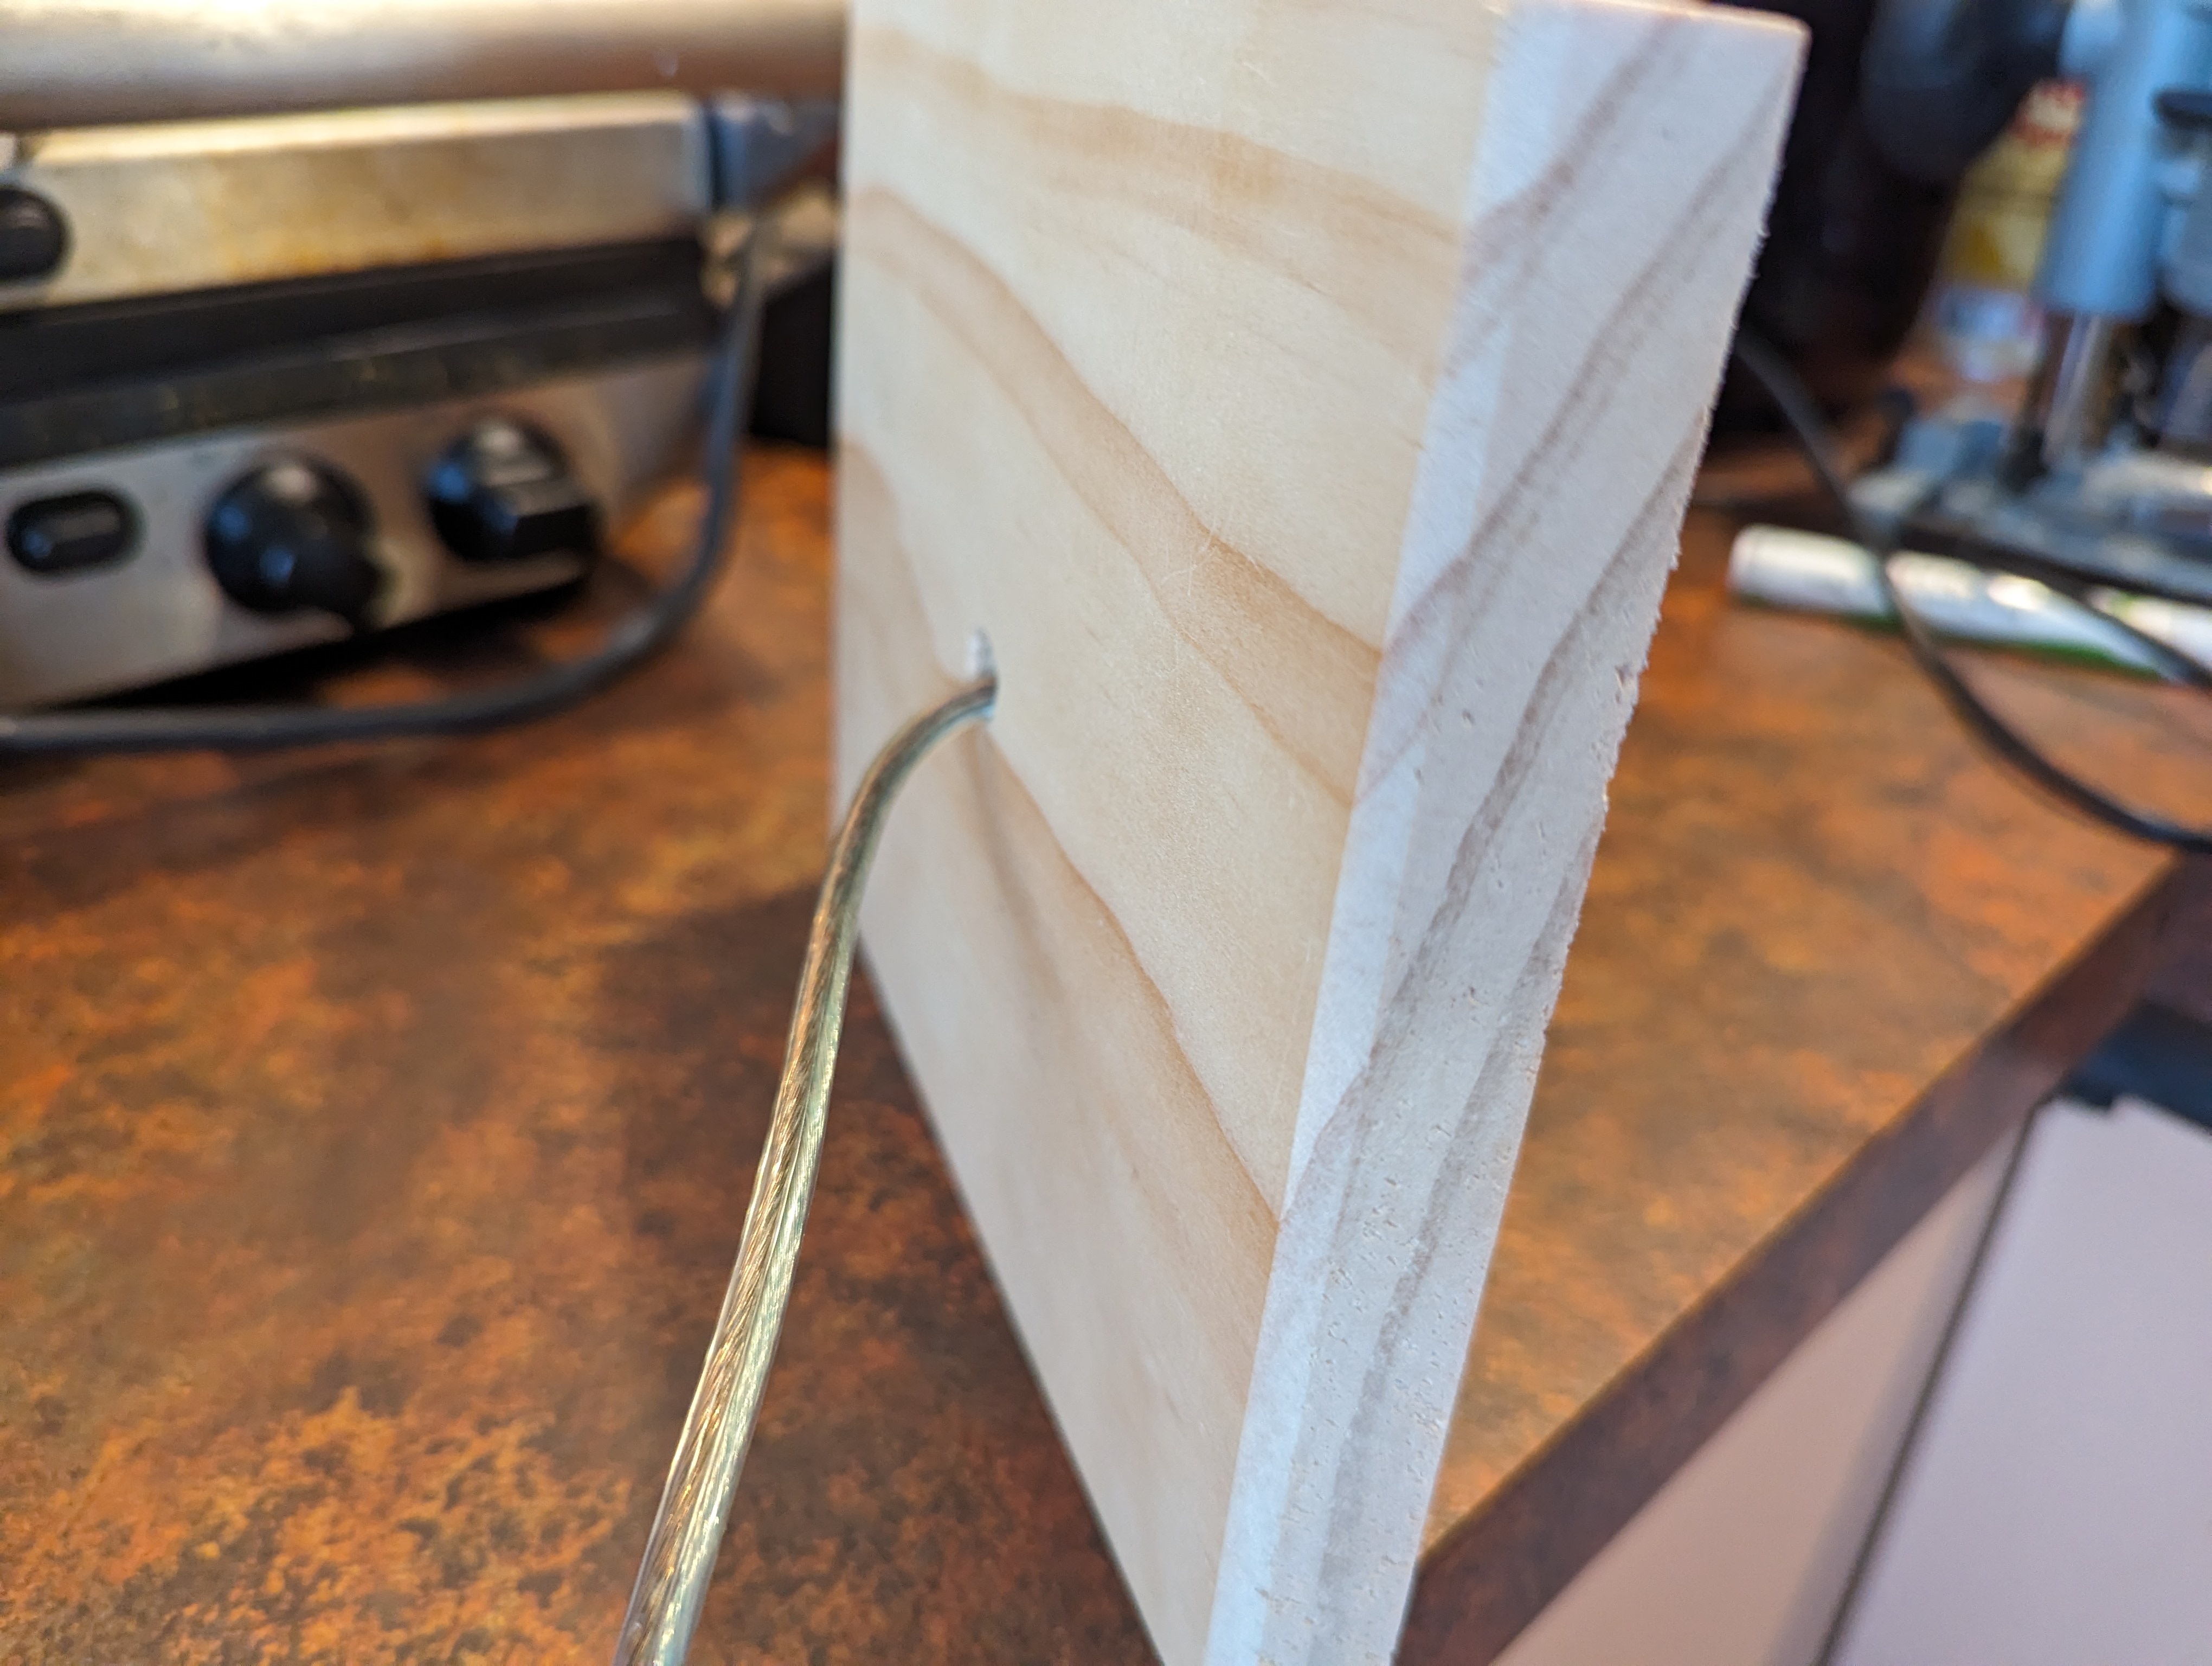
On the other side, I routed out a notch for the cable to access the sensors.
I had originally planned to just solder wires into the sensors, but then I realised JST connectors would fit perfectly into the sensors. This meant I had to widen the holes somewhat, which I did with a small chisel and file.
I got a bit lazy with making screw holes to hold down the perspex, so they're not in as neat a place as I'd like. If I did this again I'd measure properly for their placement. Still, with countersinking they hold down the perspex well and nothing sticks up for mail to get caught on.
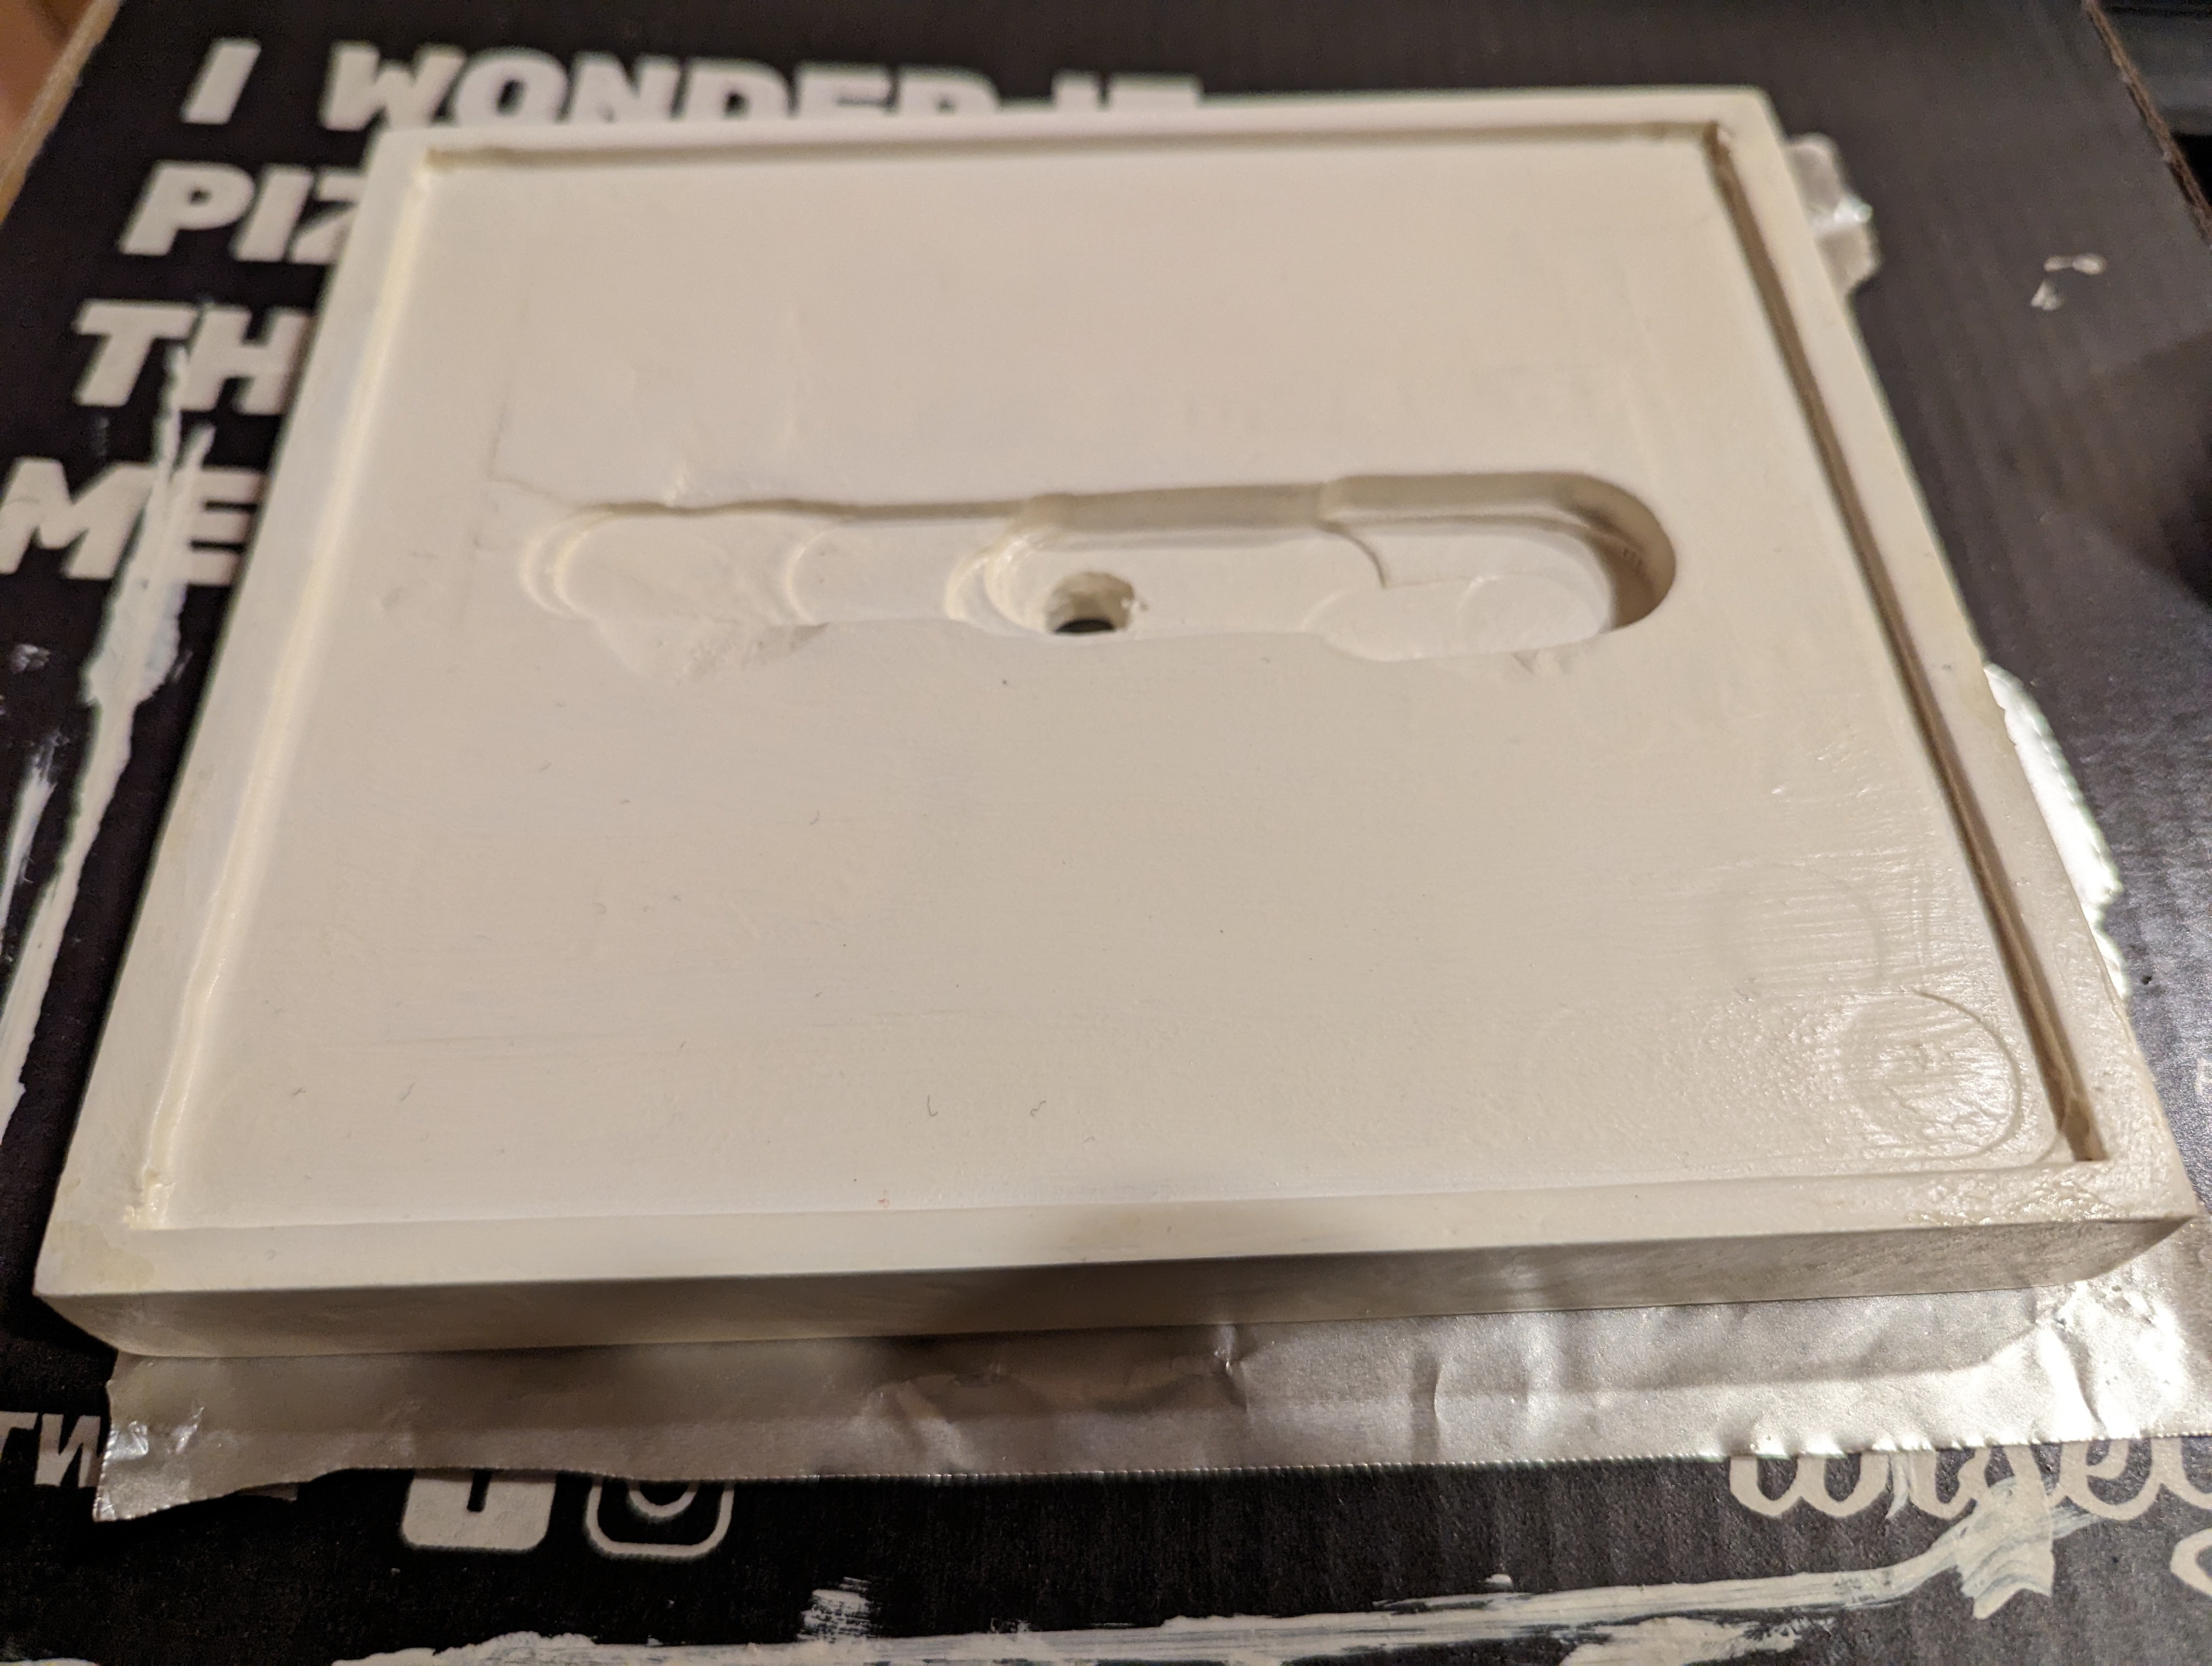
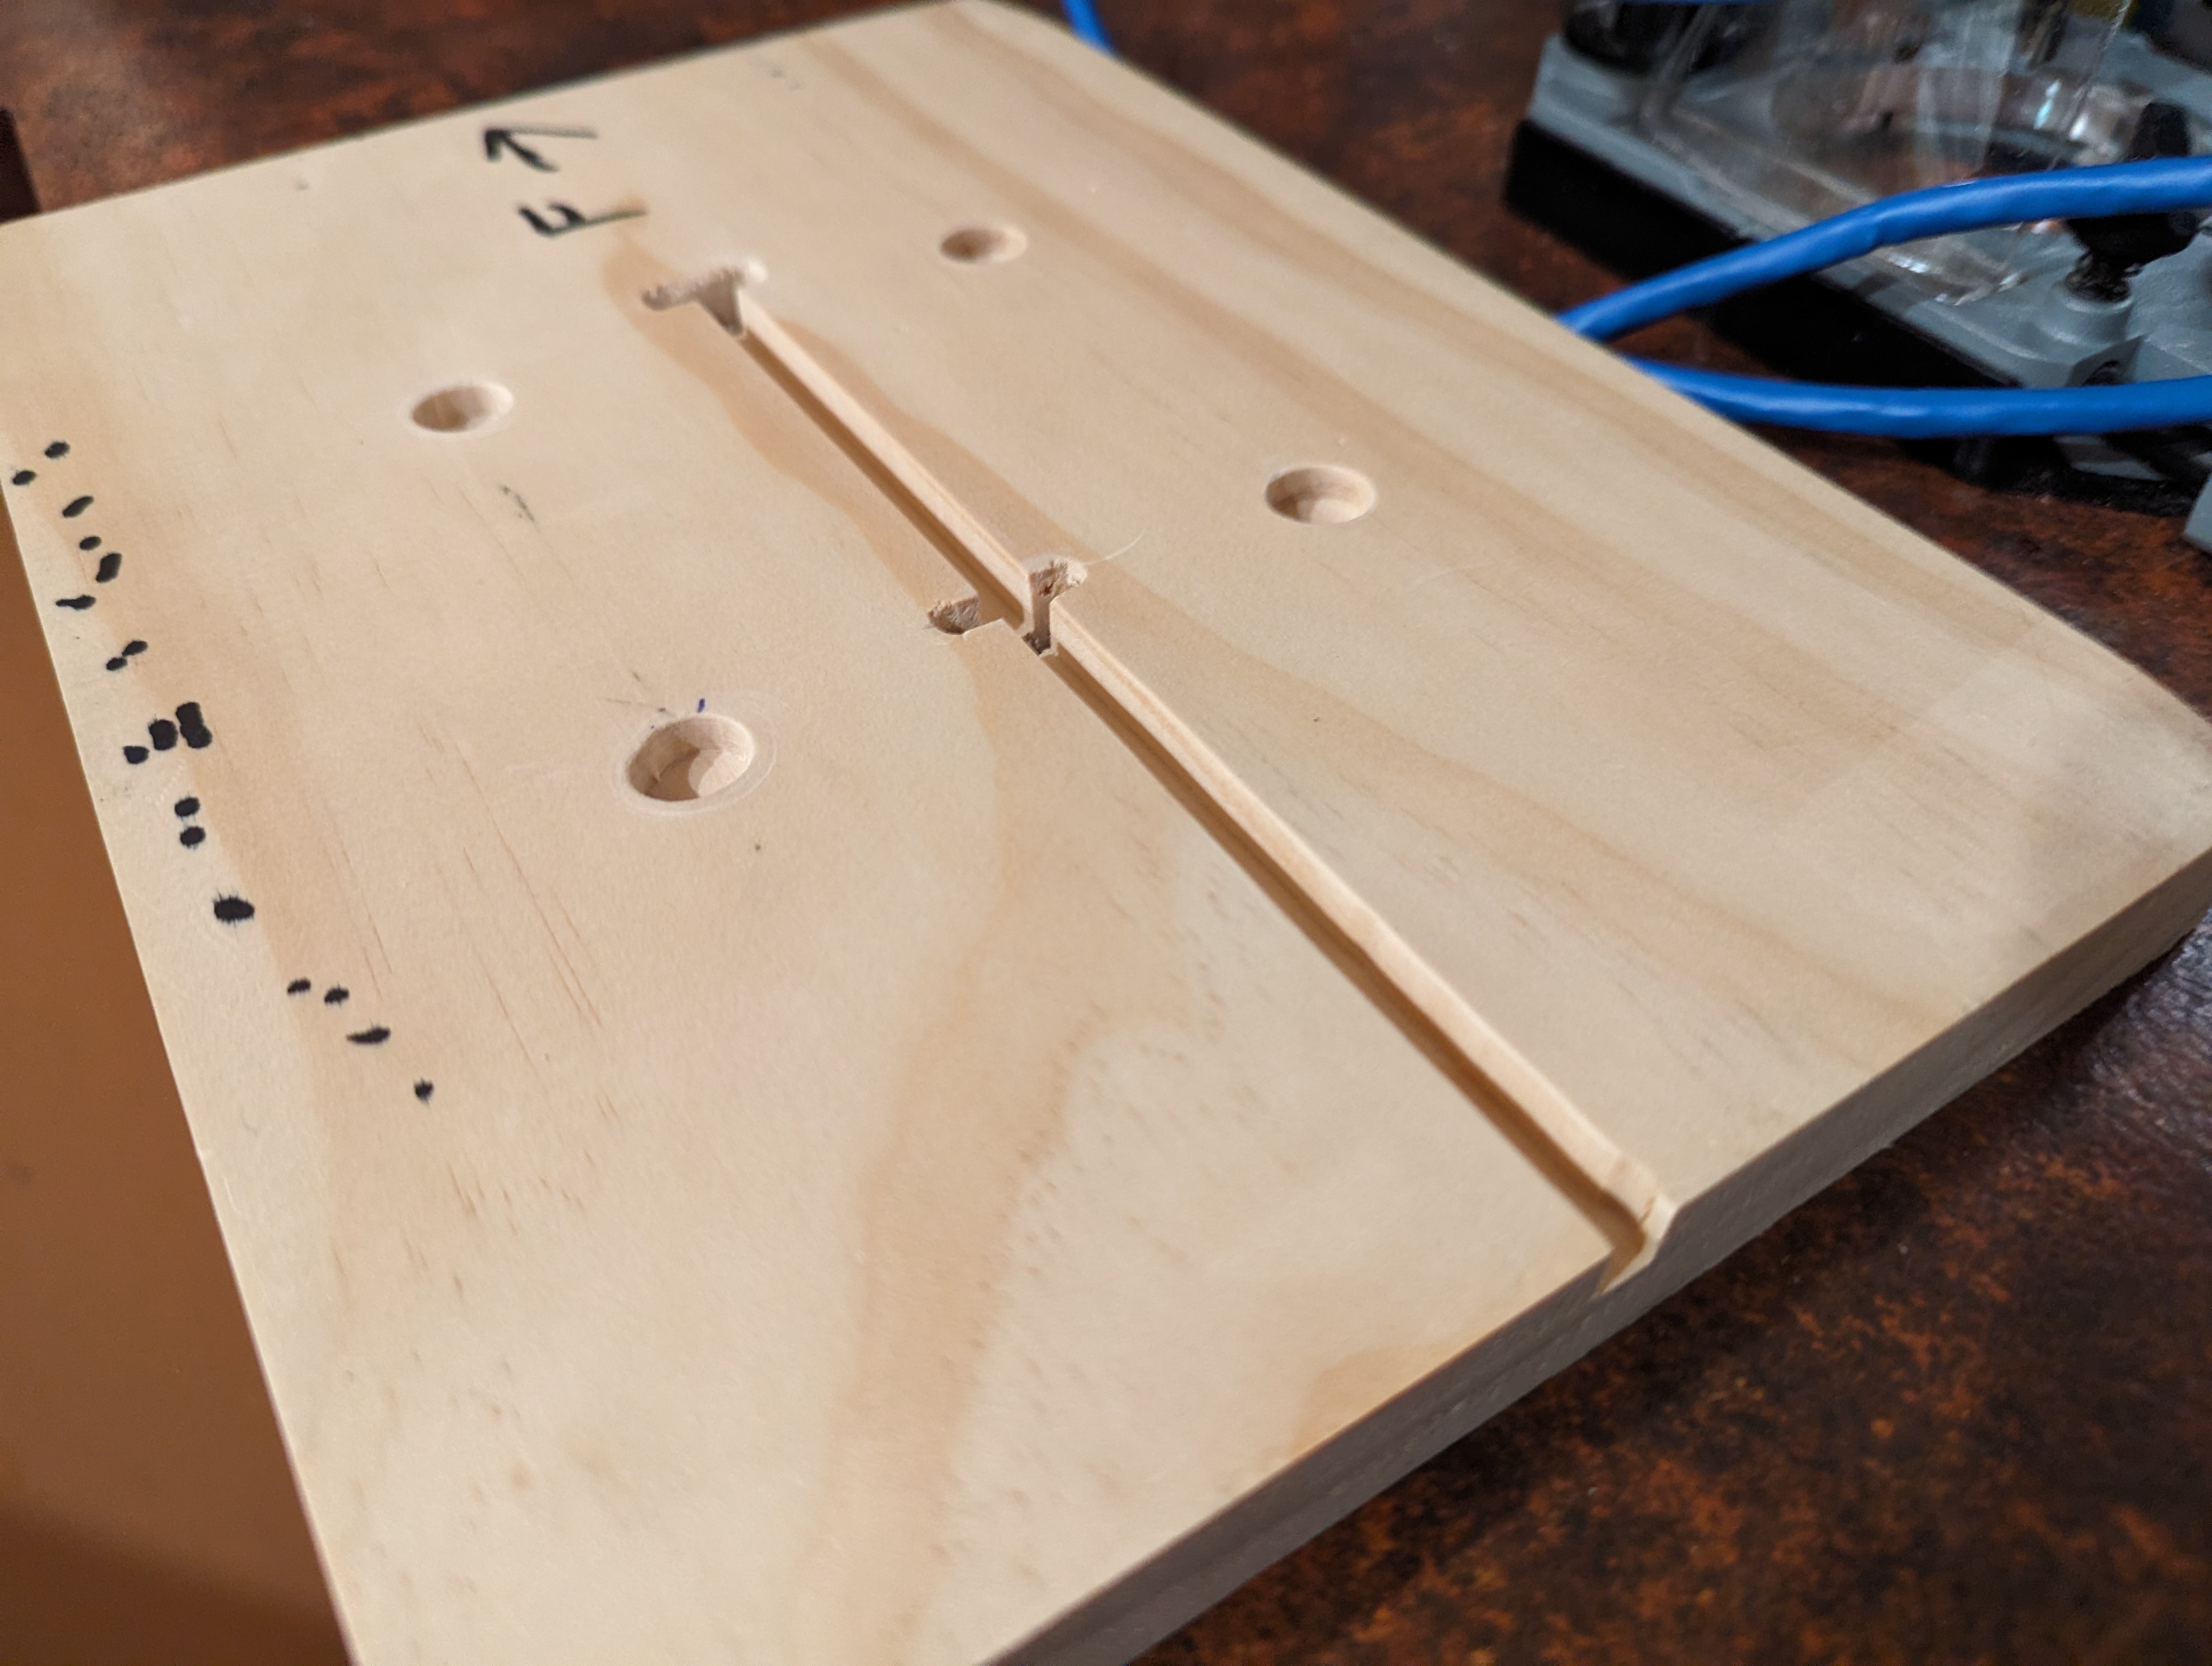
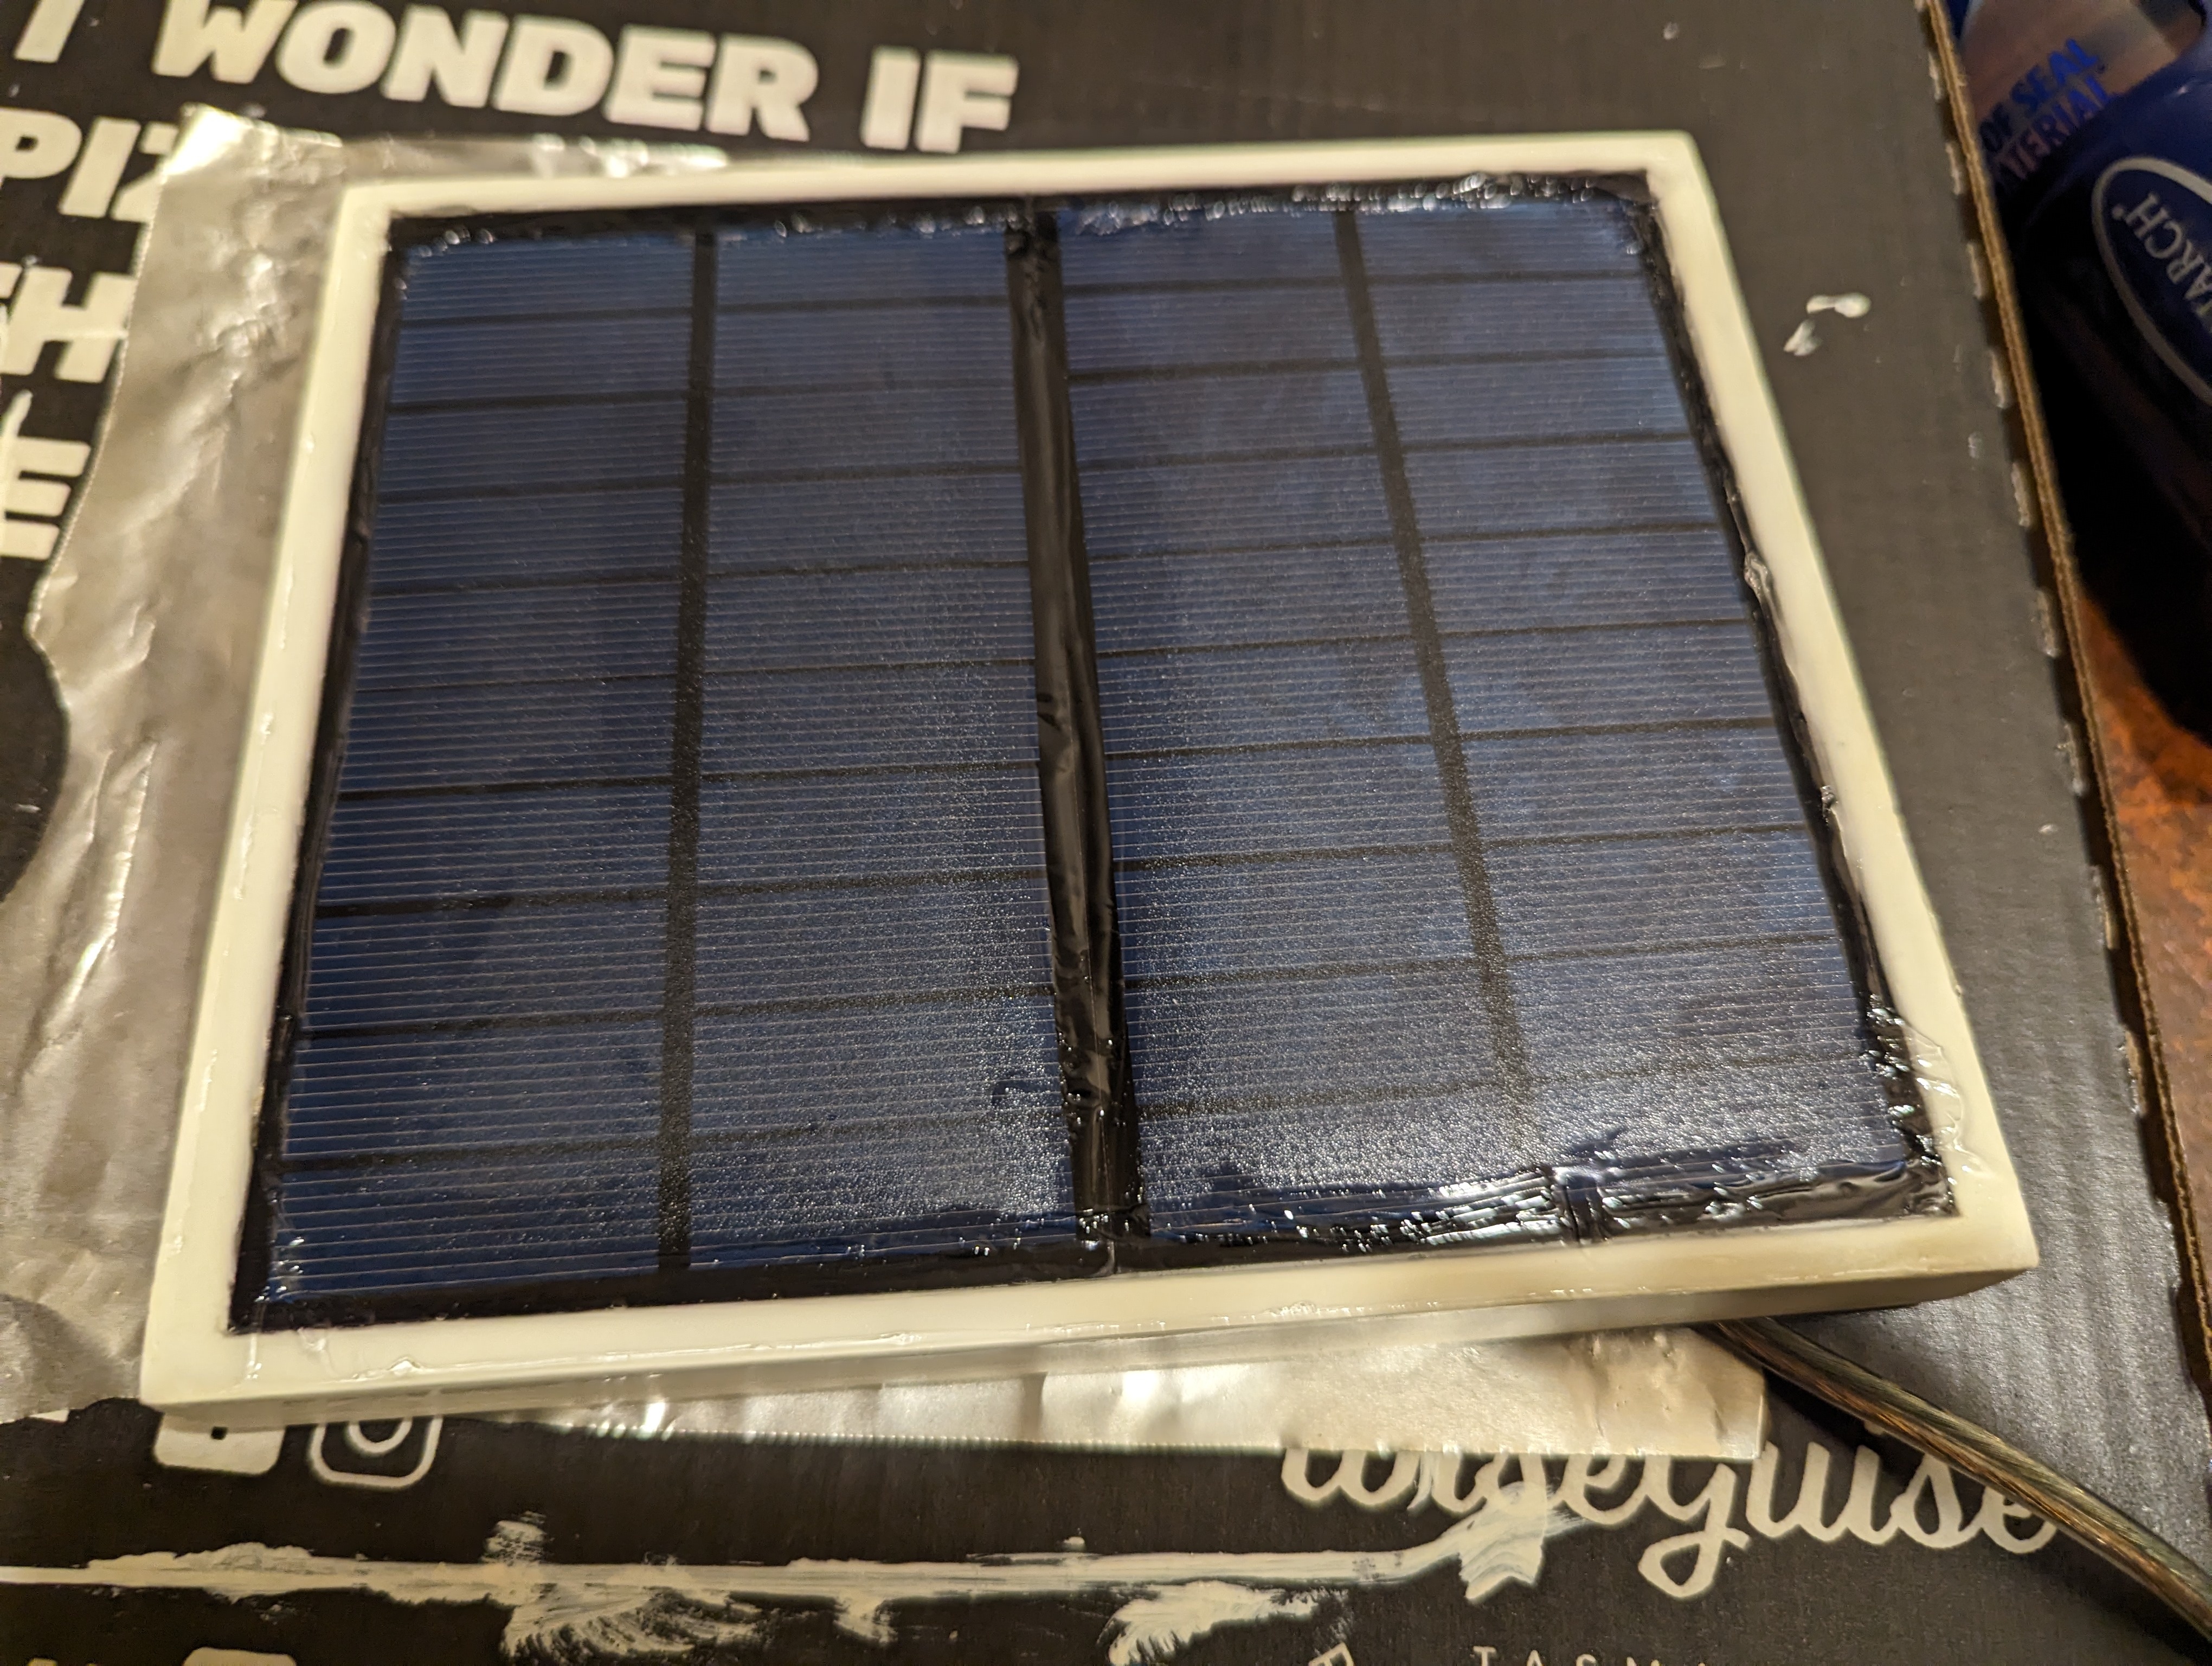
I also got started on making a housing for the solar panels. I used the router to carve out a 1-2mm area for them to sit in, and a much deeper ditch linking the two terminals, which you'll see in a later picture. For now, here's how they look sitting in it.
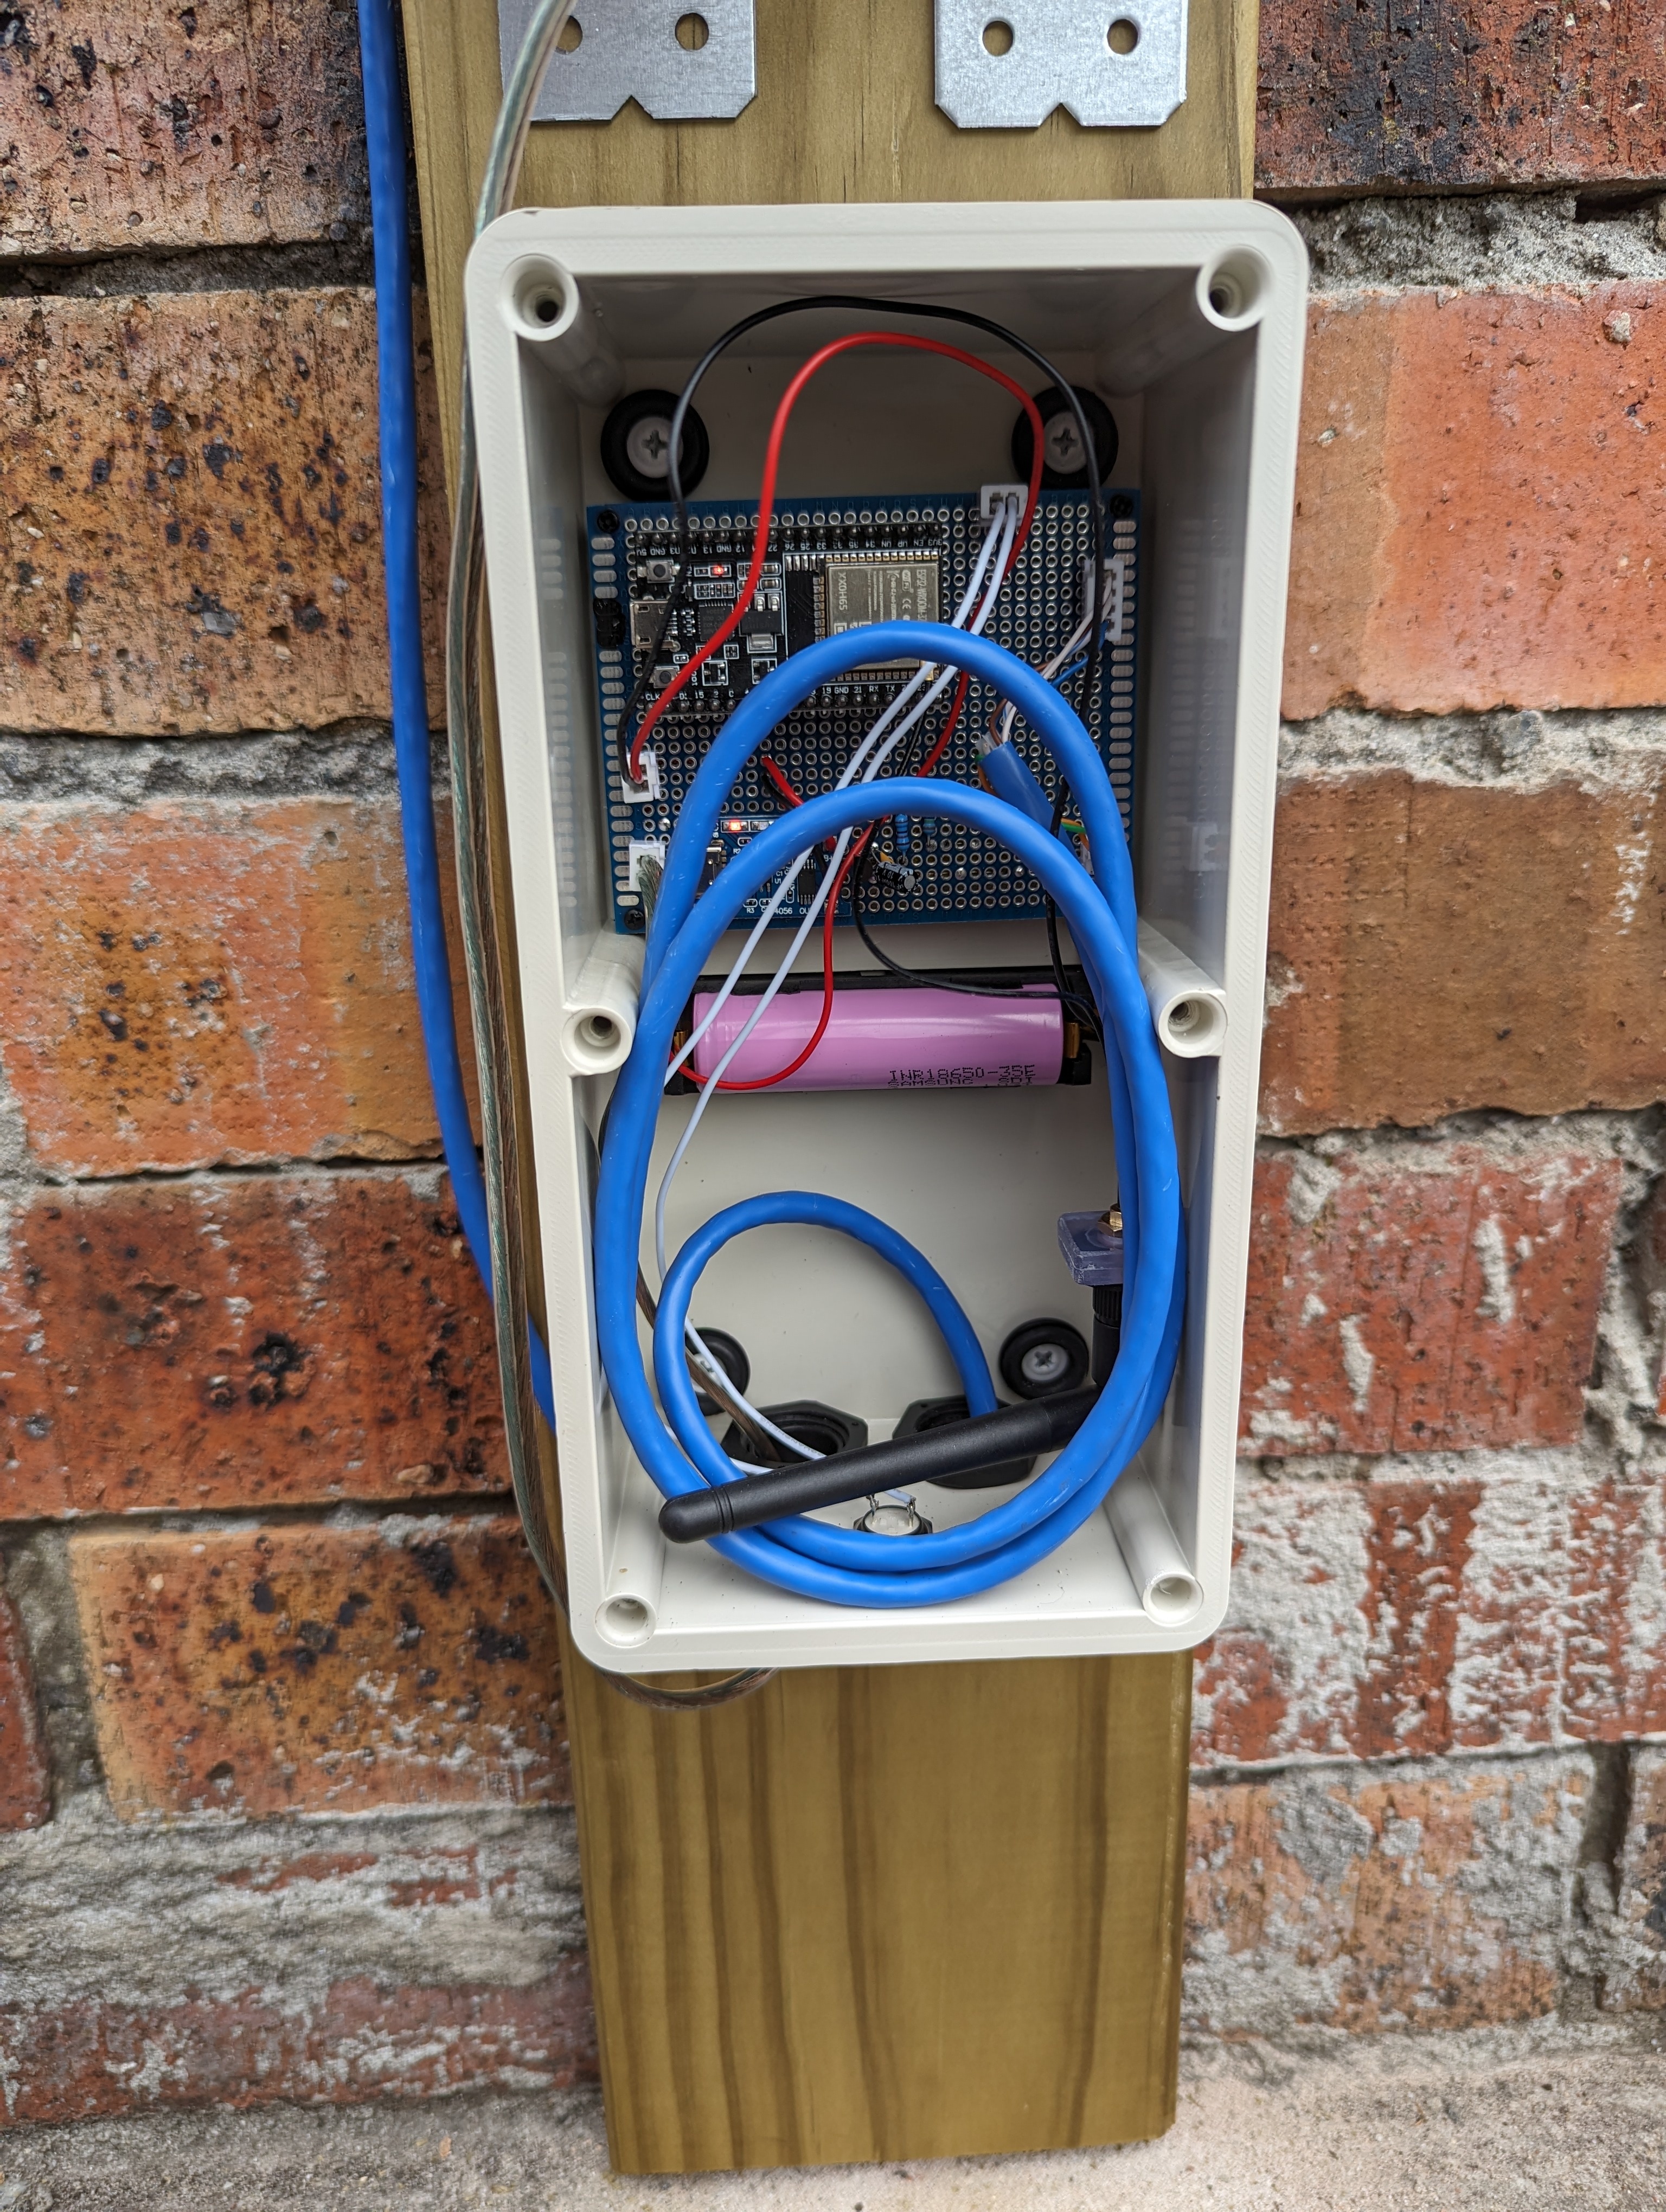
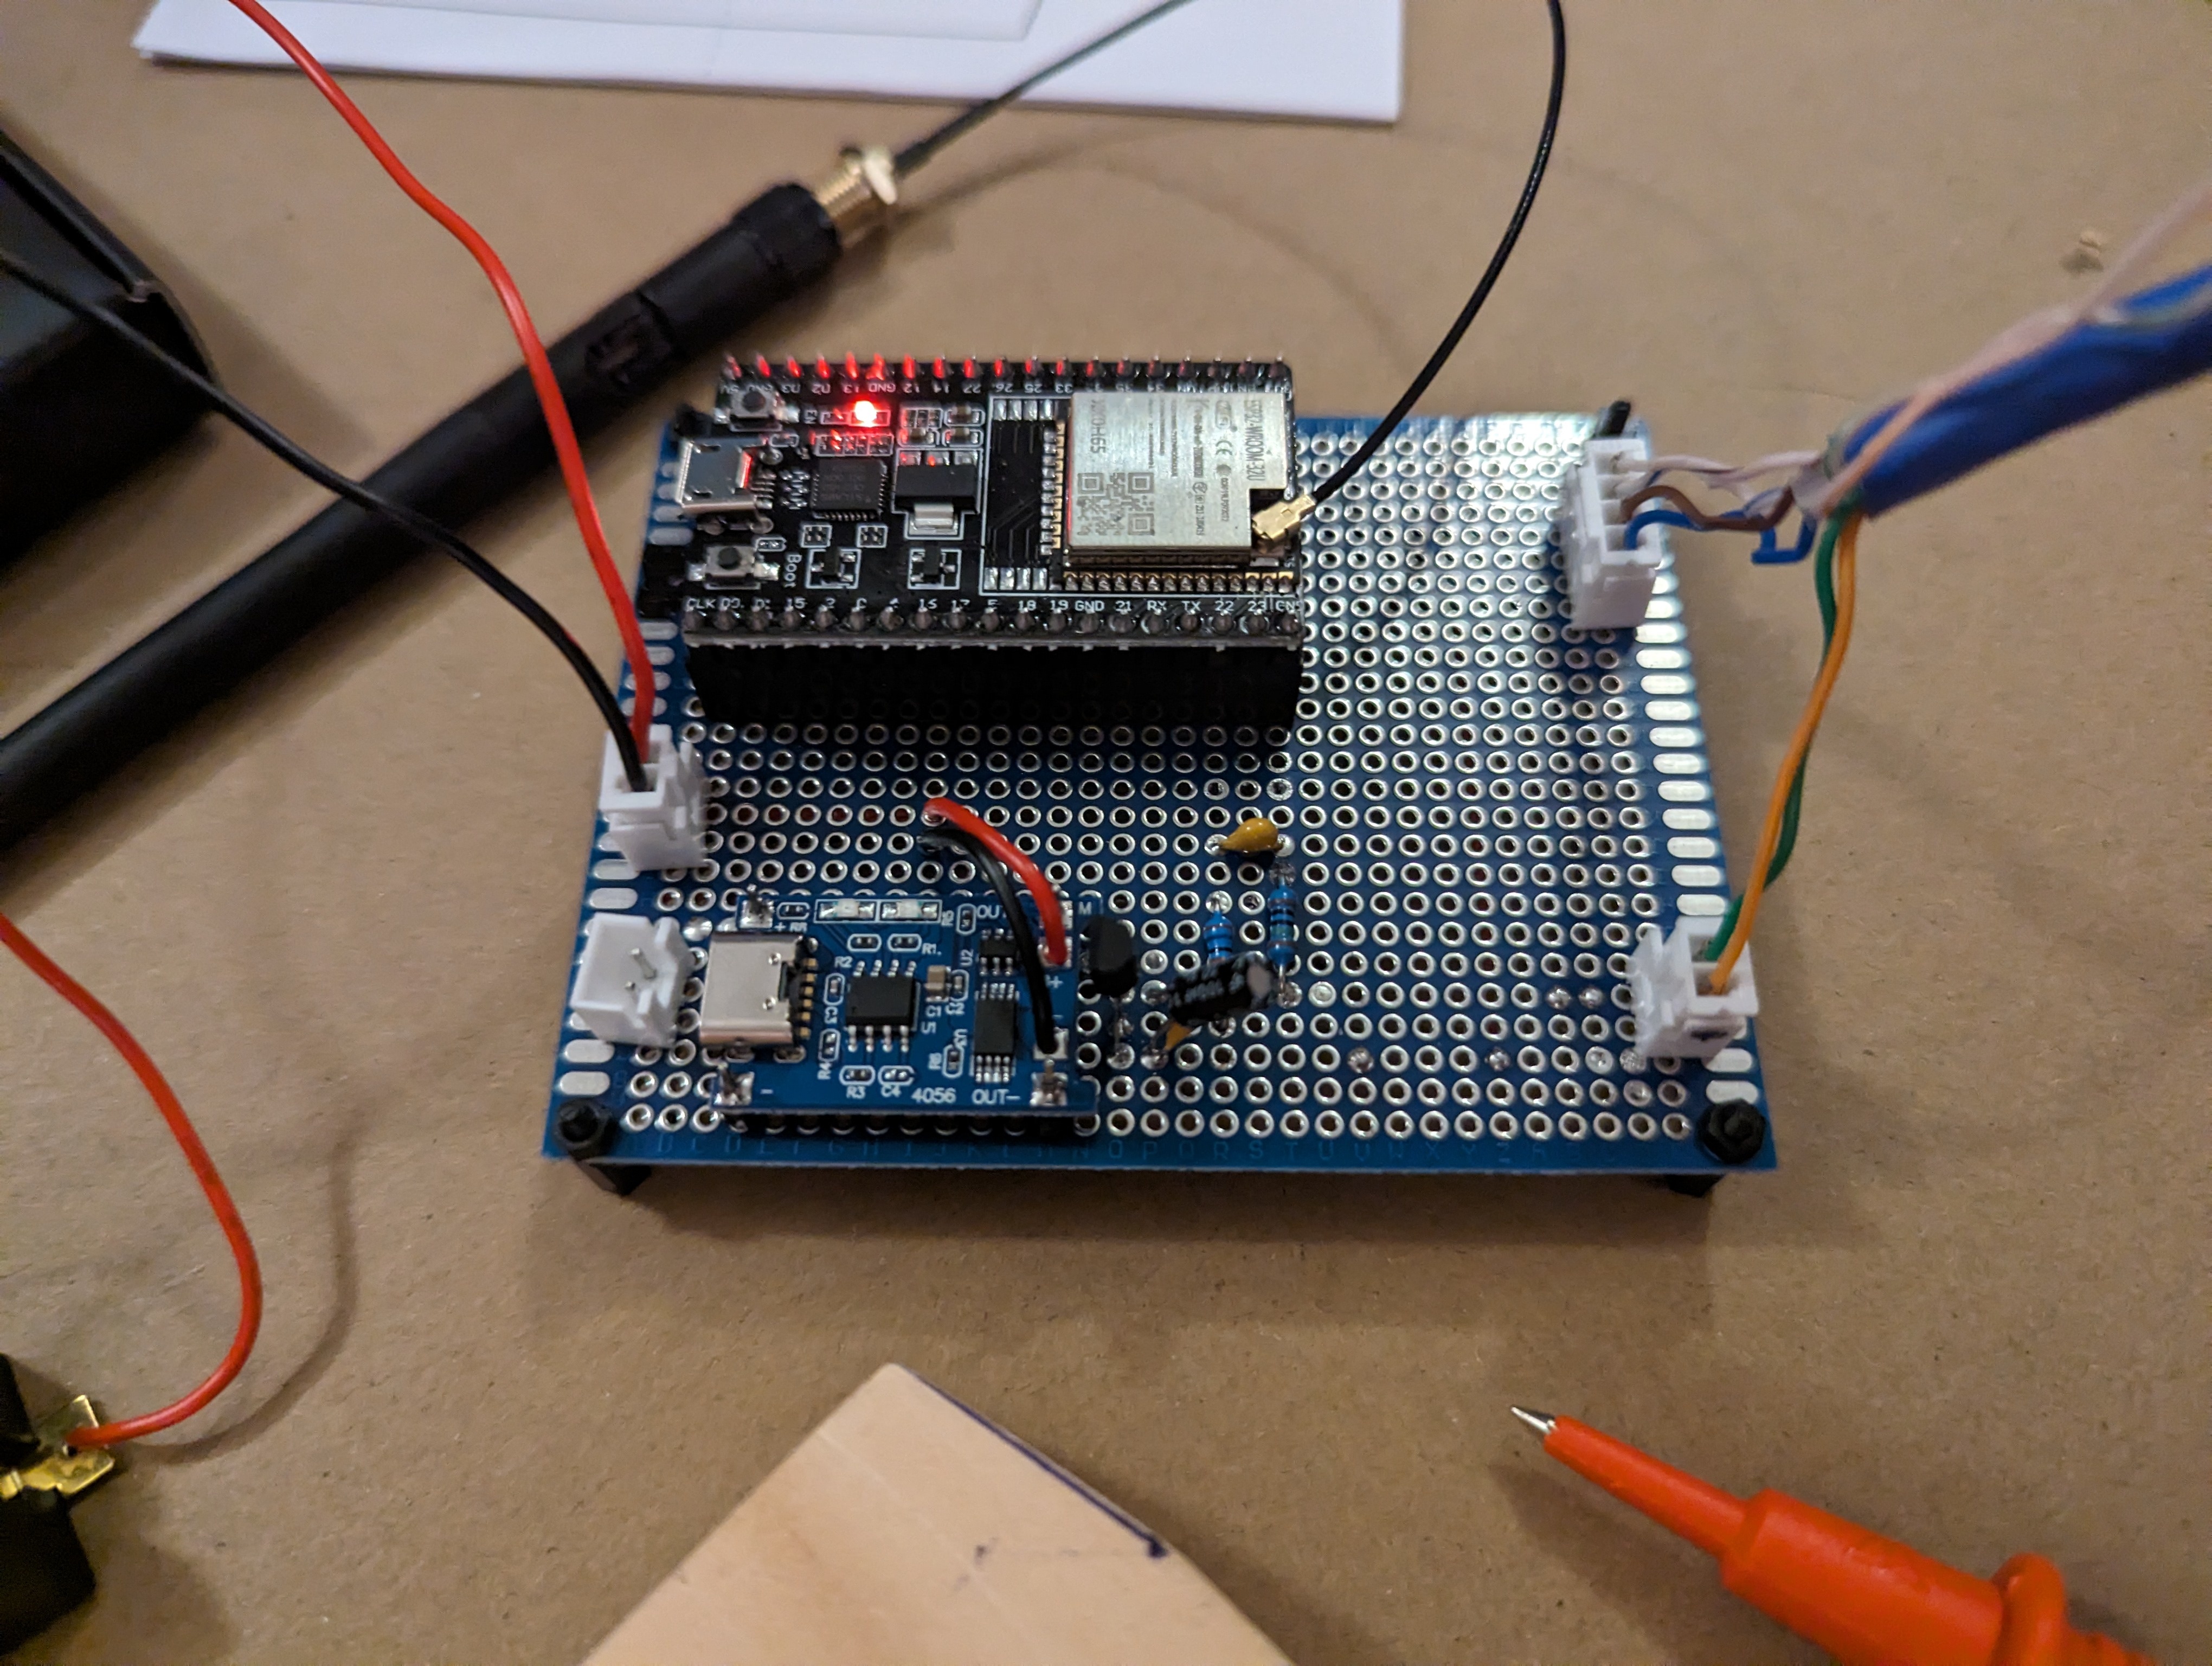
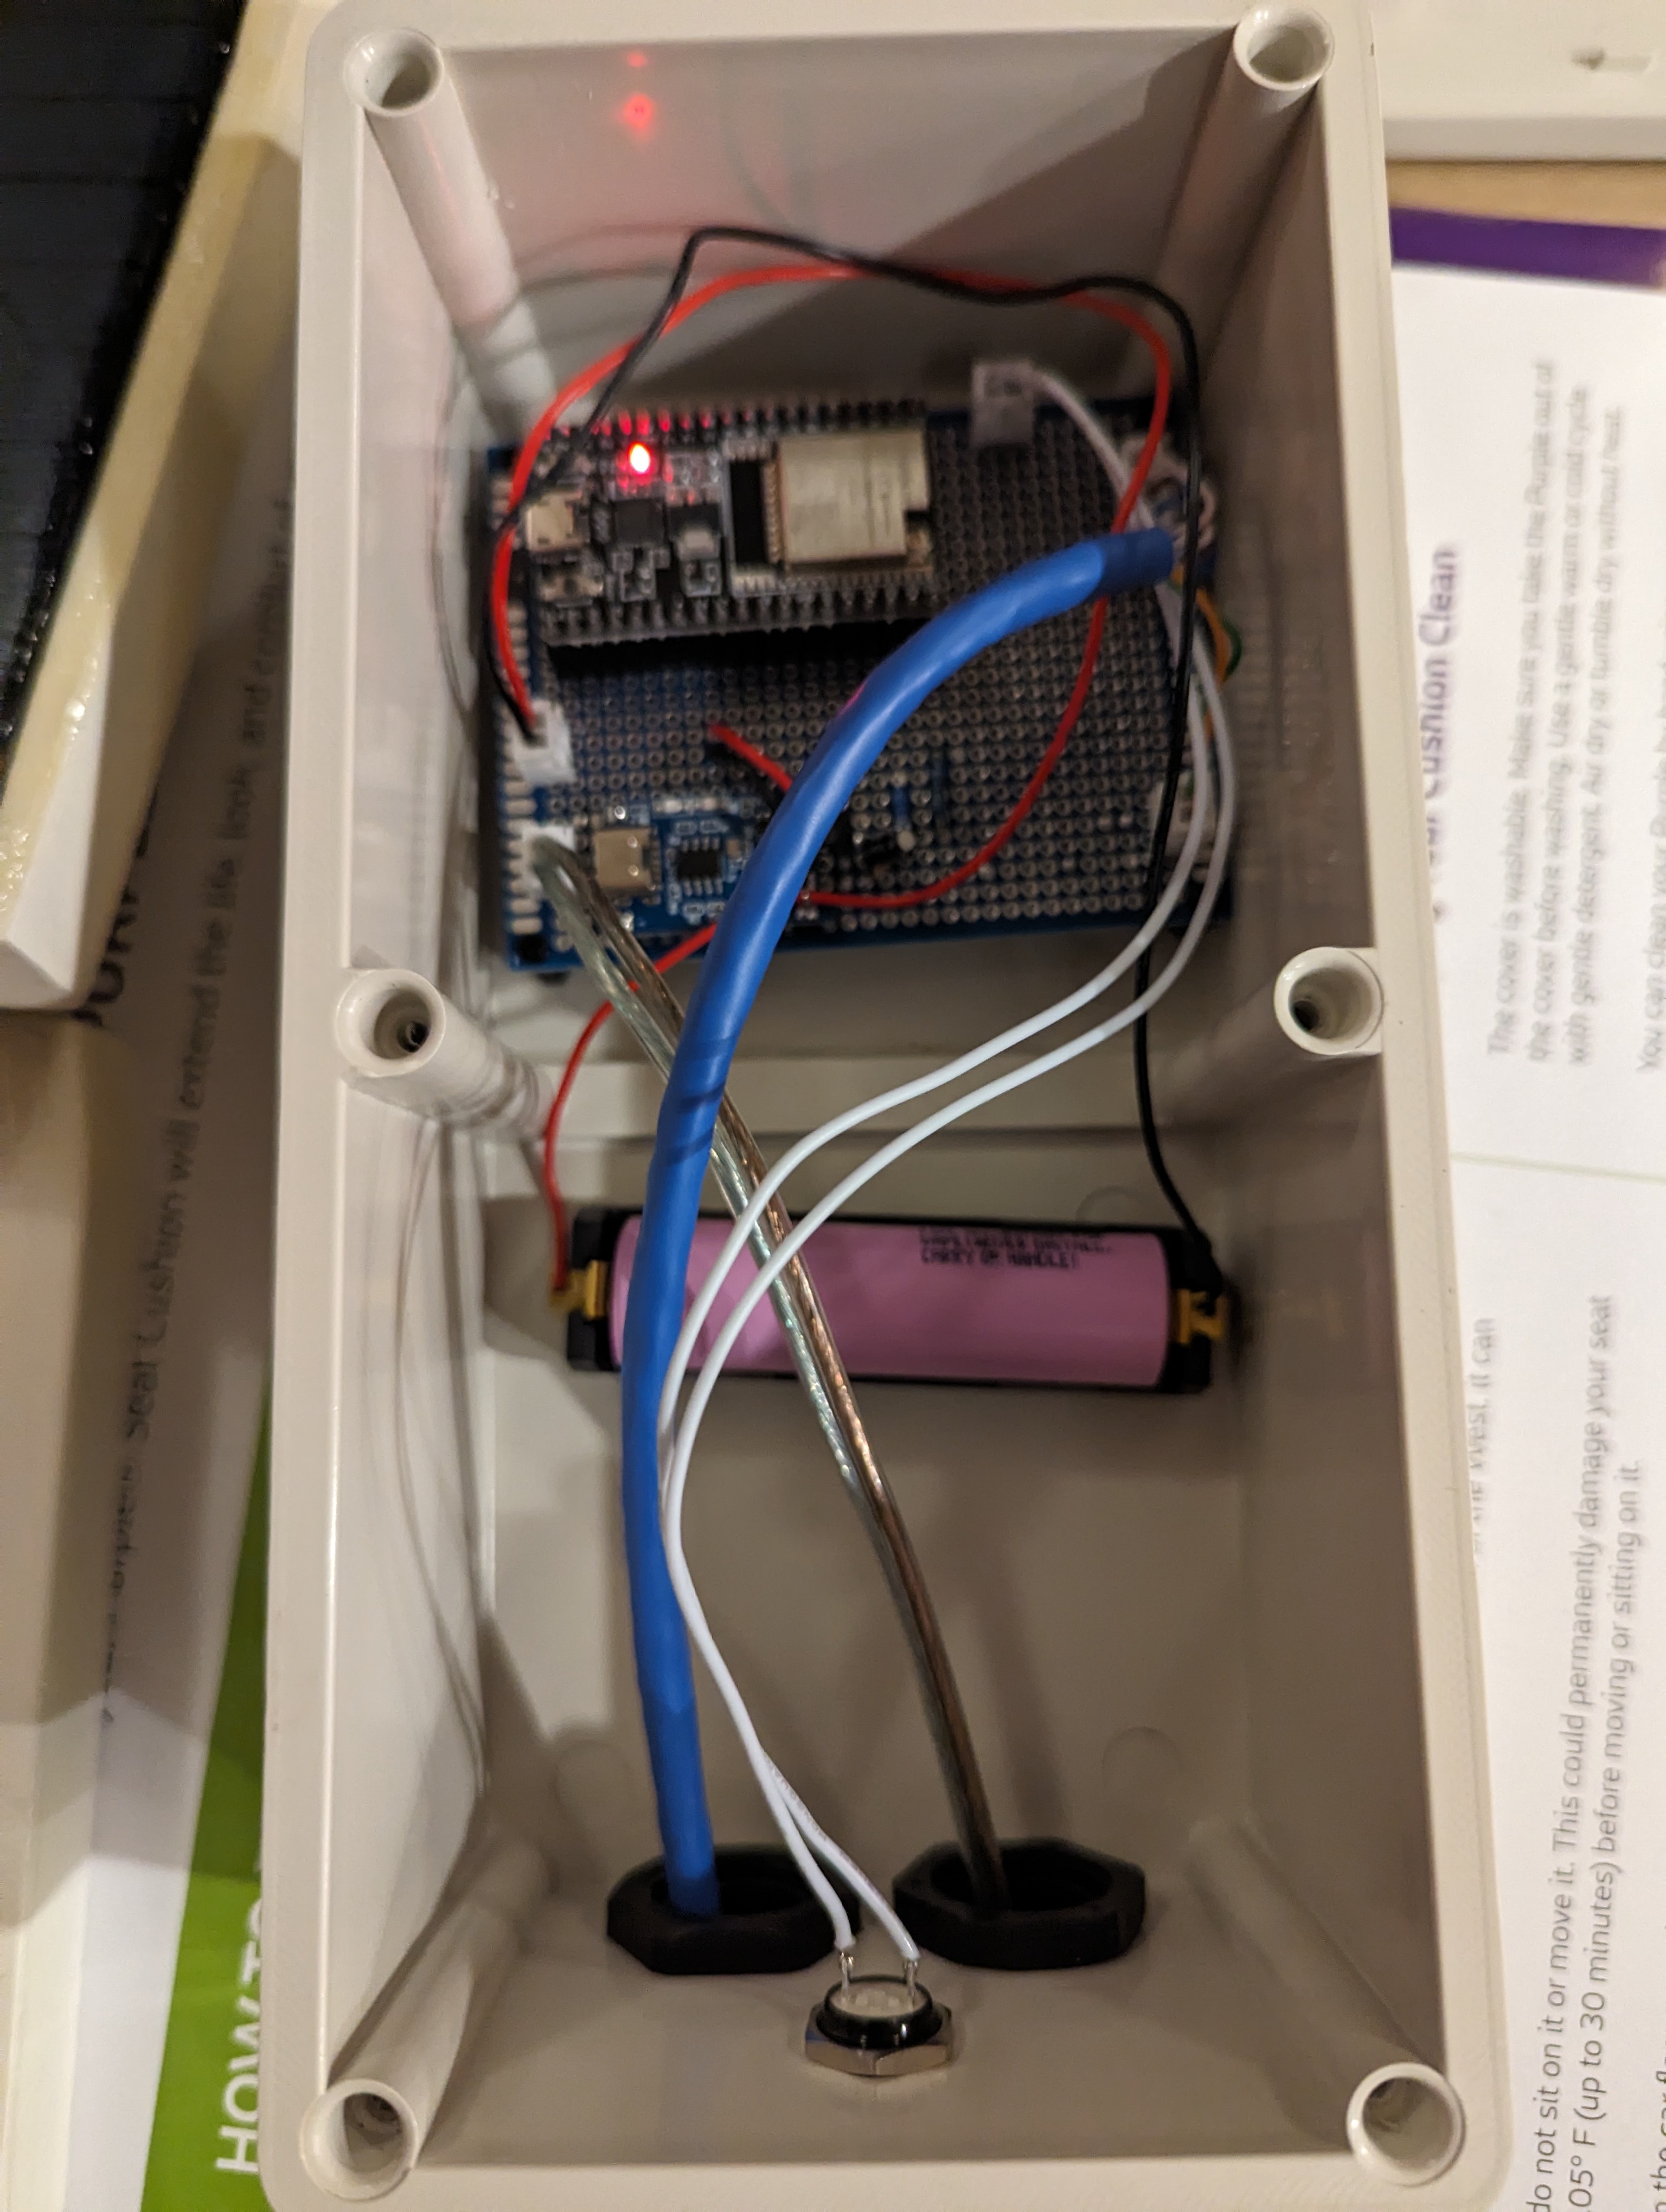
Wiring up the prototype board was next. Again, see the article I linked above for how this works. I used pin headers to allow the ESP32 dev board to be slotted in and out, just in case I ever needed to take it out for replacement or reprogramming. Also the JSTs on the prototype board are for connecting the battery (top left), connecting the solar panels (bottom left), providing power to the sensors (bottom right) and clock and data lines for the sensors (top right). Since the sensors are both using the same I2C bus address and cannot be configured otherwise, I had to run two clock and data lines, but if I'd found sensors that could have different addresses I could have just used one of each. I didn't take a photo of the board at this stage, but I later added another header to connect a button to reset the ESP32 from the outside.
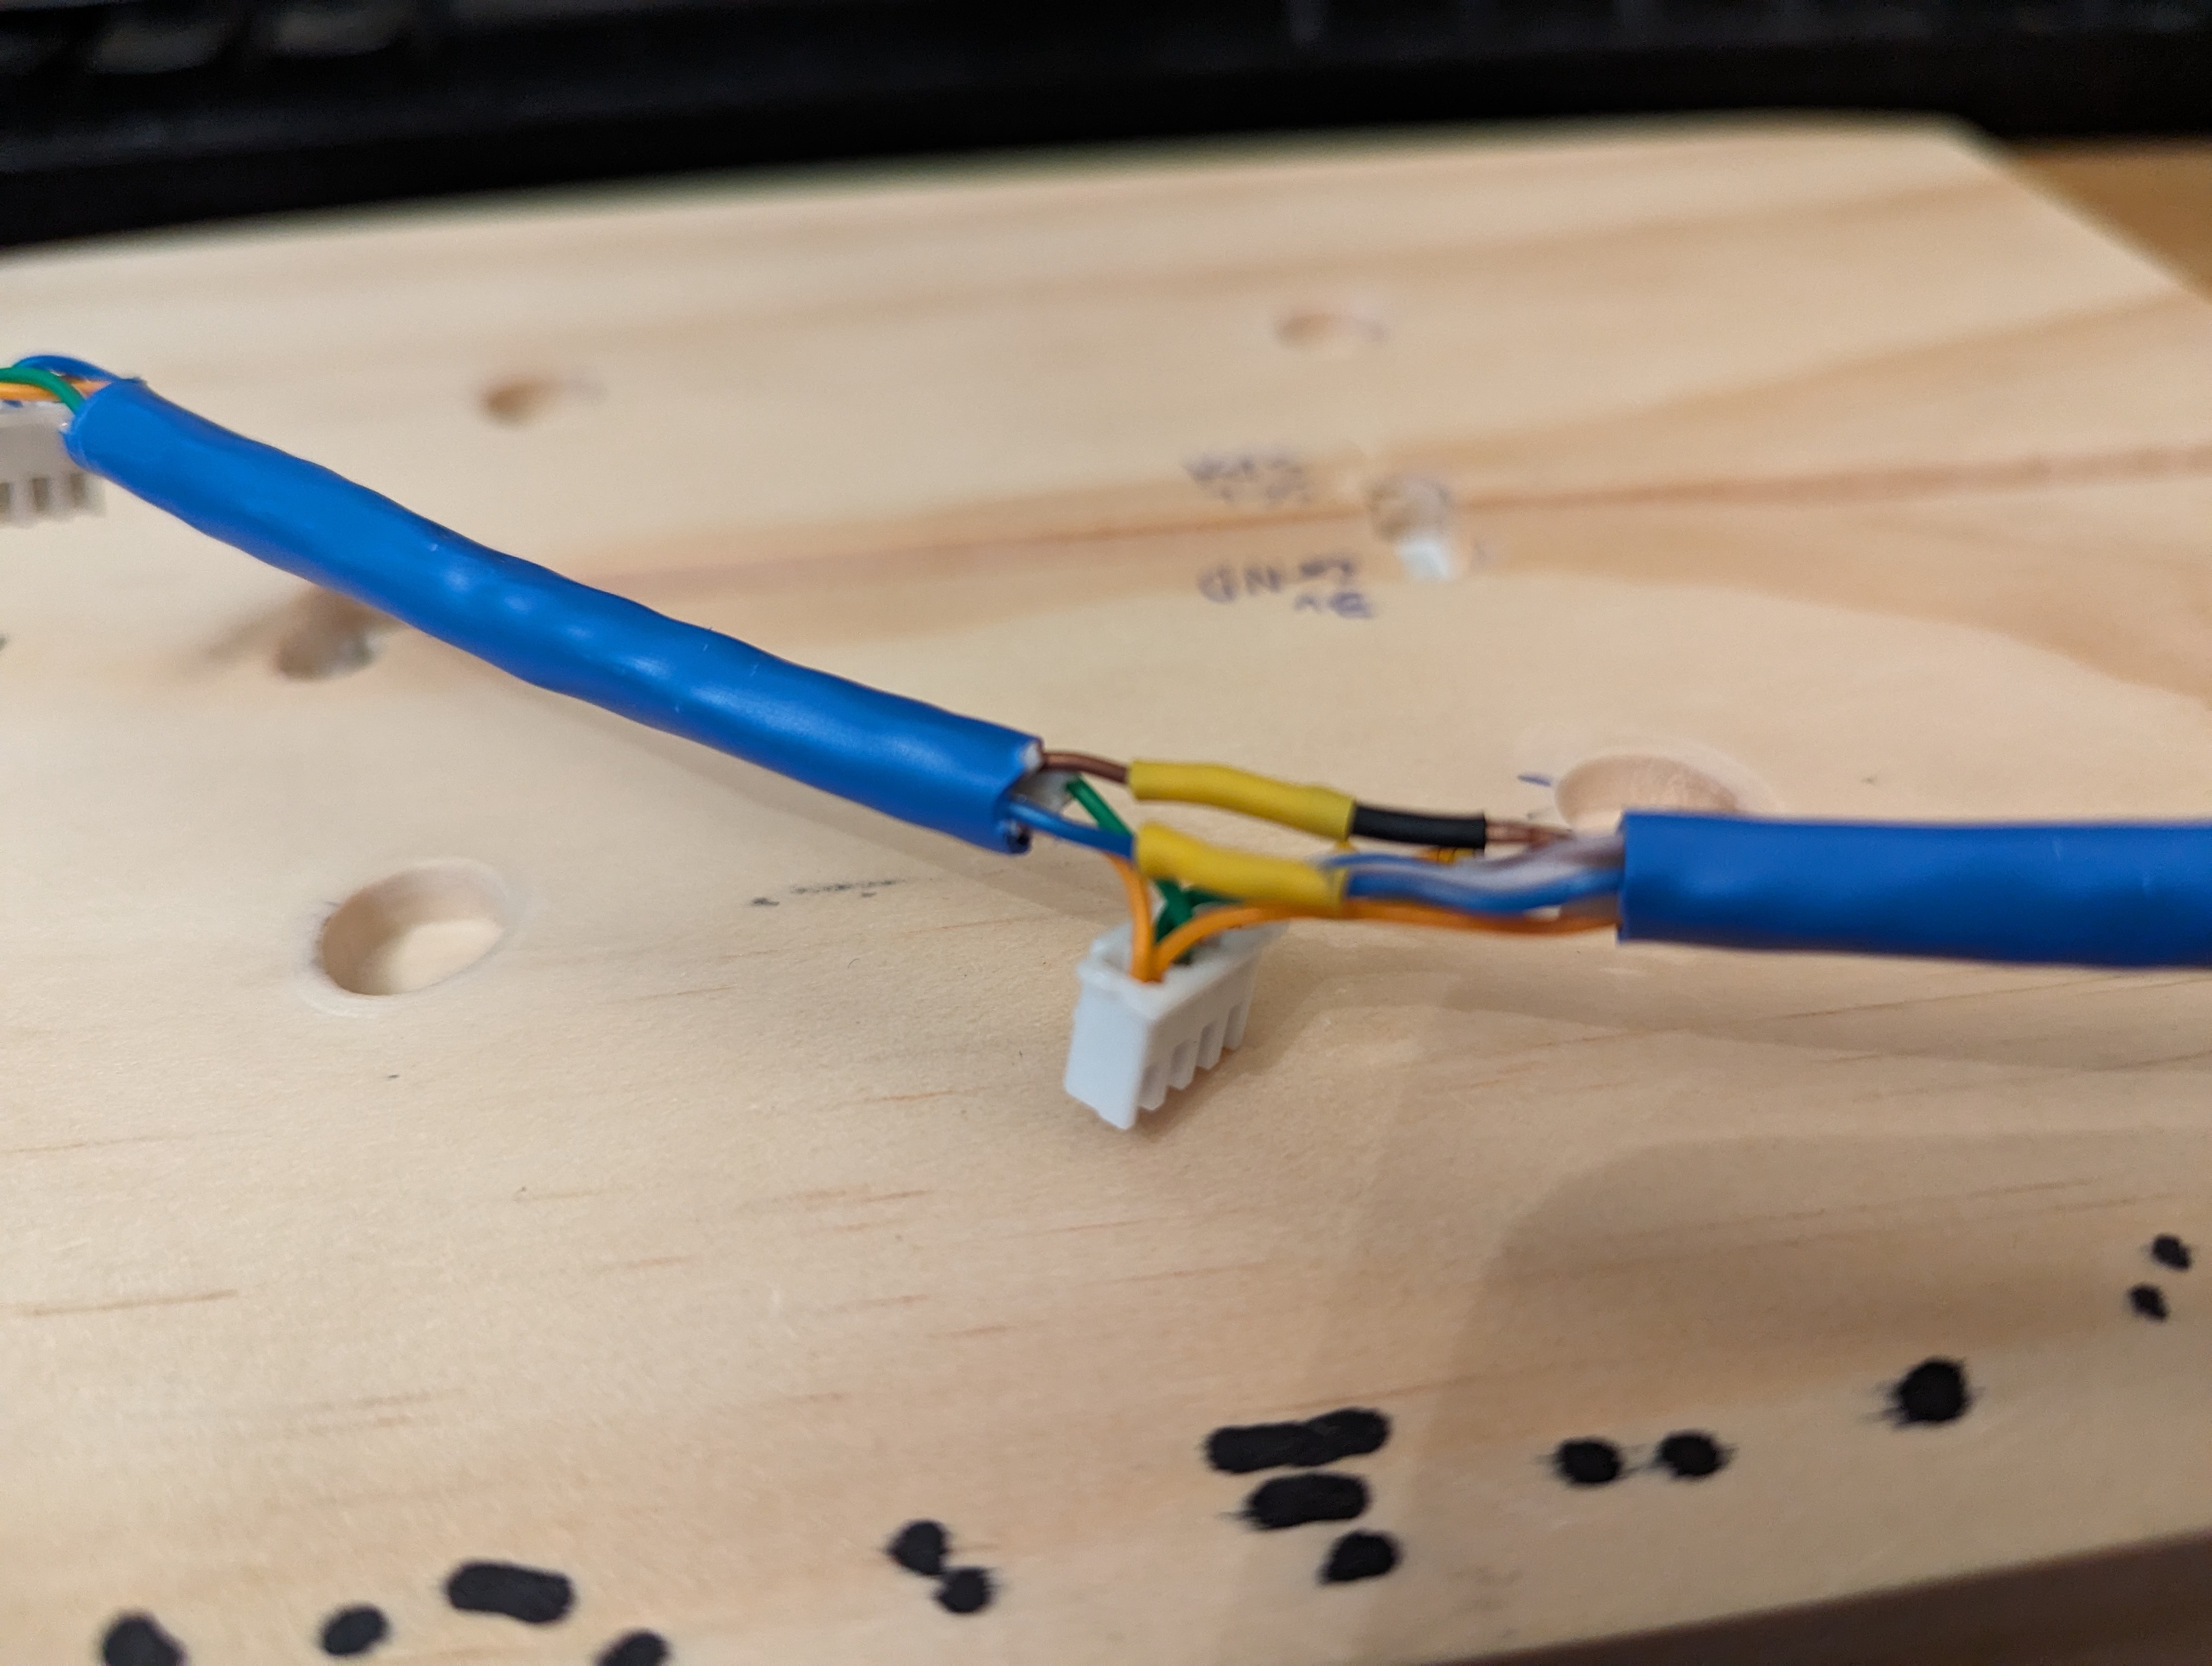
I also made the data and power cable for the sensor board.
The solar panel housing and 'sensor plate' were both painted and treated with polyurethane spray to protect them from rain and humidity.
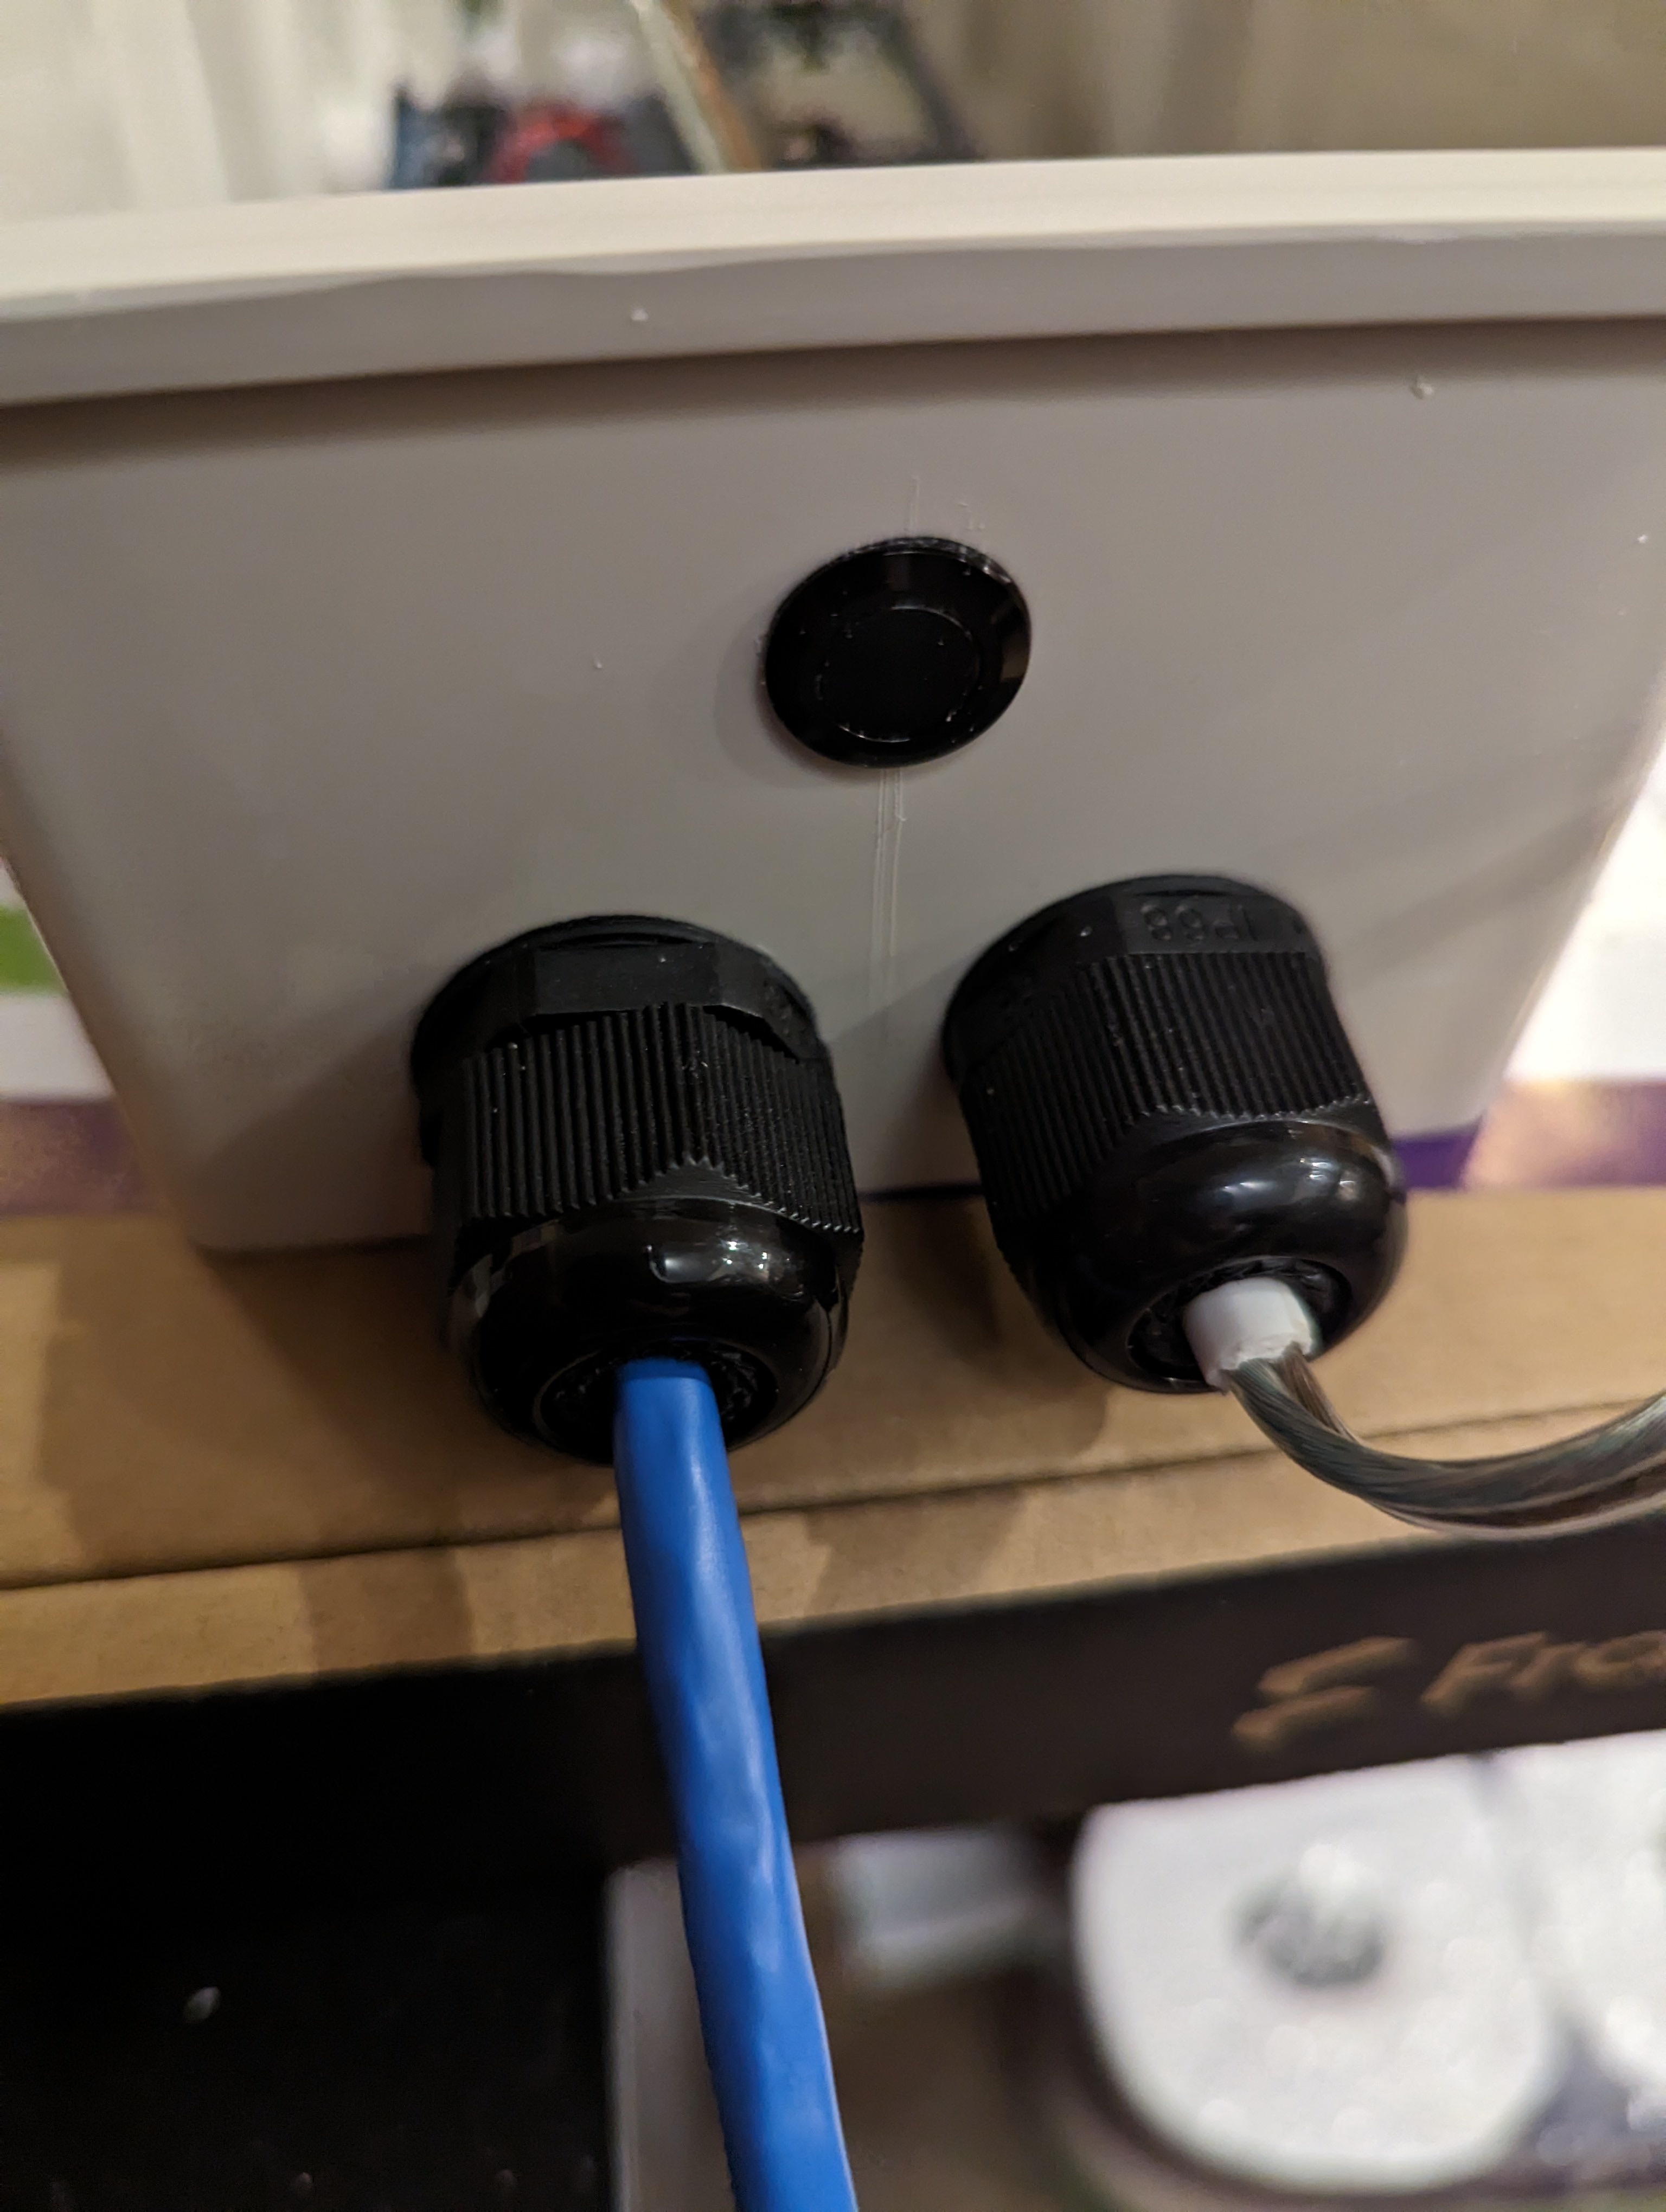
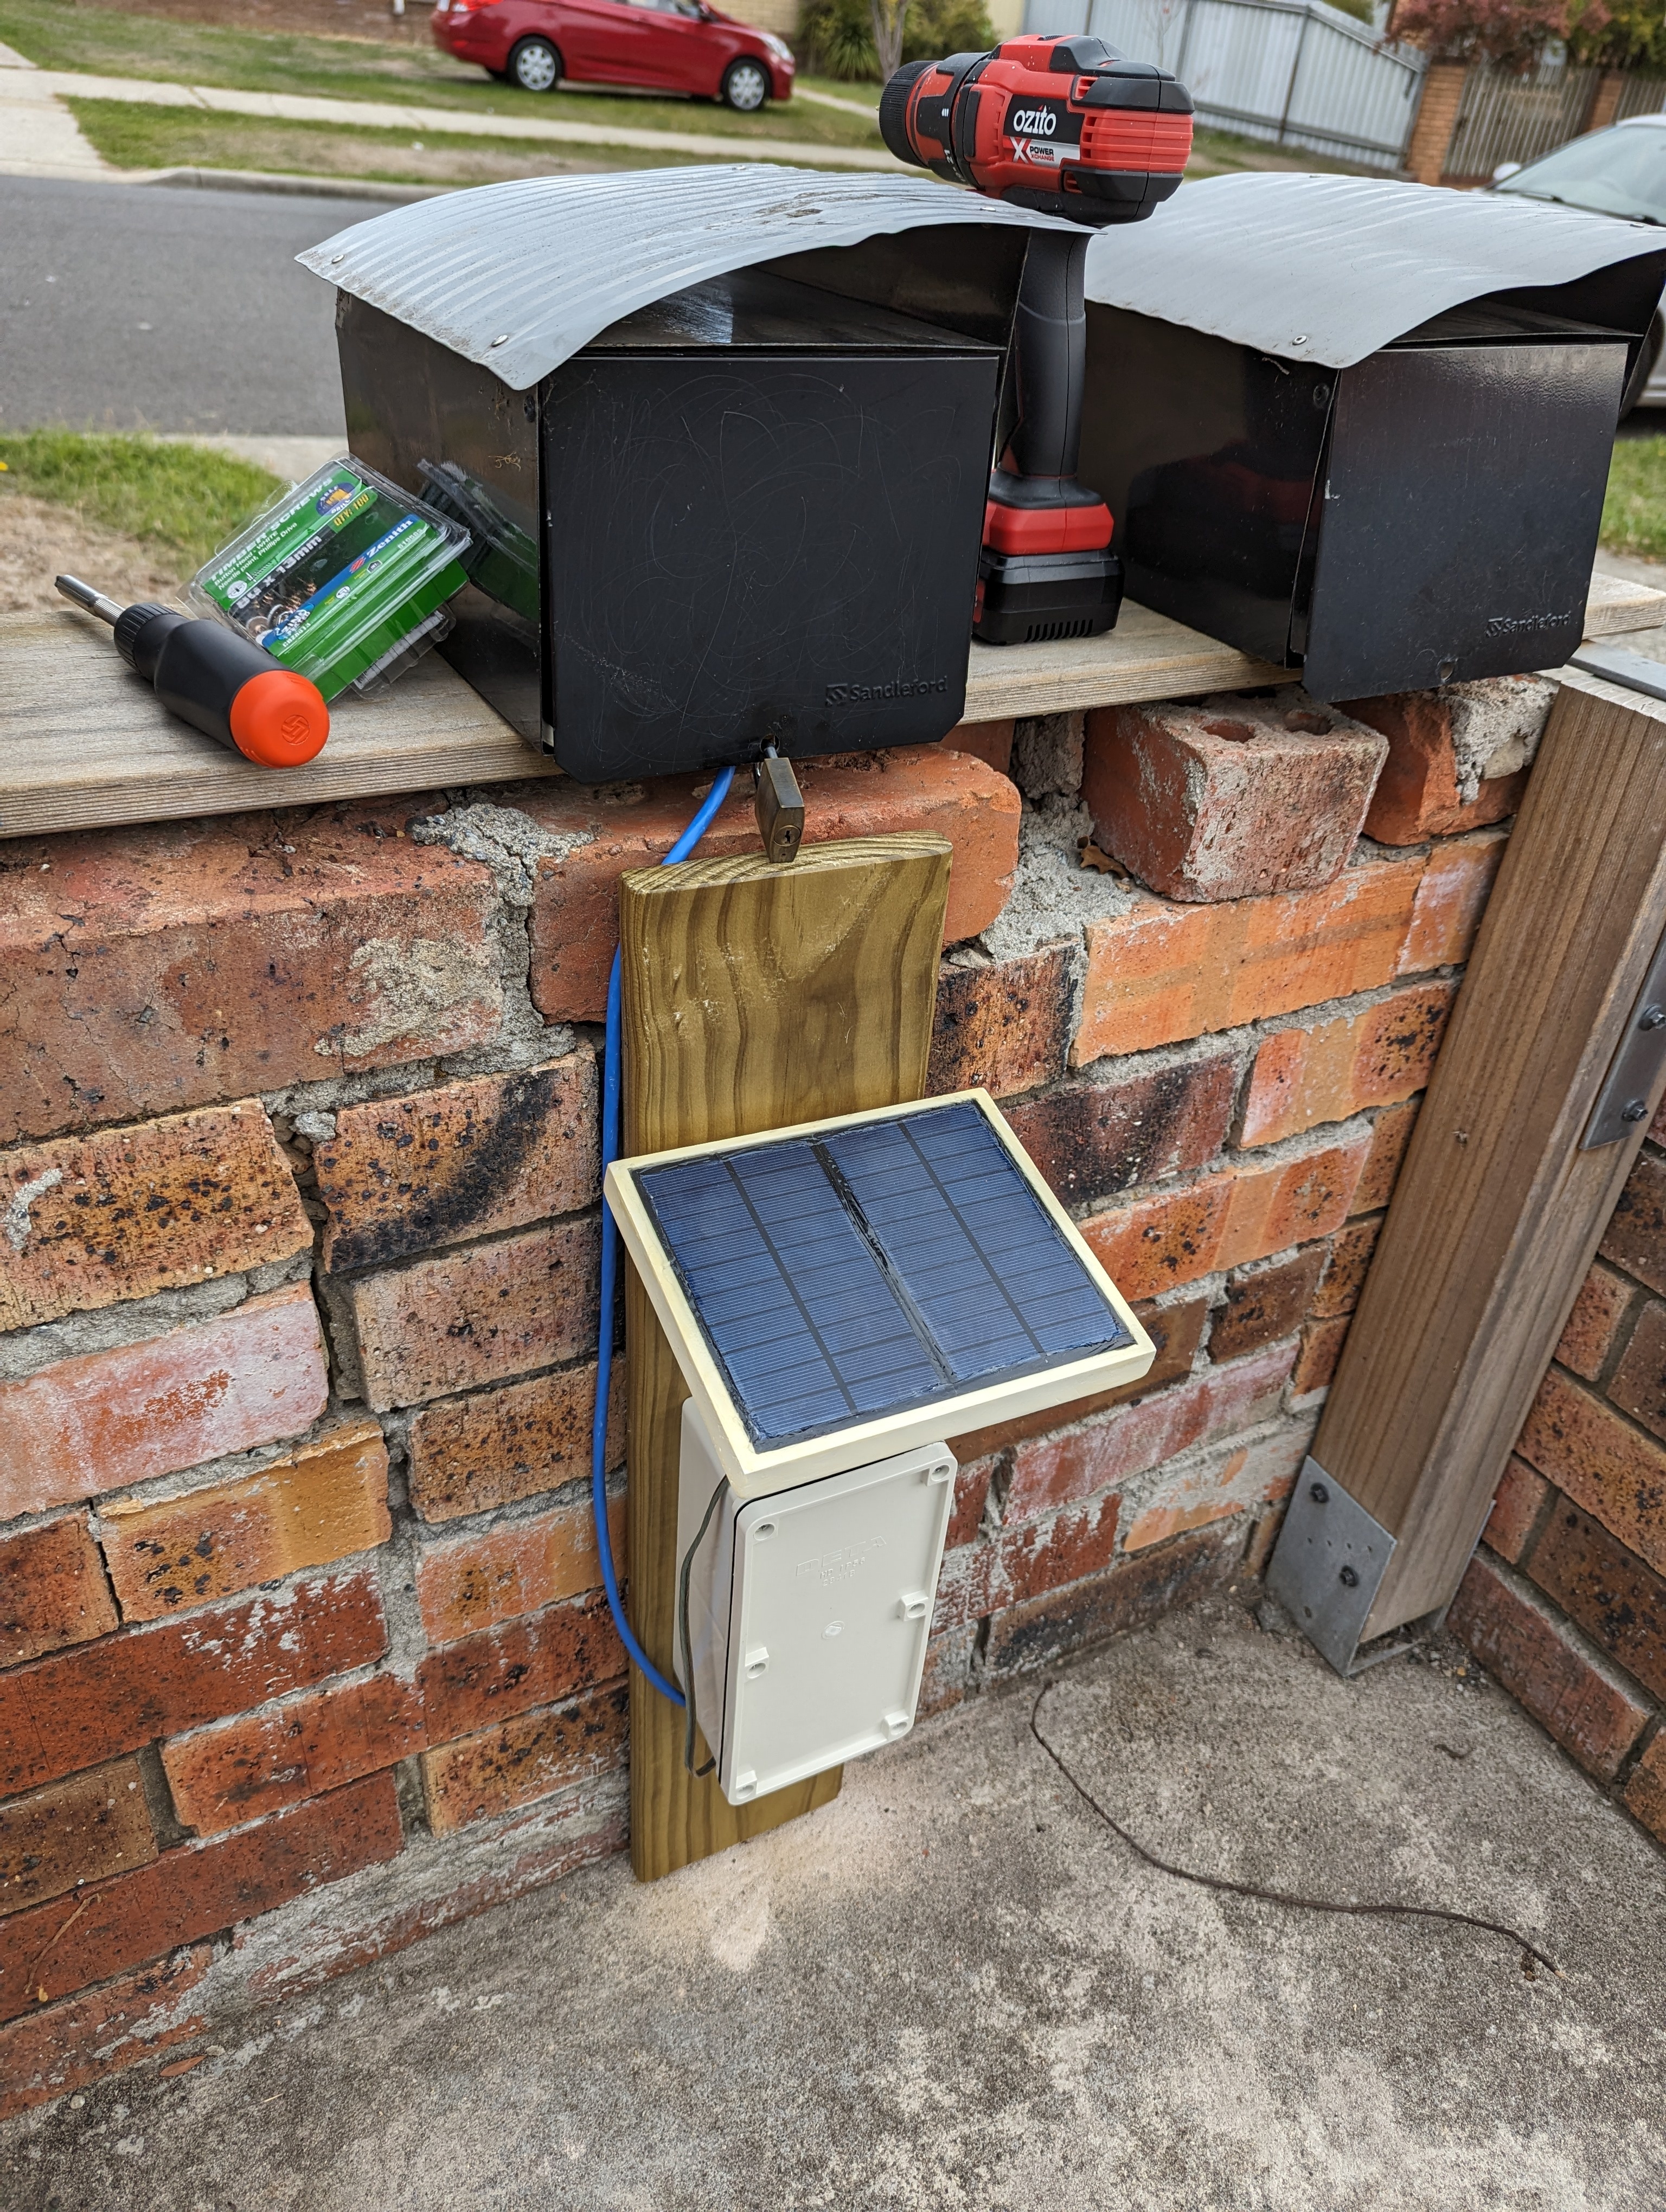
I drilled holes in the weatherproof box to fix the cable glands and the weatherproof button. In the case of the solar panel wire, I had opted to buy speaker wire since I figured it would be easier to run in the channel between the two solar panels, being flat. But that also made it not really fit the cable glands that great. I ended up stripping some of the outer sheath off some 2 wire power cable I had, and wrapping that around the part of the speaker wire that gets clamped in the glands, just to make a reasonable seal. These all were on the side I decided I would mount at the bottom, so water wouldn't be able to easily fall into the box.
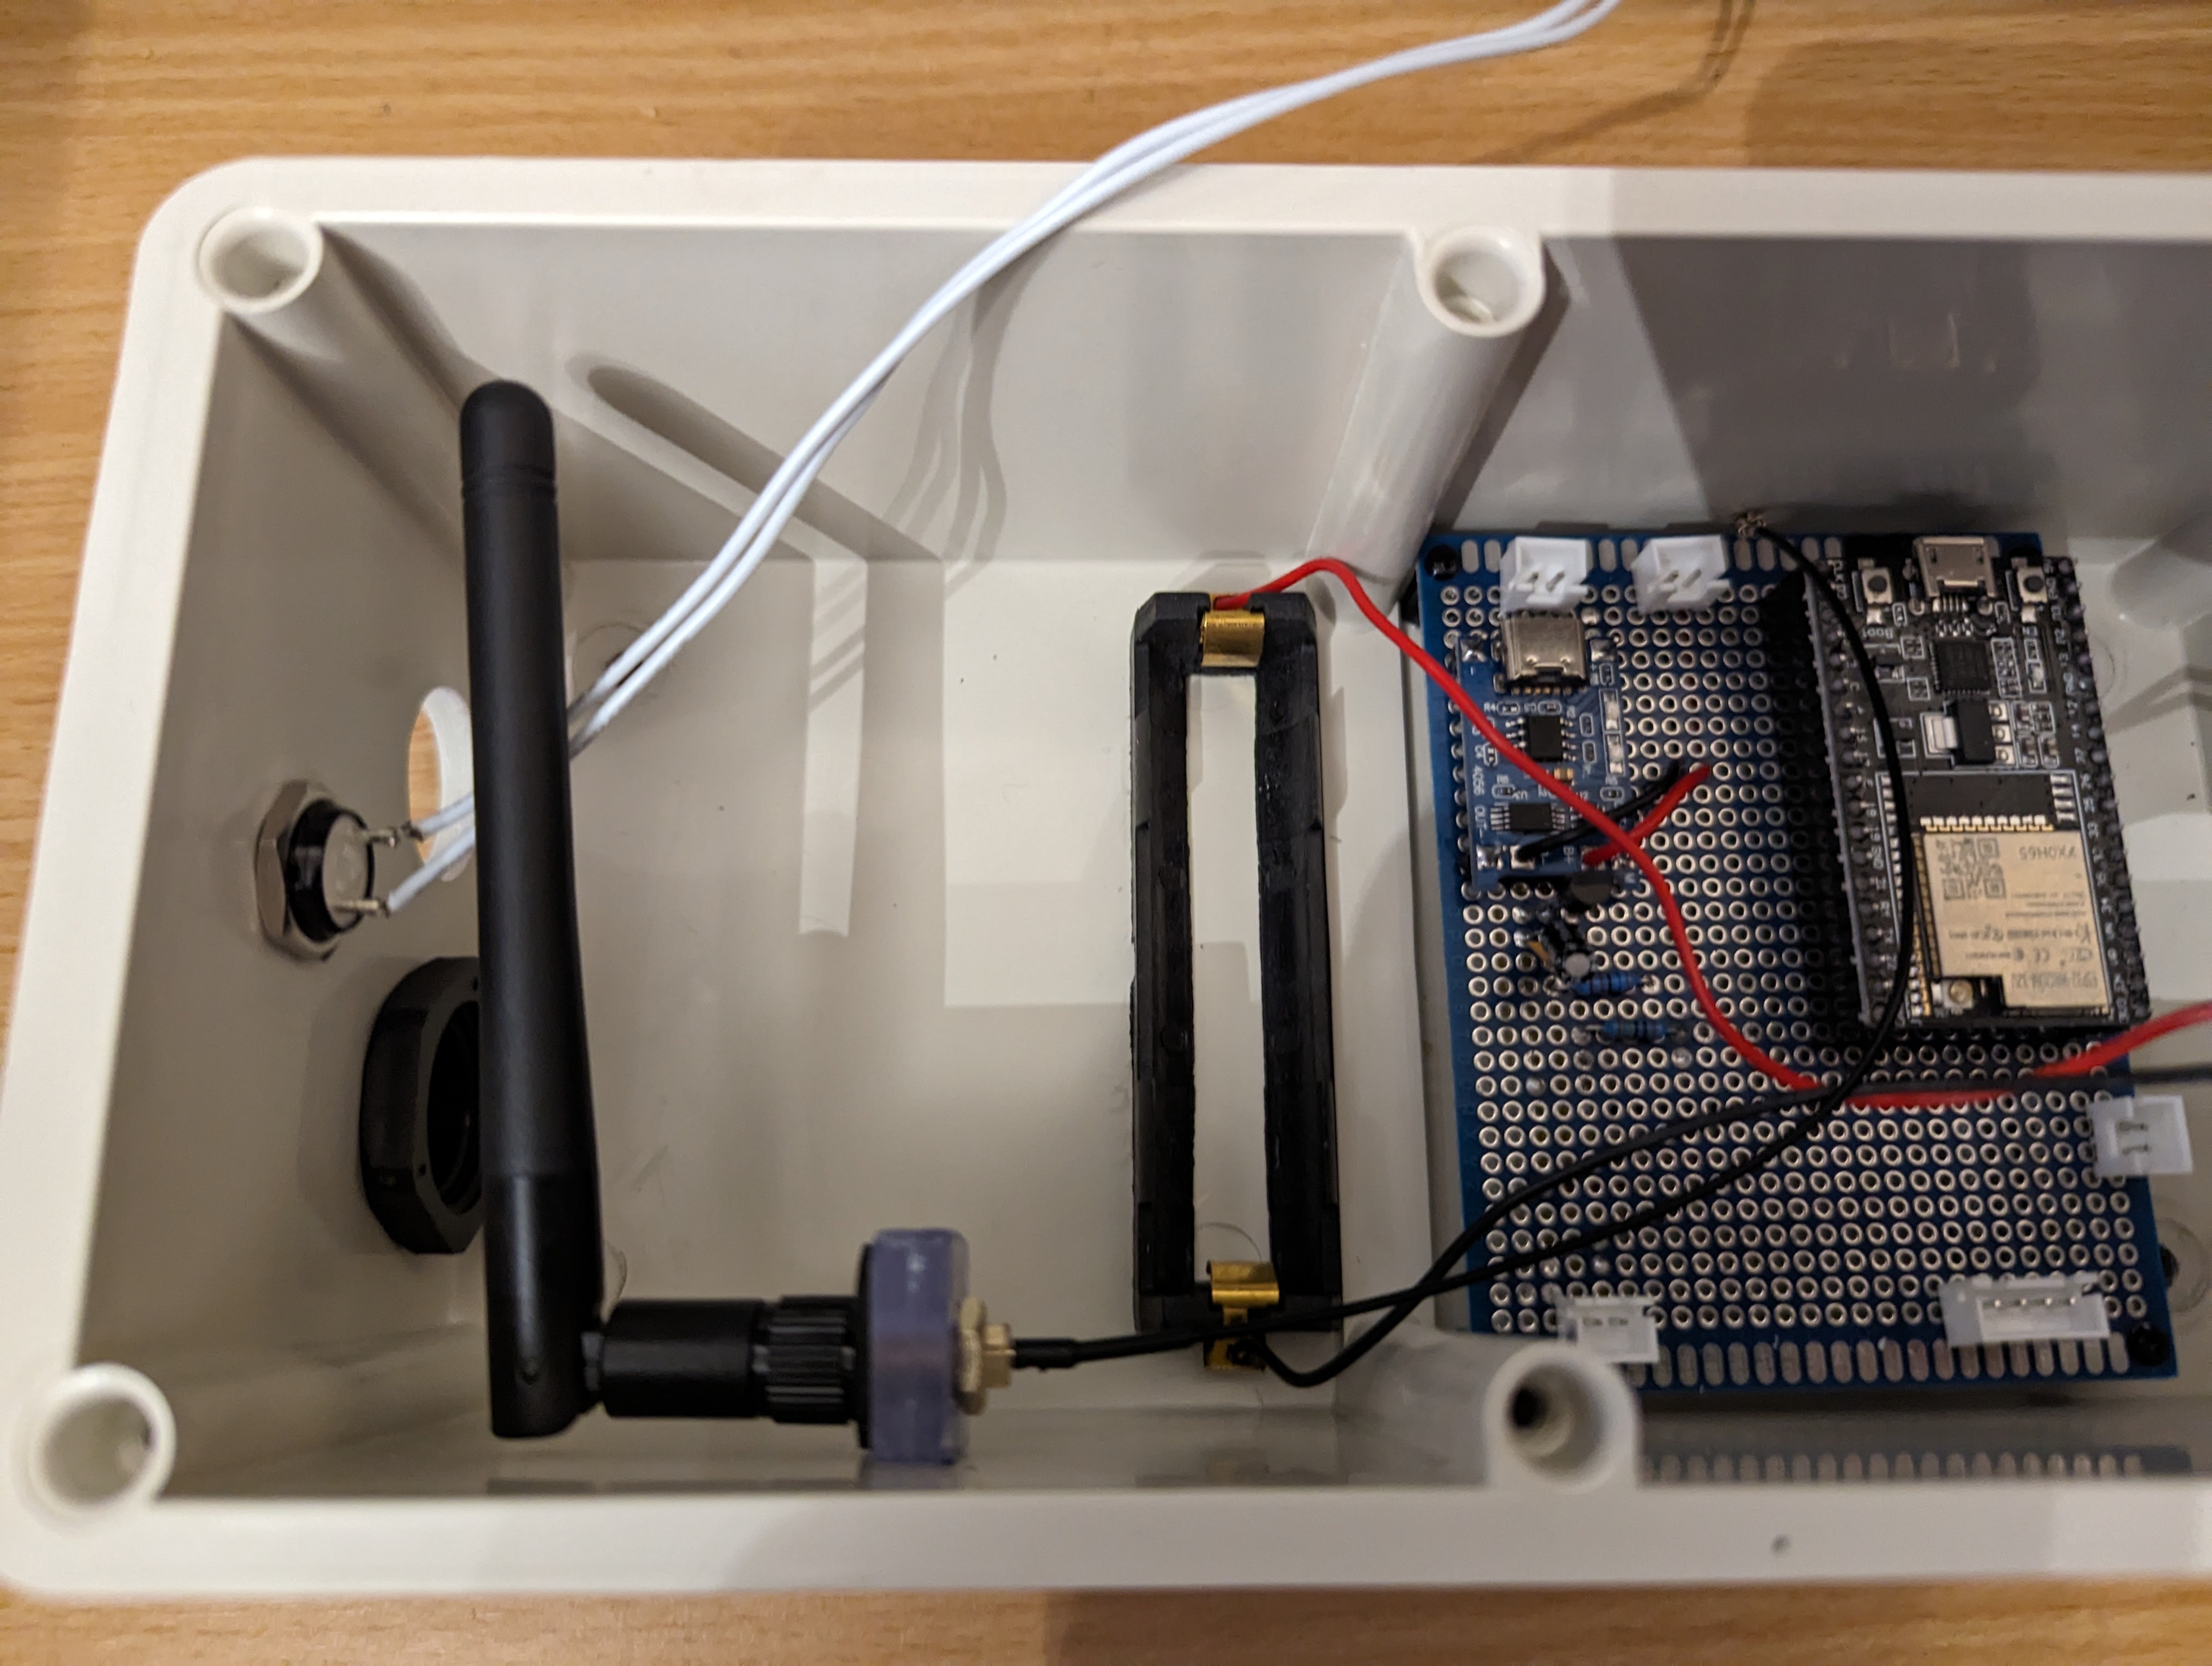
Final test fit. I later used epoxy glue to glue down the nylon headers and the battery holder inside the box.
The mailbox itself also needed a hole in the bottom for the sensor cable to come out. After drilling a hole and filing it into a square shape, I cut some rubber grommet strip to size and fitted it around the hole, with some marine silicone adhesive to protect the sharp metal edges from water and to hold the grommet strip in place.
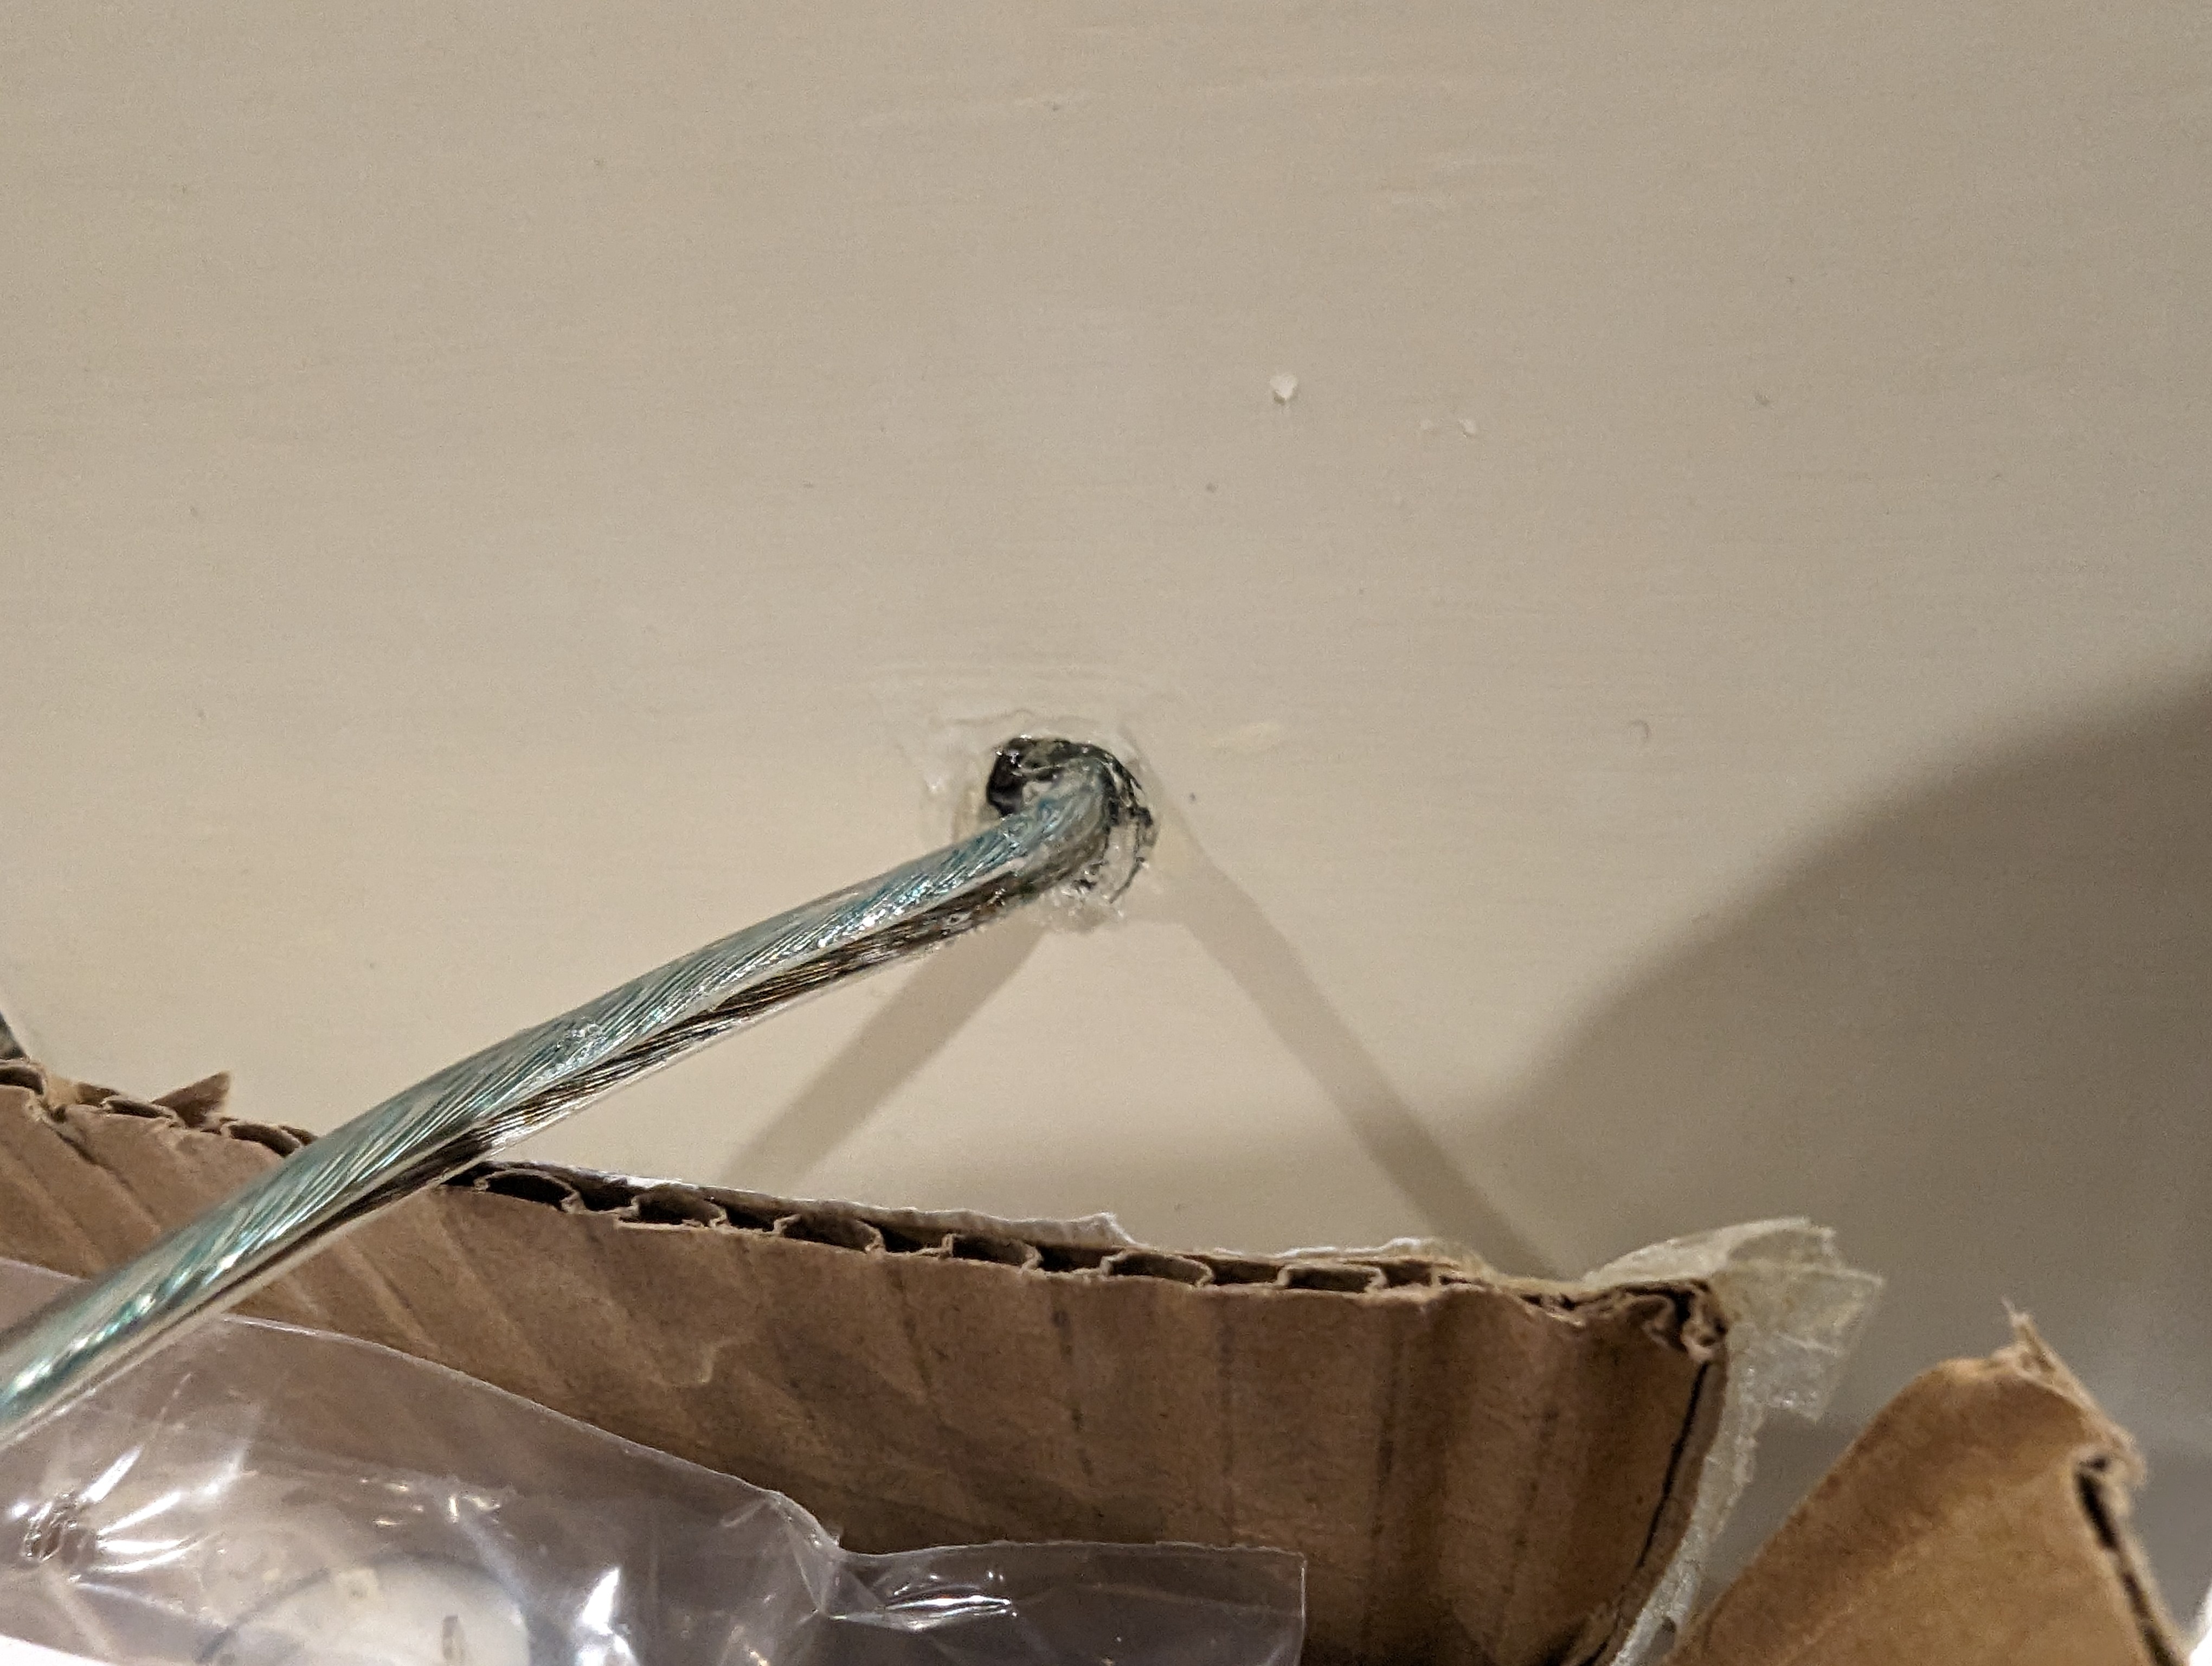
I'd drilled some holes in the brick wall my mailbox sits upon for masonry anchors, and this piece of treated pine got the last of my polyurethane spray, just in case.
Using a two pieces of the leftover perspex glued together, I made an internal mount for the antenna, figuring it would be best to not have the thing either floating around freely inside the box or sticking out the side where people could potentially break it off.

Finally, after weeks of off and on work, it was ready to install.
The ESPHome coding used my VCNL4010 component, and if anyone is interested I can share it but it's kinda a large file.
It was a long running project, but I finally did it. I built what I'm calling a smart mailbox that communicates the presence of mail locally with Home Assistant via ESPHome.
Parts:
Tools:
For a start, I followed this guide to get me started on the power delivery portion, but I ended up using much higher valued resistors since I found that I was losing more battery charge through the voltage divider than I was from the ESP32 or proximity sensors.
Once I'd tested the concept with the parts just laying in a jumble on the table, it was time to get to work.
I started by cutting a plank of pine to fit my mailbox, chamfering the ends to make space for the metal joins. I routed out some spaces for the tops of the bolts that hold the mailbox down.
Measured out where the sensors should go, along with a surrounding space to screw down some little perspex windows to cover them. The idea I wanted was for the mail to be able to slide over the sensors without getting caught on them, as well as to protect them from dust.
Routed out the dents and cleaned them up with a chisel and sandpaper. Cut the perspex to shape for a test fit.
On the other side, I routed out a notch for the cable to access the sensors.
I had originally planned to just solder wires into the sensors, but then I realised JST connectors would fit perfectly into the sensors. This meant I had to widen the holes somewhat, which I did with a small chisel and file.
I got a bit lazy with making screw holes to hold down the perspex, so they're not in as neat a place as I'd like. If I did this again I'd measure properly for their placement. Still, with countersinking they hold down the perspex well and nothing sticks up for mail to get caught on.
I also got started on making a housing for the solar panels. I used the router to carve out a 1-2mm area for them to sit in, and a much deeper ditch linking the two terminals, which you'll see in a later picture. For now, here's how they look sitting in it.
Wiring up the prototype board was next. Again, see the article I linked above for how this works. I used pin headers to allow the ESP32 dev board to be slotted in and out, just in case I ever needed to take it out for replacement or reprogramming. Also the JSTs on the prototype board are for connecting the battery (top left), connecting the solar panels (bottom left), providing power to the sensors (bottom right) and clock and data lines for the sensors (top right). Since the sensors are both using the same I2C bus address and cannot be configured otherwise, I had to run two clock and data lines, but if I'd found sensors that could have different addresses I could have just used one of each. I didn't take a photo of the board at this stage, but I later added another header to connect a button to reset the ESP32 from the outside.
I also made the data and power cable for the sensor board.
The solar panel housing and 'sensor plate' were both painted and treated with polyurethane spray to protect them from rain and humidity.
And the panels themselves were sealed in with a tonne of silicone. It made a real mess, but I'm confident no water is going to get in there.
I drilled holes in the weatherproof box to fix the cable glands and the weatherproof button. In the case of the solar panel wire, I had opted to buy speaker wire since I figured it would be easier to run in the channel between the two solar panels, being flat. But that also made it not really fit the cable glands that great. I ended up stripping some of the outer sheath off some 2 wire power cable I had, and wrapping that around the part of the speaker wire that gets clamped in the glands, just to make a reasonable seal. These all were on the side I decided I would mount at the bottom, so water wouldn't be able to easily fall into the box.
Final test fit. I later used epoxy glue to glue down the nylon headers and the battery holder inside the box. This means the prototype board can also be easily removed, as can the ESP32 dev board and the battery, but the battery holder cannot. Let's hope I never have to get that thing out.
The mailbox itself also needed a hole in the bottom for the sensor cable to come out. After drilling a hole and filing it into a square shape, I cut some rubber grommet strip to size and fitted it around the hole, with some marine silicone adhesive to protect the sharp metal edges from water and to hold the grommet strip in place.
I'd drilled some holes in the brick wall my mailbox sits upon for masonry anchors, and this piece of treated pine got the last of my polyurethane spray, just in case.
Using a two pieces of the leftover perspex glued together, I made an internal mount for the antenna, figuring it would be best to not have the thing either floating around freely inside the box or sticking out the side where people could potentially break it off.
Finally, after weeks of off and on work, it was ready to install.
The ESPHome coding used my VCNL4010 component, and if anyone is interested I can share it but it's kinda a large file. I had originally planned to just use Arduino IDE and talk directly to MQTT, in order to keep things simple and just use the Adafruit VCNL4010 library, but in the end elected to use ESPHome. For, among other things, its support for over the air updates.
Until someone can explain to me how I can transfer, manage and control my passkeys without syncing them to some hostile corporation's cloud infrastructure, passkeys will remain a super hard sell for me.
Sounds like he's hoping thugs will show up and scare some people into not voting in states he'd probably have lost?
Here's my (fallible) understanding of the nugget of truth behind the soy nonsense.
Plants contain something called phytoestrogen. It has a similar shape and function in plants to estrogen in humans. Soy contains a lot of it.
However, since it is made of different chemicals to estrogen it does not act like estrogen in humans.
Still, because it has the word "estrogen" in it, a lot of idiots think it will cause you to become weak and grow tits if you eat soy. You know, like a woman. Hence the "soyboy" memes and the use of the term as an insult, mostly by woman-hating alt-right goons.
It's possible your friend is covertly falling for the fallacy, or perhaps their concern is several times removed; i.e. they fell for someone's lie based on a lie based on a lie based on bigotry.
Good, I hate that guy.

"Can't be oppressed if you're dead" :/