20
Full resolution image and more details here
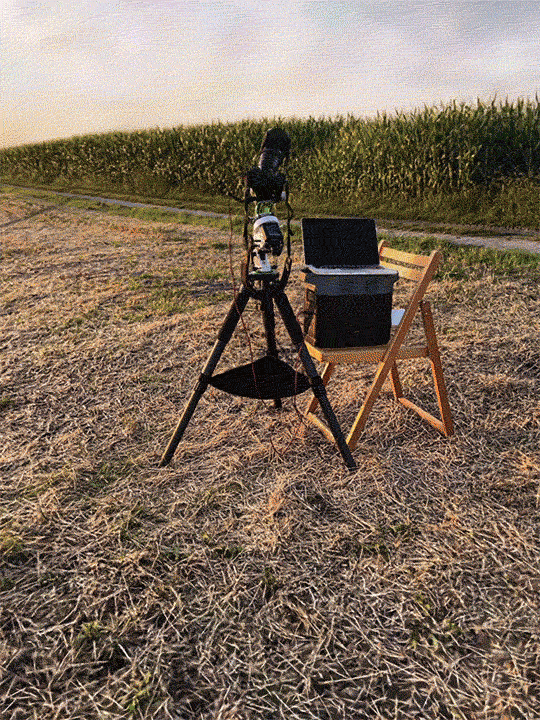
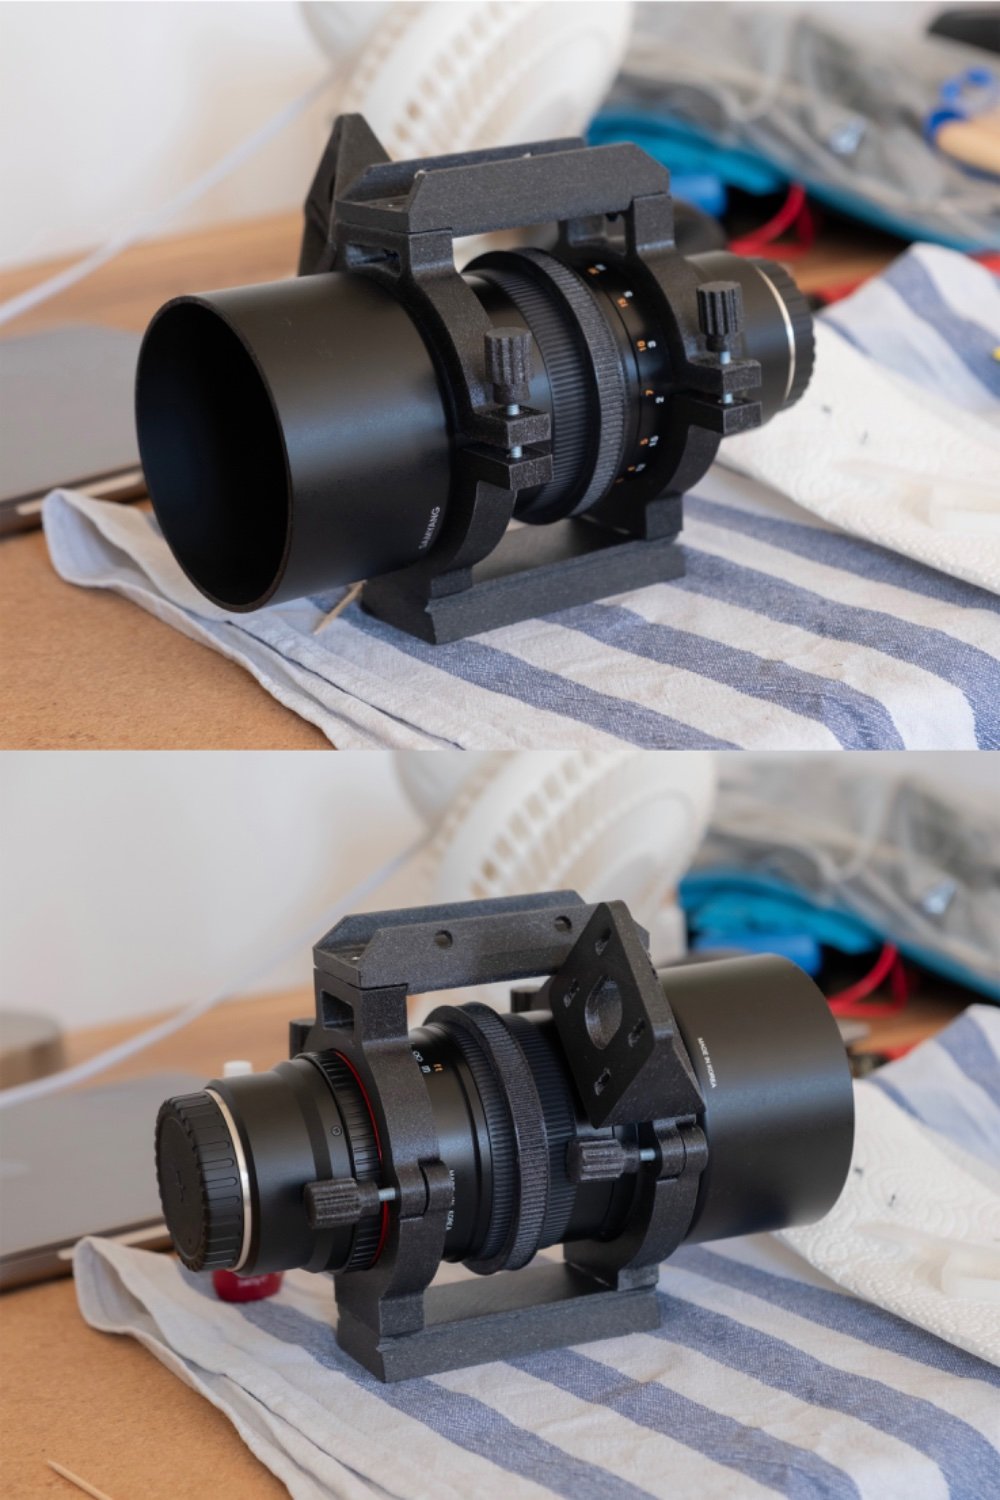
Also this is what our setup looks like to shoot such an image:
Full resolution image and more details here
Also this is what our setup looks like to shoot such an image:
We shoot this image over two nights to reveal the faint structures of the veil nebula complex.
Shot with a 135mm lens and a Fuji X-T5.
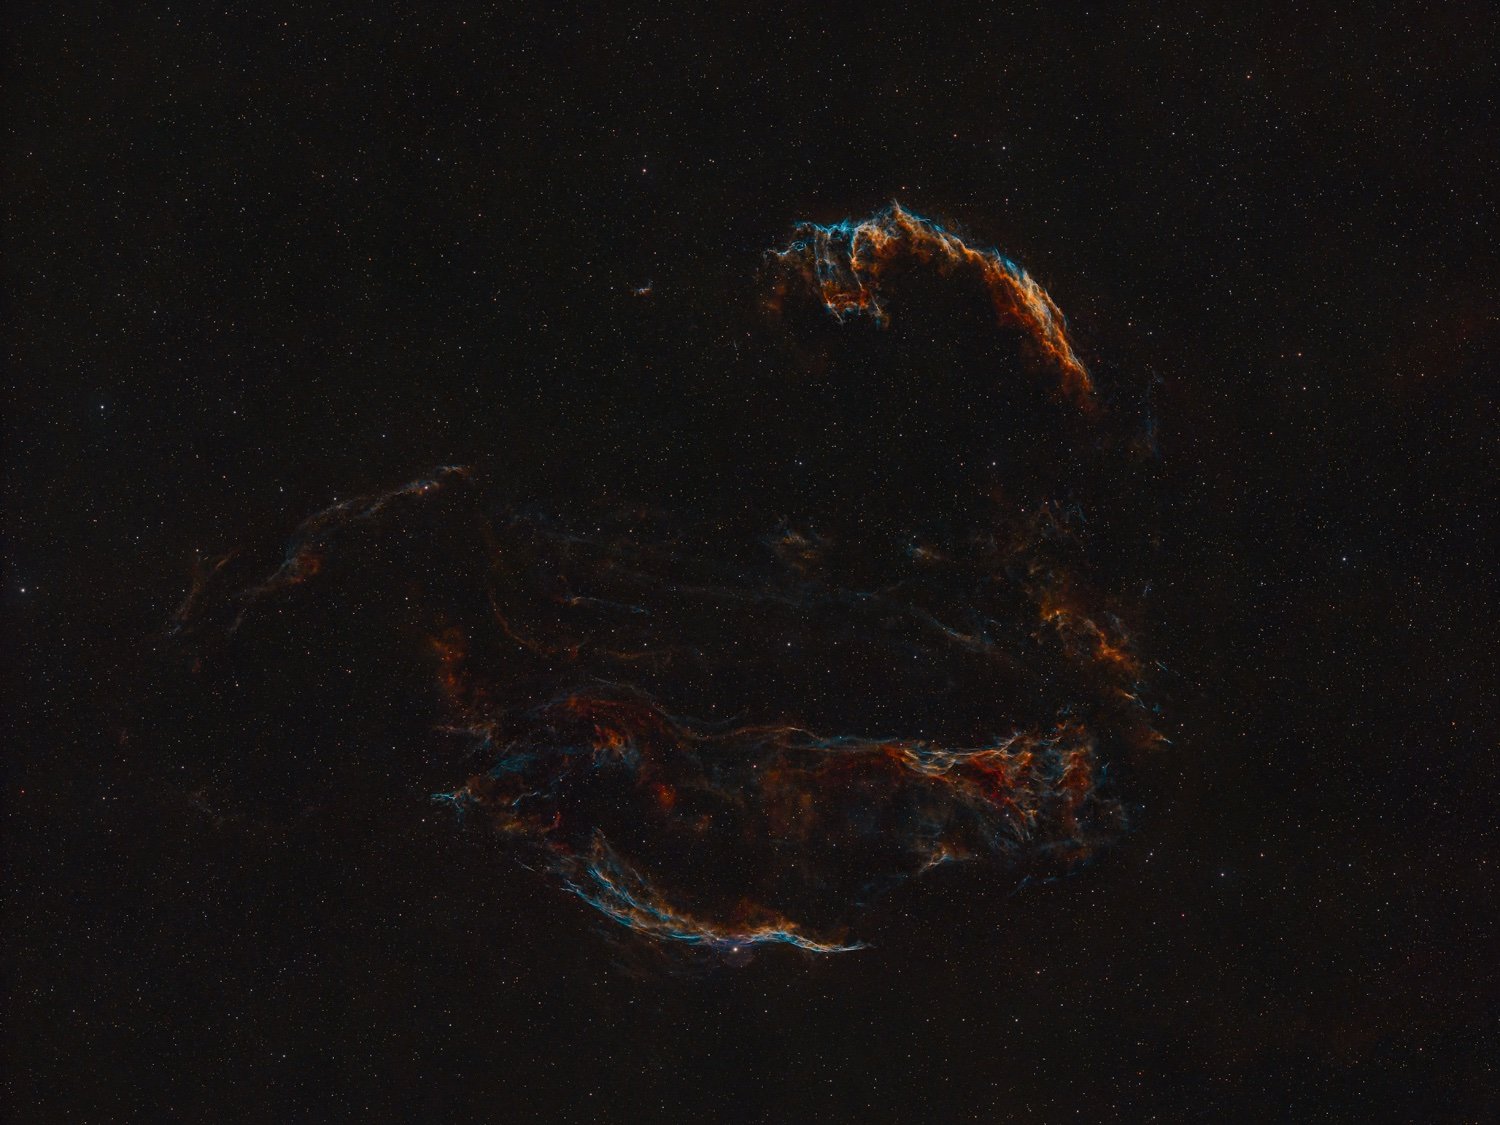
The lens is the telescope in this case. But as the focal length of 135mm is fairly short it works best for objects appearing very large in the sky. Astrophotography can get very expensive very quickly, so we try to make the most out of the equipment we have. Just like with the 3d printed mount.
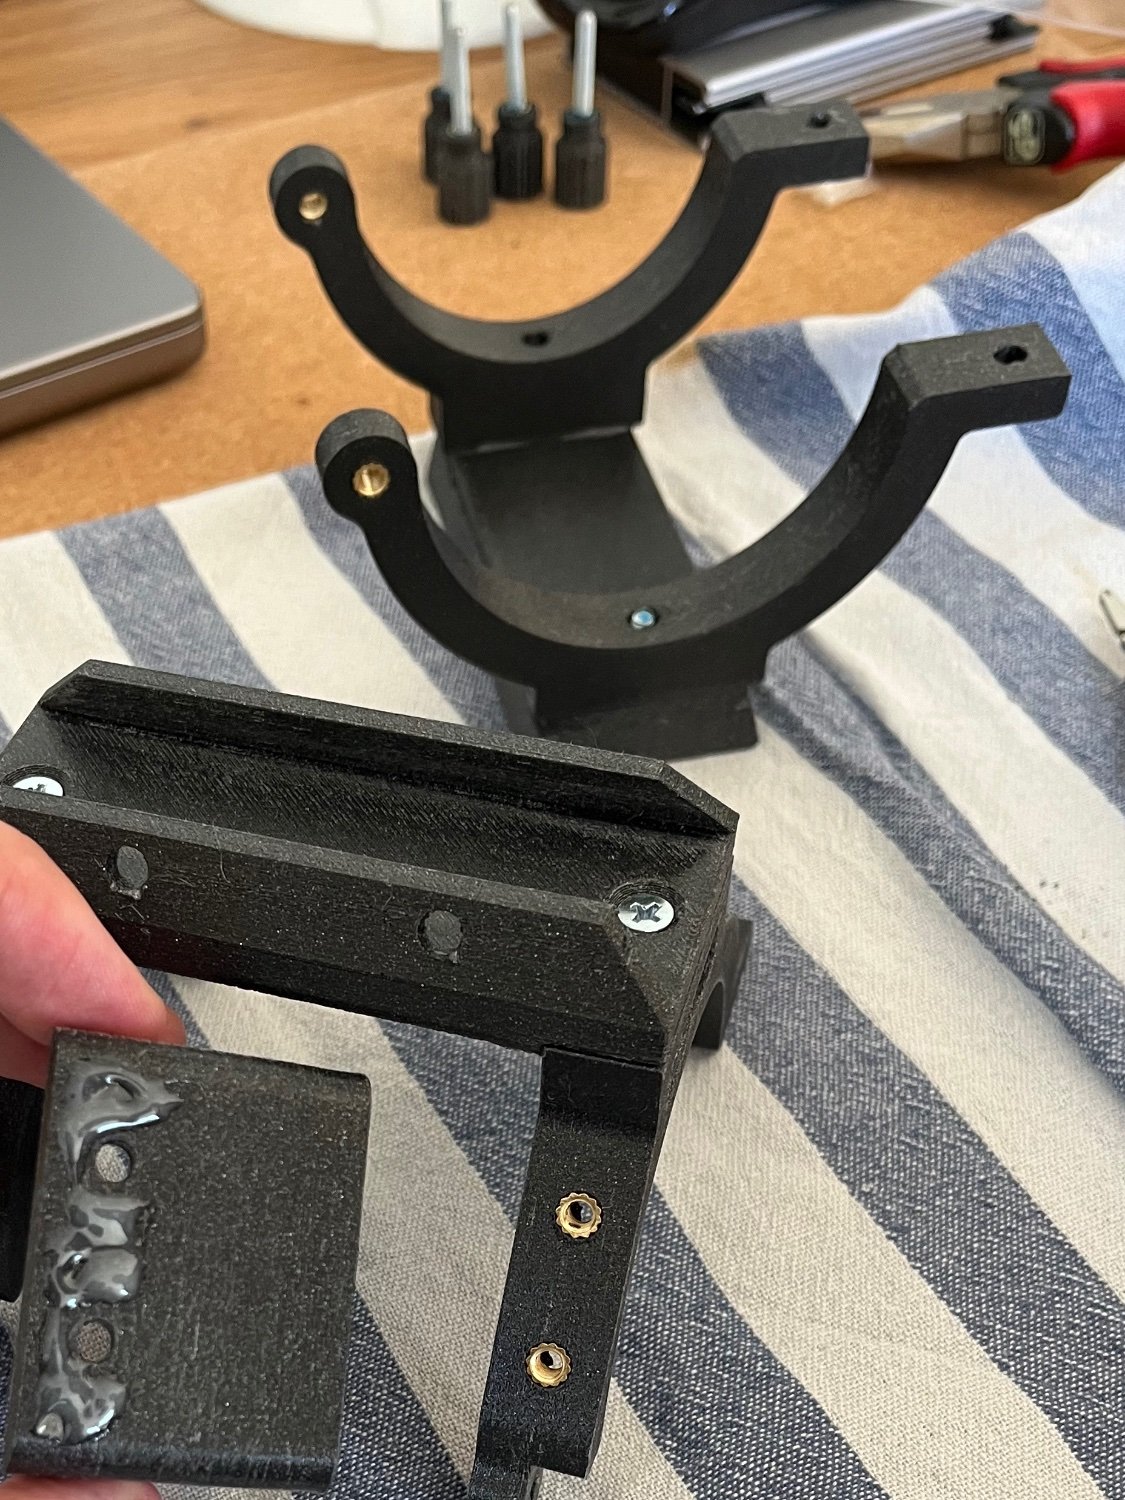
Glueing and screwing the parts:
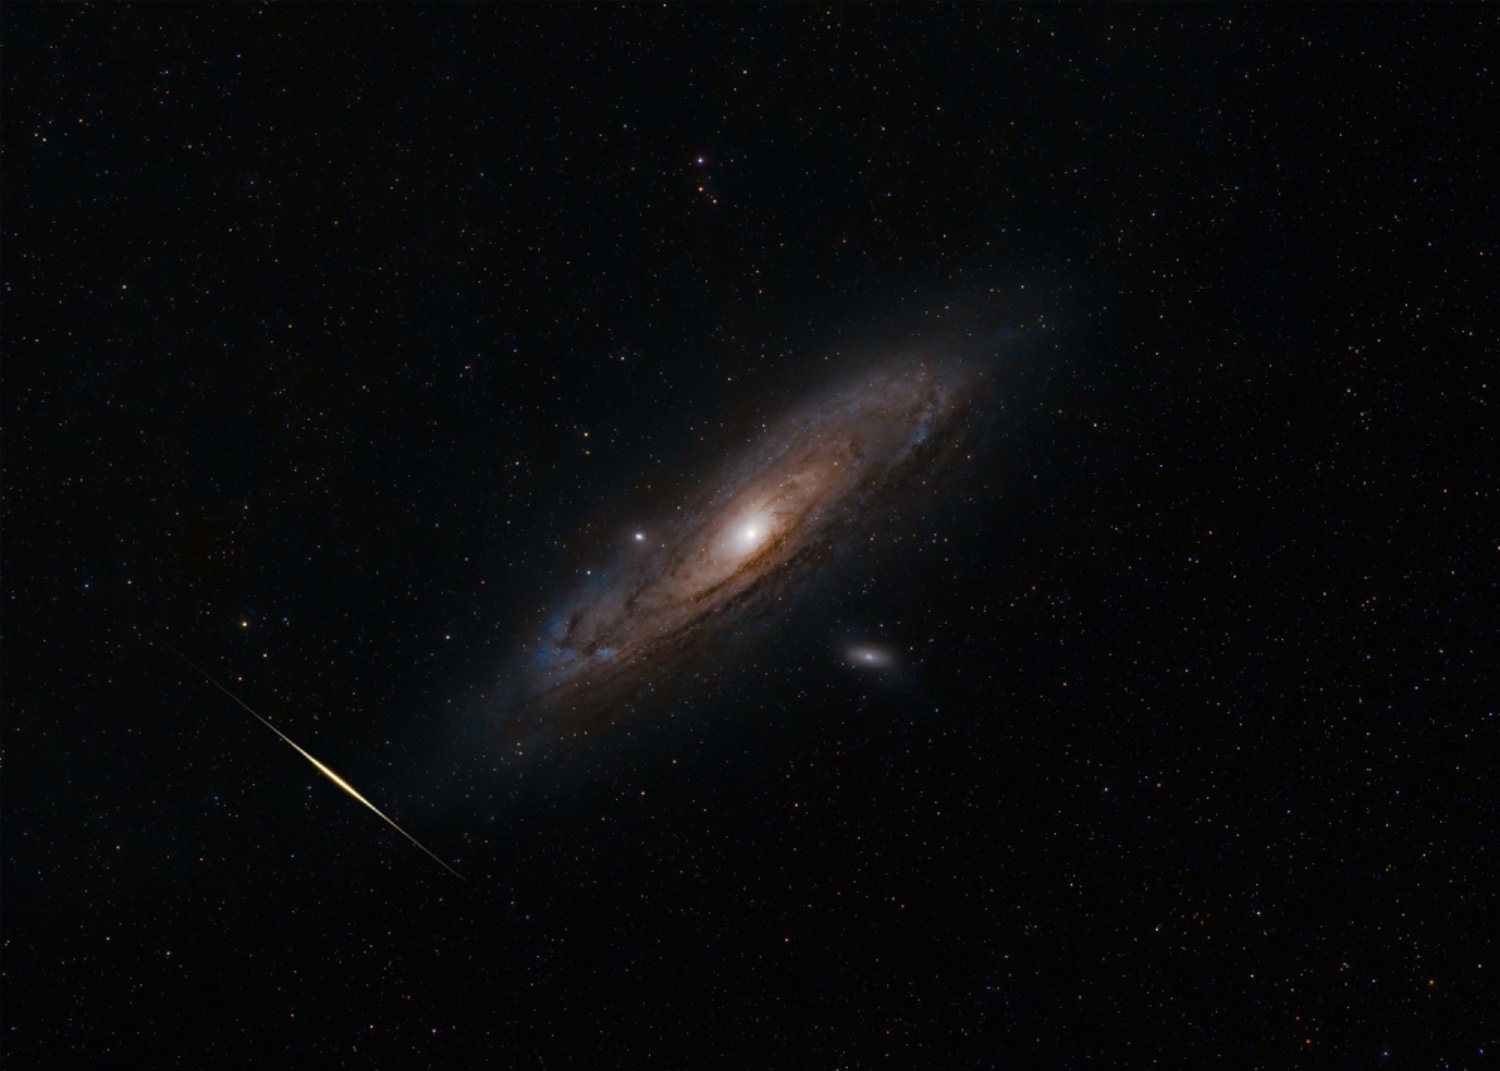
One result shot with this mount (and many other accessories):
I found this design and it fitted my need perfectly. It is a mount for a very popular camera lens used in astrophotography. It not only functions as a weight relief for the camera but also allows to rotate the field of view. Moreover it is possible to focus the lens with the installation of a stepper motor, which will be the next step.
The single parts are screwed together with the help of threaded heat inserts. Just to make sure they are also glued together with epoxy, as the mount really needs to hold up. The screws are locked with Loctite.
Edit: Link to the mount (not my design): https://www.thingiverse.com/thing:6099113
Thanks, yes there is a very thin sheet of plywood attached at the bottom of each disk. The disks themselves where completely dried before of course
Thanks! There is one anker point at the top with an dowel in the wall. The rest is fairly stable as one piece
As we didn’t find any shelf of our liking we tried to create it ourself. It worked out better than expected, however it obviously isn’t perfect. But as completely laymans we are happy nonetheless.
One cool feature is that through all pieces goes one straight hole, this allows putting lamps on the shelf without seeing any cables.

cross-posted from: https://lemmy.world/post/14024670
M51
This was shot under extremely poor conditions with lot of clouds. So this is just a practice shot, but we try to get the best results with the equipment we have, so we will visit this target again with good seeing.
Equipment:
- Fuji X-T5
- Samyang 135mm
- Star Adventurer 2i
Images:
- 217x 60s
- ISO 125
More info here: https://telescopius.com/pictures/view/185140/deep_sky/whirlpool-galaxy/M/51/galaxy/by-maxi_franzi

Since people are commenting this image is „fake“ or „ai“, here is the same scene shot from a similar location with a cheap smartphone:
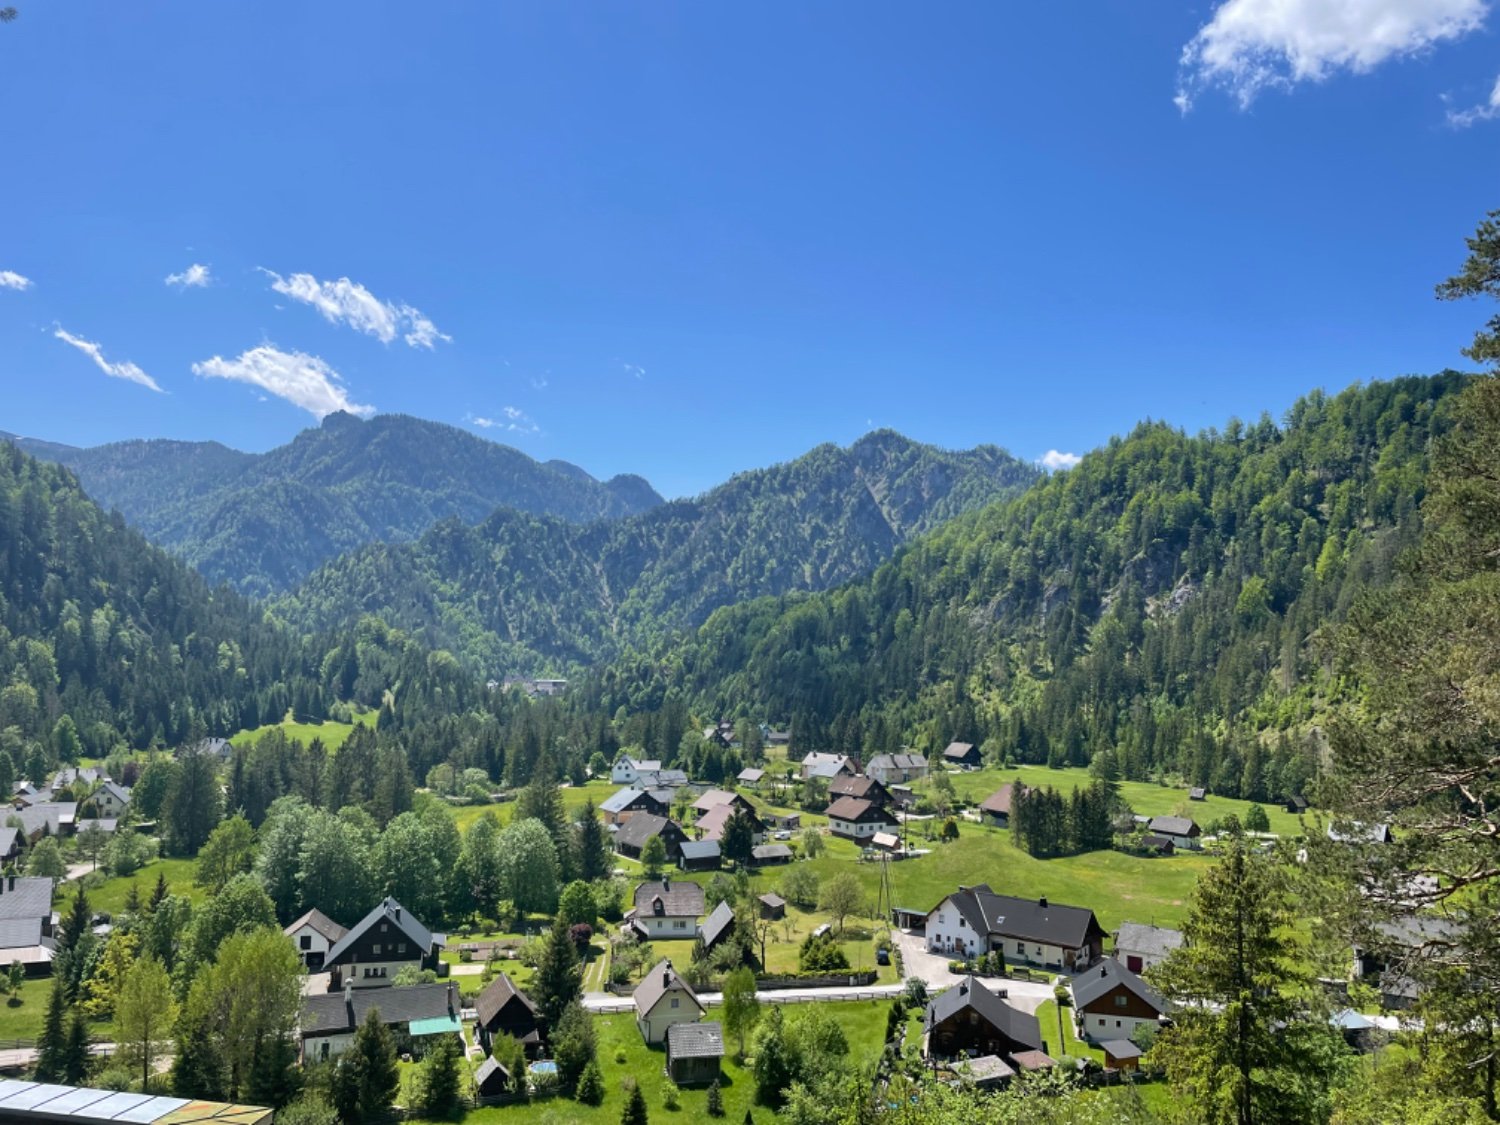
I take this as a compliment, as I tried to imitate a miniature model town. The village is photographed with a tele lens from a mountain. Then with very tedious post processing several layers of blur was added to amplify the tilt shift effect.
It is actually a real village. The blur was added in post processing to imitate the tilt shift effect.
Austria ;)
This is my second try at the Andromeda galaxy. This image is shot with an ordinary camera and lens, though the work behind the image is much more than point and shot. The total exposure time is a bit more than 2 hours. For anyone interested in the workflow and equipment:


Tl;DR The EU makes sure that third party developers gain access to connectivity features to develop devices like smartwatches, headphones or VR headsets that have a deep integration to the OS.
It is crucial that the request process is transparent, timely, and fair so that all developers have an effective and predictable path to interoperability and are enabled to innovate.